Einführung
Schnellstart
Du hast es eilig? Geh gleich zu Loslegen.
Hilfe erhalten
Du suchst Hilfe? Schaue bitte auf Getting Help.
Übersetzungen
Dieses Handbuch ist eine Übersetzung des englischen Originals. Es wurde von Freiwilligen in verschiedene Sprachen übersetzt, die Übersetzungen sind allerdings nicht unbedingt aktuell.
- Bahasa Indonesia
- Deutsch (alte Übersetzung)
- Español
- Français
- Italiano
- Polski
- Português Brasileiro
- русский язык
- العربية
- فارسى
- 日本語
- 简体中文
Wenn du zu der vorliegenden Übersetzung beitragen möchtest, siehe hier. Wenn du bei der Übersetzung in eine andere Sprache helfen möchtest, siehe hier.
Hintergrund
Anki ist ein Programm, dass es einfach macht, sich Dinge zu merken. Weil es viel effizienter ist als traditionelle Lernmethoden, kannst du entweder deine Lernzeit drastisch reduzieren oder die Menge, die du lernst, enorm steigern.
Jeder, der sich in seinem Alltag Dinge merken muss, kann von Anki profitieren. Da es inhaltsunabhängig ist und Bilder, Ton, Video und wissenschaftliche Textauszeichnung (durch LaTeX) unterstützt, sind die Möglichkeiten unbegrenzt. Hier sind ein paar Beispiele, was du mit Anki machen kannst:
-
eine Sprache lernen
-
für eine Medizin- oder Jura-Prüfung lernen
-
Namen und Gesichter auswendig lernen
-
deine Geographiekenntnisse auffrischen
-
lange Gedichte meistern
-
sogar Gitarrenakkorde üben!
Hinter Anki stehen zwei simple Konzepte: active recall testing (aktive Erinnerungsprüfung) und spaced repetition (verteilte Wiederholung). Den meisten Lernern sind sie unbekannt, obwohl über sie seit Jahren in der wissenschaftlichen Literatur berichtet wird. Zu verstehen, wie sie funktionieren, wird dich effektiver lernen lassen.
Active recall testing
Active recall testing bedeutet, eine Frage gestellt zu bekommen und zu versuchen, sich an die Antwort zu erinnern, mit anderen Worten, abgefragt zu werden. Das Gegenstück dazu ist passives Lernen, bei dem wir etwas lesen, sehen oder hören, ohne dabei innezuhalten, um zu überlegen, ob wir die Antwort kennen. Die Forschung hat gezeigt, dass Abfragen wesentlich effektiver dazu ist, starke Erinnerungen zu formen, als passives Lernen. Dafür gibt es zwei Gründe:
-
Das Abrufen einer Erinnerung stärkt sie und erhöht damit die Chance, sie erneut abrufen zu können.
-
Können wir eine Frage nicht beantworten, sagt uns das, dass wir den Stoff wiederholen oder neu erlernen müssen.
Wahrscheinlich kennst du active recall testing aus deiner Schulzeit, ohne dass es dir bewusst ist. Wenn ein guter Lehrer dich nach der Lektüre eines Artikels eine Reihe von Fragen beantworten oder wöchentliche Tests schreiben lässt, macht er das nicht nur, um zu prüfen, ob du den Stoff verstanden hast. Durch das Abfragen erhöht er auch die Wahrscheinlichkeit, dass du dich in Zukunft daran erinnern können wirst.
Eine gute Möglichkeit, active recall testing in deinen eigenen Lernprozess zu integrieren, sind Karteikarten. Bei traditionellen Karteikarten aus Papier schreibst du eine Frage auf die eine und die Antwort auf die andere Seite. Indem du die Karte nicht umdrehst, bis du über die Antwort nachgedacht hast, kannst effektiver lernen, als durch passives Lernen möglich wäre.
Use it or lose it
Unser Gehirn ist eine effiziente Maschine, das Informationen, die nicht nützlich erscheinen, schnell entsorgt. Vermutlich erinnerst du dich nicht daran, was du am Montag vor zwei Wochen zum Abendessen hattest, weil diese Information für gewöhnlich keinen Nutzen bringt. Wenn du an dem Tag allerdings in einem großartigen Restaurant warst und die letzten zwei Wochen jedem erzählt hast, wie toll es war, kannst du dich wahrscheinlich noch lebhaft daran erinnern.
Das Gehirn wendet das Prinzip "use it or lose it" ("benutz es oder verlier es") auf alles an, was wir lernen. Wenn du einen Nachmittag lang Fachausdrücke auswendig gelernt und dann zwei Wochen nicht daran gedacht hast, hast du vermutlich die meisten wieder vergessen. Tatsächlich haben Studien gezeigt, dass wir etwa 75% des gelernten Stoffes innerhalb von 48 Stunden vergessen. Das mag ziemlich deprimierend erscheinen, wenn du du sehr viel lernen musst!
Die Lösung ist jedoch einfach: Wiederholung. Durch das Wiederholen neu erlernter Informationen, können wir dem Vergessen stark entgegenwirken.
Das einzige Problem ist, dass Wiederholung traditioneller Weise nicht sehr praktikabel ist. Benutzt du Karteikarten aus Papier, kannst du sie schnell durchblättern, wenn du nur 30 von ihnen wiederholen musst. Aber wenn es 300 oder 3000 sind, wird die Handhabung schnell schwierig.
Spaced Repetition
Über den Abstandseffekt berichtete 1885 der deutsche Psychologe Hermann Ebbinghaus. Er beobachtete, dass wir uns besser an Dinge erinnern können, wenn die Wiederholungen über einen gewissen Zeitraum verteilt, anstatt alle in einer einzigen Sitzung erfolgt sind. Seit den 1930ern wurde eine Reihe von Vorschlägen gemacht, wie dieser Effekt zur Verbesserung des Lernprozesses genutzt werden kann, und es etablierte sich der Begriff spaced repetition.
Ein Beispiel dafür ist die Spaced-Repetition-Methode mittels Karteikarten aus Papier, die der deutsche Publizist Sebastian Leitner 1972 bekannt machte. Indem die Karten in eine Reihe von Kästen eingeordnet und je nach erfolgreicher oder gescheiterter Wiederholung einem neuen Kasten zugeordnet wurden, war es möglich, mit einem Blick einen groben Überblick davon zu bekommen, wie gut eine Karte bekannt war und wann die nächste Wiederholung erfolgen sollte. Das war eine deutliche Verbesserung zu nur einem einzelnen Kasten und wurde weitgehend in Karteikarten-Software umgesetzt. Es ist allerdings ein eher ungenaues Vorgehen, da es kein exaktes Datum liefert, zu dem Stoff wiederholt werden sollte, und nicht gut mit Stoff unterschiedlicher Schwierigkeit zurechtkommt.
Die größten Entwicklungen in den letzten 30 Jahren stammen von den Urhebern von SuperMemo, einem kommerziellen Karteikartenprogramm, das spaced repetition benutzt. SuperMemo bereitete den Weg für ein System, das den optimalen Zeitpunkt für die Wiederholung des Lernstoffs überwacht und sich selbst basierend auf der Leistung des Anwenders optimiert.
In SuperMemos System teilst du dem Programm bei jedem Beantworten einer Frage mit, wie gut du dich erinnern konntest — ob du die Antwort komplett vergessen hattest, einen kleinen Fehler gemacht hast, Schwierigkeiten hattest, dich zu erinnern, dich leicht erinnern konntest, etc. Das Programm nutzt diese Rückmeldung, um den perfekten Zeitpunkt zu bestimmen, dir die Frage erneut zu zeigen. Weil die Erinnerung durch jeden erfolgreichen Abruf stärker wird, wird die Zeit zwischen den Wiederholungen länger und länger. So siehst du eine Frage vielleicht das erste Mal, dann 3 Tage später, 15 Tage später, 45 Tage später und so weiter.
Das war eine Revolution des Lernens, da es bedeutete, dass Stoff mit dem absoluten Minimum an Aufwand gelernt und behalten werden konnte. SuperMemos Slogan fasst es zusammen: Mit spaced repetition kannst du Vergessen vergessen.
Warum Anki?
Obwohl SuperMemos enormer Einfluss auf das Gebiet nicht zu leugnen ist, hat es auch seine Probleme. Das Programm wird oft als fehlerhaft und schwer navigierbar kritisert. Es läuft nur auf Windows. Es is geschützte Software, das heißt Endbenutzer können sie nicht erweitern oder auf die Rohdaten zugreifen. Und während sehr alte Versionen kostenlos zur Vefügung gestellt wurden, sind sie für die heutige Nutzung ziemlich limitiert.
Anki behebt diese Probleme. Es gibt kostenlose Versionen für viele Plattformen, sodass Schüler und Lehrer mit begrenztem Budget nicht außen vor sind. Anki ist quelloffene Software mit einer florierenden Sammlung von Erweiterungen, die von Endbenutzern beigesteuert wurden. Es läuft auf vielen Plattformen, Windows, macOS, Linux/FreeBSD und einigen Mobilgeräten. Und es ist wesentlich einfacher zu benutzen als SuperMemo.
Ankis Spaced-Repetition-System basiert auf einem älteren, SM-2 genannten Algorithmus von SuperMemo.
Plattformspezifisches
Wie Anki installiert wird, und die Probleme, auf die du stoßen könntest, hängen von der Art von Computer ab, die du benutzt.
Installation & Updates
Voraussetzungen
Neue Anki-Versionen benötigen die 64-Bit-Version von Windows 10 oder 11.
- Die letzte Version, die Windows 7 und 8.1 unterstützt, war Anki 2.1.49.
- Die letzte Version, die 32-Bit-Windows unterstützt, war Anki 2.1.35-alternate.
Wenn du einen alten PC hast, kannst du diese Version hier herunterladen.
Installation
Um Anki zu installieren:
- Lade Anki von https://apps.ankiweb.net herunter. Siehe unten, wie du zwischen -qt5 und -qt6 entscheidest.
- Speicher die Datei auf deinem Desktop oder im Downloads-Ordner.
- Doppelklicke auf die Datei, um sie auszuführen. Wenn du eine Fehlermeldung siehst, schau dir bitte die Links auf der linken Seite an.
- Sobald Anki installiert ist, doppelklicke auf das neue Stern-Logo auf deinem Desktop, um Anki zu starten.
Qt5 vs. Qt6
Neue Anki-Versionen kommen in den Varianten Qt5 und Qt6. Letztere wird für die meisten Benutzer empfohlen.
Vorteile der Version Qt6:
- Verschiedene Fehlerbehebungen, u.a. bessere Unterstützung für seltenere Sprachen.
- Sehr große Bilder laden schneller als mit Qt5.
- Sicherheitsaktualisierungen. Unterstützung für Qt5 wurde im November 2020 beendet, d.h. seitdem entdeckte Sicherheitslücken werden nicht geschlossen.
Nachteile der Version Qt6:
- Einige Add-Ons funktionieren derzeit nur mit Version Qt5.
Updates
Wenn du von Anki 2.1.6+ updatest, besteht keine Notwendigkeit, die vorherige Version zunächst zu deinstallieren. Alles was du tun musst, ist Anki zu schließen, falls es geöffnet ist, und den Installationsanweisungen oben zu folgen. Deine Karten bleiben erhalten, wenn du updatest.
Wenn du von einer älteren Version als 2.1.6 updatest oder von der Standard zur alternativen Version wechselst oder umgekehrt, empfehlen wir, die alte Version zuerst zu deinstallieren, was Ankis Programmdateien, aber nicht deine Kartendateien löscht.
Wenn du zu einer früheren Version wechseln möchtest, benutze bitte zunächst die Downgrade-Funktion.
Add-On-Kompatibilität
Einige Add-Ons (Erweiterungen) wurden nicht aktualisiert, um die neueste Version von Anki zu unterstützen. Wenn du auf ein solches Add-On angewiesen bist, hast du vielleicht mehr Glück mit Version 2.1.44 von der Download-Seite.
Probleme
Solltest du auf irgendwelche Probleme beim Installieren oder Starten von Anki stoßen, siehe bitte die Links auf der linken Seite.
Installationsprobleme
Einige Fehlermeldungen, auf die du beim Installieren von Anki stoßen könntest:
Siehe bitte auch Startprobleme.
"Fehler beim Öffnen der Datei zum Schreiben"
Wenn Anki und deinen Datei-Explorer zu schließen nicht hilft, versuche bitte deinen PC neuzustarten und dann die Installation erneut auszuführen.
"Der Computer wurde durch Windows geschützt"
Wenn eine neue Anki-Version veröffentlicht wird, zeigt Windows vielleicht eine unheimlich aussehende Nachricht, bevor es genug Nuter gesehen hat, die diese Version benutzen. Um mit der Installation fortfahren zu können, benutz bitte Trotzdem ausführen.
Antivirenprogramme können ebenfalls manchmal eine falsch positive Warnung. ausgeben.
Startprobleme
- Kein Fehler, aber Programm erscheint nicht
- Windows-Updates
- Windows 7/8
- Videotreiber
- Mehrere Bildschirme
- Antivirus- / Firewall-Software
- Administratorrechte
- Mehrere Anki-Installationen nach Update
- Debuggen
- Wenn alles andere versagt
Kein Fehler, aber Programm erscheint nicht
In jüngerer Zeit gab es Berichte darüber, dass Anki nicht erscheint, ohne dass eine Fehlermeldung angezeigt wird. In dieser Situation kannst du eines der folgenden Dinge tun:
- Die neuste Anki-Version installieren. (Probier sowohl Qt5 als auch Qt6.)
- Das Dezimaltrennzeichen ändern, wenn es kein Punkt ist.
- Die alte Anki-Version 2.1.35-alternate installieren.
Windows-Updates
Wenn du Anki startest, erhältst du vielleicht eine solche Meldung:
- Fehler beim Laden der Python-DLL.
- Das Programm kann nicht gestartet werden, weil api-ms-win-... nicht auf Ihrem Computer installiert ist.
- Skript runanki kann nicht ausgeführt werden.
- Skript pyi_rth_multiprocessing kann nicht ausgeführt werden.
- Skript pyi_rth_win32comgenpy kann nicht ausgeführt werden.
Diese Fehlermeldungen erscheinen für gewöhnlich, weil deinem PC ein Windows-Update oder eine Windows-Bibliothek fehlt.
Öffne bitte Windows Update und stell sicher, dass alle Updates installiert sind. Falls welche installiert werden müssen, starte deinen PC bitte nach der Installation neu.
Windows 7/8
Auf Windows 7/8 musst du vielleicht manuell zusätzliche Updates installieren. Versuche es bitte mit:
- https://www.microsoft.com/en-us/download/details.aspx?id=48234
- https://aka.ms/vs/15/release/vc_redist.x64.exe
- http://www.catalog.update.microsoft.com/Search.aspx?q=kb4474419
- http://www.catalog.update.microsoft.com/Search.aspx?q=kb4490628
Videotreiber
Siehe bitte Anzeigeprobleme.
Mehrere Bildschirme
Wenn du die Meldung "LoadLibrary ist mit Fehler 126 fehlgeschlagen" bekommst, könnte das daran liegen, dass das von Anki benutzte Toolkit Probleme mit mehreren Bildschirmen. hat.
Antivirus- / Firewall-Software
Drittanbieter-Software auf deinem Rechner kann Anki am Starten hindern. Du kannst versuchen, eine Ausnahme hinzuzufügen oder die Antivirus- / Firewall-Software vorübergehend deaktivieren, um zu sehen, ob es hilft.
Administratorrechte
Einige Nutzer haben berichtet, dass Anki erst gestartet hat, nachdem sie auf das Anki-Symbol rechtsgeklickt und "Als Administrator ausführen" ausgewählt haben. Anki speichert all seine Dateien in deinem Benutzerorder und sollte keine Administratorrechte benötigen, aber es ist einen Versuch wert, wenn du die Alternativen ausgeschöpft hast.
Mehrere Anki-Installationen nach Update
Wenn nach einem Update mehrere Anki-Installationen vorliegen (zum Beispiel in
C:\Programme\Anki and C:\Programme (x86)\Anki), könnten sie fehlerhaft
sein und Anki sich nicht ohne Fehlermeldung starten lassen.
Versuche, alle Kopien zu deinstallieren, zum Beispiel mit Windows' Apps und Features
oder, indem du uninstall.exe in jedem Anki-Ordner ausführst. Anschließend kannst
du Anki wieder installieren.
Debuggen
Anki von der Konsole aus zu starten, kann weitere Erkenntnisse über einige Fehler liefern. Nachdem du die neueste Anki-Version und alle Windows-Updates installiert hast, kannst du Start>Ausführen>cmd.exe benutzen, anstatt Anki direkt zu starten. Gib Folgendes in die geöffnete Konsole ein:
cd \program files\anki & anki-console
Vermutlich wird Anki genausowenig starten wie zuvor, aber es könnte Informationen über die Fehlerursache liefern.
Wenn alles andere versagt
Wenn du Anki immer noch nicht starten kannst, nachdem du alle obigen Vorschläge ausprobiert hast, gibt es noch zwei verbleibende Optionen:
- Du kannst versuchen, Anki von Python aus zu starten.
- Du kannst eine ältere Anki-Version wie 2.1.35-alternate oder 2.1.15 ausprobieren, die mit einer anderen Version des Toolkits erstellt wurden.
Anzeigeprobleme
Auf Windows gibt es drei Möglichkeiten, Inhalte auf dem Bildschirm anzuzeigen. Der Standard ist Software, langsam aber am kompatibelsten. Es gibt zwei Alternativen: OpenGL und ANGLE. Sie sind schneller, aber funktionieren vielleicht nicht oder nicht richtig, was zu fehlenden Menüleisten, leeren Fenstern und so weiter führen kann. Welche Option am besten funktioniert, hängt von deinem Computer ab.
Ob und wie du diese Anzeigeweise ändern kannst, hängt von der Anki-Version ab, die du benutzt, genauer gesagt von der Version des benutzten Qt-Toolkits.
Qt5
Dieses Toolkit wird von allen Anki-Versionen vor 2.1.50 benutzt. Hier kann der Anzeigetreiber unter Werkzeuge>Einstellungen angepasst werden. Anschließend solltest du Anki neu starten.
Wenn du nicht auf Ankis Einstellungen zugreifen kannst und, Anki ein paar mal neu zu starten, nicht hilft, musst du den Grafiktreiber vielleicht manuell anpassen. Dafür kannst du cmd.exe starten und das Folgende eingeben:
echo auto > %APPDATA%\Anki2\gldriver
Es wird kein Text ausgegeben. Nun kannst du Anki neu starten.
Die Voreinstellung ist software; die beiden anderen Treiber, die du ausprobieren kannst,
sind angle und auto.
Qt6
Anki 2.1.50+ kann mit dem neueren Qt6-Toolkit benutzt werden. Grafikbeschleunigung ist hier
standardmäßig aktiviert. Bei Anzeigeproblemen kannst du den Modus software ausprobieren:
echo software > %APPDATA%\Anki2\gldriver6
Es wird kein Text ausgegeben. Nun kannst du Anki neu starten.
Um zur Standardeinstellung zurückzukehren, ersetze software durch auto oder lösch die Datei.
Vollbild
Anki 2.1.50+ hat einen Vollbildmodus, der aber aufgrund verschiedener Probleme deaktiviert werden
musste, während OpenGL benutzt wird. Wird wie oben beschrieben zur software-Anzeige gewechselt,
kann der Vollbildmodus benutzt werden, aber bitte beachte, dass die Anzeigeleistung darunter leiden kann.
Probleme beim Kopieren und Einfügen
Wenn du Probleme beim Kopieren und Einfügen hast, überprüfe bitte, ob du andere Programme auf dem PC laufen hast, die die Zwischenablage überwachen, zum Beispiel Wörterbuchprogramme, Zwischenablage-Manager oder Ausschnittswerkzeuge. Wenn solche Programme laufen, kann die Programmbibliothek, die Anki benutzt, Schwierigkeiten bekommen.
Textgröße
Wenn du feststellst, dass der Text die falsche Größe hat, gibt es zwei Umgebungsvariablen, die du ausprobieren kannst:
-
ANKI_NOHIGHDPI=1deaktiviert teilweise Qt’s Unterstützung für hohe DPI. -
ANKI_WEBSCALE=1ändert die Skalierung von Ankis Web-Ansichten (wie die Stapelansicht, den Lernbildschirm etc.), wohingegen es Schnittstellen-Elemente wie die Menüleiste nicht verändert. Ersetze1mit der gewünschten Skalierung, wie1.5oder0.75.
In Windows kannst du diese Variablen zu einer Batch-Datei hinzufügen, um Anki leichter
starten zu können. Erstelle zum Beispiel eine Datei startanki.bat auf deinem
Desktop mit folgendem Inhalt:
set ANKI_WEBSCALE=0.75
start "Anki" "C:\Programme\Anki\anki"
Nach dem Speichern kannst du die Datei doppelklicken, um Anki mit dieser Einstellung zu starten.
Berechtigungsprobleme
Wenn du Fehlermeldungen wie "Zugriff verweigert" erhältst, sind einige Anki-Dateien vielleicht schreibgeschützt, das heißt, Anki kann sie nicht verändern.
Um das Problem zu beheben, kannst du das Folgende tun:
- Gib
cmd.exein die Suchleiste des Startmenüs ein und drücke Enter. - Gib
whoamiin das sich öffnende Fenster ein und drücke Enter, um deinen Benutzernamen anzuzeigen. - Gib nun das Folgende ein, wobei du nach jeder Zeile Enter drückst und
____ (ohne das
:Fzu entfernen) mit deinem Benutzernamen ersetzt:cd %APPDATA% icacls Anki2 /grant ____:F /t
Dieser Befehl sollte die Zugriffsrechte in Ankis Dateiordner korrigieren und du solltest nun in der Lage sein, das Programm zu starten.
Antivirus / Firewall / Anti-Malware
Einige Nutzer haben Fehlermeldungen wie "Zugriff verweigert" oder "schreibgeschützt" erhalten, die von Sicherheits-Software verursacht wurden. Möglicherweise musst du eine Ausnahme für Anki hinzufügen oder die Software vorübergehend deaktivieren, um sie als Verursacher ausschließen zu können. Manche Nutzer haben berichtet, dass allein, die Software abzuschalten, nicht geholfen hat und sie entweder eine Ausnahme für Anki hinzufügen oder die Software deinstallieren mussten.
Berechtigungsprobleme finden und beseitigen
Wenn die Probleme weiterhin bestehen, nachdem du Antivirus- und ähnliche Programme
ausgeschlossen hast, die oben beschriebenen Schritte ausgeführt hast und nicht OneDrive
benutzt, führe bitte die folgenden Befehle in cmd.exe aus, indem du nach jeder Zeile
Enter drückst:
whoami
cd %APPDATA%
icacls Anki2 /t
Mache anschließend einen Screenshot von dem, was du siehst, oder kopiere es, und schick es uns in einer Support-Anfrage.
Installing & Upgrading Anki on macOS
Requirements
Recent Anki releases require a Mac running macOS 10.13.4 or later.
The last Anki release that supported macOS 10.10 to 10.13.3 was 2.1.35-alternate. If you're on an old machine, you can obtain the old version from the releases page.
Installing
- Download Anki from https://apps.ankiweb.net. See the next section for how to choose between -qt5 and -qt6.
- Save the file to your desktop or downloads folder.
- Open it, and drag Anki to your Applications folder or desktop.
- Double-click on Anki in the location you placed it.
Qt5 vs. Qt6
Recent Anki versions come in separate Qt5 and Qt6 variants. The Qt6 version is recommended for most users.
Advantages of the Qt6 version:
- Native support for recent Apple Silicon Macs (faster, better battery life).
- Various bugfixes, including things like better support for less common languages.
- Security updates. Support for the Qt5 library was discontinued in Nov 2020, meaning that any security flaws discovered since then will remain unfixed.
Disadvantages of the Qt6 version:
- Tabbed windows (eg in full screen) are no longer possible.
- Some add-ons currently only work with the Qt5 version.
Upgrading
To upgrade, close Anki if it is open, and then follow the steps above. Drag the Anki icon into the same location you previously stored it, and when prompted, overwrite the old version. Your card data will be preserved.
Add-on Compatibility
Some add-ons have not been updated to support the latest Anki release yet. If an add-on you depend on has not been ported to the latest release yet, you may have more luck with 2.1.44 from the releases page.
Problems
If you encounter any issues when installing or starting Anki, please see the following links on the left.
Display Issues on macOS
Qt6 Video Driver
Hardware acceleration defaults to on. This should be fine for most Macs, but if you are experiencing crashes or display issues, you can try enabling software rendering.
Open Terminal.app, then paste the following and hit enter:
echo software > ~/Library/Application\ Support/Anki2/gldriver6
It will not print anything. You can then start Anki again.
If you wish to switch back to the default, change software to auto, or
remove that file.
eGPUs
If you experience blank screens when using an external graphics card on a Mac, you can ctrl+click on the Anki app, click "Get Info", and enable the "prefer eGPU" option.
Monitors with different resolutions
Please see this forum post.
Installing & Upgrading Anki on Linux
Requirements
The packaged version requires a recent 64 bit Intel/AMD Linux with glibc, and common libraries like libwayland-client and systemd. If you are on a different architecture, or a barebones Linux distro, you will not be able to use the packaged version, but you may be able to use the Python wheels instead.
On recent Ubuntu installations, please use the following before installing:
sudo apt install libxcb-xinerama0
If Anki fails to start after installing, you may be missing other libraries.
Anki's build system only supports glibc, so musl-based distros are not currently supported.
Installing
To install Anki:
- Download Anki from https://apps.ankiweb.net to your Downloads folder. See the next section for how to choose between -qt5 and -qt6.
- If zstd is not already installed on your system, you'll need to install it (eg
sudo apt install zstd). - Open a terminal and run the following commands, replacing the filename as appropriate.
tar xaf Downloads/anki-2.1.XX-linux-qt6.tar.zst
cd anki-2.1.XX-linux-qt6
sudo ./install.sh
On some Linux systems, you may need to use tar xaf --use-compress-program=unzstd.
- You can then start Anki by typing 'anki' and hitting enter. If you encounter any issues, please see the links on the left.
Qt5 vs. Qt6
Recent Anki versions come in separate Qt5 and Qt6 variants. The Qt6 version is recommended for most users.
Advantages of the Qt6 version:
- Compatibility with recent glibc versions (fixes blank screens on recent distros).
- Better HiDPI support.
- Better Wayland support.
- Various bugfixes, including things like better support for less common languages.
- Security updates. Support for the Qt5 library was discontinued in Nov 2020, meaning that any security flaws discovered since then will remain unfixed.
Disadvantages of the Qt6 version include:
- Some add-ons currently only work with the Qt5 version.
Upgrading
If you were running Anki from a .deb/.rpm/etc in the past, please make sure to remove the system version before installing the package provided here.
If you're upgrading from a previous package, simply repeat the installation steps to upgrade to the latest version. Your user data will be preserved.
If you wish to downgrade to a previous version, please make sure you downgrade first.
Add-on Compatibility
Some add-ons have not been updated to support the latest Anki release yet. If an add-on you depend on has not been ported to the latest release yet, you may have more luck with 2.1.44 from the releases page.
Problems
If you encounter any issues when installing or starting Anki, please see the following links on the left.
Missing Libraries
If Anki fails to start, please run it from a terminal with anki. If it says a
library is missing, please install it and try again.
If it complains about no platform being available, please start Anki with the following command line, which should reveal a missing library:
QT_DEBUG_PLUGINS=1 anki
After installing the library with apt-get or similar, repeat the process. You may need to do this a few times before all required libraries are installed.
Display Issues on Linux
Qt5
Hardware acceleration defaults to off. Enabling it in the preferences screen and restarting Anki may make Anki’s interface more responsive, but some users may experience missing menubars, blank windows or crashes when it is enabled. (Blank windows may also be caused by this problem.)
You can adjust the display driver in Anki's Preferences screen. We recommend you try both settings, and see which one works best for you.
If you're unable to open Anki, you can adjust the driver in a terminal, by
writing either auto or software into ~/.local/share/Anki2/gldriver. Please
note that if you’re using nouveau, it is known to be buggy, and it only supports
software mode.
Qt6
Hardware acceleration defaults to on. If you experience blank screens or display issues, you can try enabling software rendering using the terminal:
echo software > ~/.local/share/Anki2/gldriver6
If you wish to switch back to the default, change software to auto, or
remove that file.
Blank Main Window
Some Linux distros have recently updated glibc. Recent versions break the web toolkit that Anki is built on, causing Anki's main window to appear blank.
There are two ways to work around this:
- Install the latest Qt6 version of Anki, which uses an updated toolkit:
- Use one of the workarounds posted on the following threads:
- https://forums.ankiweb.net/t/please-use-file-import-popup-on-startup/14695
- https://forums.ankiweb.net/t/setting-disable-seccomp-filter-sandbox-by-default-on-linux/13765
- https://forums.ankiweb.net/t/fedora-35-and-anki-2-1-47-updates-with-blank-anki-window/13431/11
Packages Distributed by Linux Distributions
We have seen a lot of issues caused by the customized versions of Anki distributed by Linux distributions:
- Anki depends on third-party libraries like Qt, and Linux distributions often substitute different versions of those libraries, without testing the impact of those changes.
- Sometimes the version of Anki they distribute is years old, or is an alpha/beta version not intended for stable release. Distributions will often disable the built-in update check as well, to prevent you from being notified of newer versions.
Compiled builds of Anki are available on https://apps.ankiweb.net. Most of the necessary libraries are included, and Anki has been tested to work with these library versions. If you're experiencing issues with your distro's version, the first thing you should try is switching to the latest packaged version we provide.
You are welcome to continue using your distro's version of Anki if you prefer, but if you run into any issues, you will need to report them to your distribution's package maintainers.
Anki not picking up GTK theme on Gnome/Linux
You can work around this issue by explicitly telling Anki what the GTK theme is. Run the following commands in a terminal:
theme=$(gsettings get org.gnome.desktop.interface gtk-theme)
echo "gtk-theme-name=$theme" >> ~/.gtkrc-2.0
echo "export GTK2_RC_FILES=$HOME/.gtkrc-2.0" >> ~/.profile
Then log out and log back into your computer, and Anki should pick up the GTK theme.
Wayland
From Anki 2.1.48, you can force Anki to use Wayland by defining ANKI_WAYLAND=1 before starting Anki. Wayland may give you better rendering across multiple displays, but it is currently off by default, due to the following issues:
- On some distros, windows are rendered without borders.
- Bringing windows to the front is not possible, so for example, clicking on Add to reveal an existing Add Cards window will not work.
Input Methods on Linux
Fcitx
The standard Anki build includes fcitx support, but it may not work on all distributions. If you are unable to use fcitx, you may want to run Anki from Python wheels instead.
Loslegen
Installation & Updates
Bitte schau dir die Anweisungen für deinen Computer an:
Videos (Englisch)
Für einen schnellen Einstieg in Anki kannst du dir diese Einführungsvideos (auf Englisch) ansehen. Einige wurden mit einer früheren Anki-Version erstellt, aber die Konzepte sind dieselben.
Falls YouTube in deinem Land nicht verfügbar ist, kannst du die Videos stattdessen herunterladen.
Grundlagen
Karten
Ein Frage-Antwort-Paar heißt Karte. Das entspricht einer Karteikarte aus Papier mit der Frage auf der Vorder- und der Antwort auf der Rückseite. In Anki sieht eine Karte nicht wirklich wie eine Papierkarte aus, und wenn du die Antwort anzeigen lässt, bleibt die Frage standardmäßig sichtbar. Wenn du zum Beispiel elementare Chemie lernst, könntest du eine Karte wie die folgende sehen:
Frage: Elementsymbol für Sauerstoff?
Nachdem du darüber nachgedacht hast und zu dem Schluss gekommen bist, dass die Antwort "O" ist, klickst du auf "Antwort zeigen" und siehst:
Frage: Elementsymbol für Sauerstoff?
Antwort: O
Nachdem du dich vergewissert hast, dass du recht hattest, kannst du Anki wissen lassen, wie gut du dich erinnern konntest, und Anki wird entscheiden, wann es dir die Karte das nächste Mal zeigen wird.
Stapel
Ein Stapel ist eine Gruppe von Karten. Du kannst Karten in verschiedene Stapel aufteilen, um Teile deiner Sammlung anstatt alles auf einmal zu lernen. Jeder Stapel kann andere Einstellungen haben, zum Beispiel wie viele neue Karten du pro Tag sehen willst oder wie viel Abstand zwischen Wiederholungen liegen soll.
Stapel können andere Stapel enthalten, was dir erlaubt, deine Stapel in einem Stammbaum anzuordnen. Anki benutzt "::", um verschiedene Ebenen zu trennen. So bezeichnet ein Stapel mit dem Namen "Chinesisch::Hanzi" einen Hanzi-Stapel, der Teil eines Chinesisch-Stapels ist. Wenn du "Hanzi" wählst, werden dir nur Hanzi-Karten angezeigt, wenn du "Chinesisch" wählst, werden dir alle Chinesich-Karten, inklusive der Hanzi-Karten, gezeigt.
Um einen Stapel in einem Stammbaum anzuordnen, kannst du ihm entweder einen Namen mit "::" zwischen jeder Ebene geben oder ihn mit der Maus auf einen anderen Stapel in der Stapelansicht ziehen und loslassen. Stapel, die sich in einem anderen Stapel befinden (die also mindestens ein "::" im Namen haben), werden oft Unterstapel und Stapel der obersten Ebene Ober- oder Elternstapel genannt.
Anki beginnt mit einem Stapel namens "Standard". Alle Karten, die irgendwie von den anderen Stapeln getrennt wurden, landen hier. Anki versteckt den Standard-Stapel, wenn er keine Karten enthält und du andere Stapel hinzugefügt hast. Alternativ kannst du ihn umbenennen und für andere Karten benutzen.
Stapel werden am besten genutzt, um große Kategorien zu umfassen, und nicht spezifische Themen wie "Essensverben" oder "Lektion 1". Für mehr Informationen dazu, siehe bitte den Abschnitt Stapel angemessen nutzen.
Für Informationen darüber, wie Stapel die Anzeigereihenfolge von Karten beeinflussen, siehe bitte den Abschnitt Anzeigereihenfolge.
Notizen & Felder
Oft möchte man mehr als eine Karteikarte zu einer bestimmten Information erstellen. Wenn du zum Beispiel Französisch lernst und dir merken willst, dass "bonjour" "hallo" bedeutet, würdest du vielleicht gerne eine Karte anlegen, die nach der deutschen Übersetzung von "bonjour" fragt, und eine, die nach der französischen Übersetzung von "hallo" fragt. Die erste Karte testet, ob du das fremde Wort erkennen, die zweite, ob du es hervorrufen kannst.
Mit Papierkarteikarten bleibt dir nichts anderes übrig, als die Informationen zweimal aufzuschreiben, einmal für jede Karte. Einige Karteikartenprogramme erleichtern das, indem sie die Möglichkeit bieten, Vorder- und Rückseite zu vertauschen. Das ist eine Verbesserung, hat aber zwei große Nachteile:
-
Weil solche Programme nicht separat überwachen, wie gut du eine Vokabel erkennen und hervorrufen kannst, werden dir die Karten nicht zum optiomalen Zeitpunkt gezeigt und du vergisst mehr, als dir lieb ist, oder musst mehr lernen als unbedingt nötig.
-
Das Vertauschen von Frage und Antwort funktioniert nur, wenn du genau denselben Inhalt auf beiden Seiten sehen willst. Es ist dir also beispielweise nicht möglich, auf den Rückseiten noch Zusatzinformationen anzeigen zu lassen.
Anki löst diese Probleme, indem es dir ermöglicht, den Inhalt deiner Karten in getrennte Informationseinheiten aufzuteilen. Anschließend kannst du Anki mitteilen, welche Information auf welcher Karte stehen soll, und Anki kümmert sich um die Erstellung und, wenn du später Änderungen vornimmst, Aktualisierung der Karten.
Stell dir vor, wir wollen Französischvokabeln lernen und es soll jeweils die Seitenzahl auf der Kartenrückseite stehen. Unsere Karten sollen so aussehen:
Frage: Bonjour
Antwort: Hallo
   Seite 12
Und:
Frage: Hallo
Antwort: Bonjour
   Seite 12
In diesem Beispiel gibt es drei zusammengehörige Informationen: ein französisches Wort, seine Bedeutung auf Deutsch und eine Seitenzahl. Zusammen sieht das so aus:
Französisch: Bonjour
Deutsch: Hello
Seitenzahl: 12
In Anki heißt dieser Informationsblock Notiz und jede einzelne Information darin Feld. Wir können also sagen, dass diese Art von Notiz drei Felder hat: Französisch, Deutsch und Seitenzahl.
Um Felder hinzuzufügen oder anzupassen, klicke während der Bearbeitung von Notizen auf die Schaltfläche "Felder...". Für weitere Informationen siehe bitte den Abschnitt Felder anpassen.
Kartentypen
Damit Anki basierend auf unseren Notizen Karten erstellen kann, müssen wir ihm eine Blaupause zur Verfügung stellen, die besagt, welche Felder auf der Vorder- und Rückseite jeder Karte zu sehen sein sollen. Diese Blaupause heißt Kartentyp. Jede Art Notiz kann einen oder mehrere Kartentypen haben. Wenn du eine Notiz hinzufügst, wird Anki für jeden Kartentyp eine Karte erstellen.
Jeder Kartentyp hat zwei Vorlagen, eine für die Frage und eine für die Antwort. Im obigen Beispiel sollte die Karte zum Erkennen der Französischvokabel so aussehen:
Frage: Bonjour
Antwort: Hallo
   Seite 12
Dafür können wir die Frage- und Antwortvorlage jeweils wie folgt festlegen:
Frage: {{Französisch}}
Antwort: {{Deutsch}}<br>
   Seite {{Seitenzahl}}
Indem wir einen Feldnamen in doppelte geschweifte Klammern einfassen, weisen wir
Anki an, diesen Bereich mit der Information aus dem Feld zu ersetzen. Alles, was
nicht in geschweifte Klammern eingefasst ist, bleibt auf jeder Karte gleich.
So müssen wir nicht jedes Mal "Seite" in das Seitenzahl-Feld eingeben, wenn wir
Notizen erstellen – es wird auf jeder Karte automatisch hinzugefügt.
<br> ist eine besondere Zeichenfolge, die Anki anweist, die Zeile umzubrechen.
Weitere Informationen finden sich im Abschnitt Kartenvorlagen.
Die Vorlagen für die Karte zum Hervorrufen der Vokabel funktionieren ganz ähnlich:
Frage: {{Deutsch}}
Antwort: {{Französisch}}<br>
   Seite {{Seitenzahl}}
Sobald ein Kartentyp erstellt wurde, wird jedes Mal, wenn du eine neue Notiz hinzufügst, basierend auf diesem Kartentyp eine neue Karte erstellt. Mit Kartentypen ist es leicht, die Formatierung deiner Karten einheitlich zu halten, und sie können den Aufwand, neue Informationen hinzuzufügen, drastisch reduzieren. Sie erlauben Anki auch, dafür zu sorgen, dass verwandte Karten nicht zu dicht nacheinander erscheinen, und ermöglichen dir, Tippfehler oder Falschinformationen an einer Stelle zu korrigieren und damit alle betroffenen Karten gleichzeitig zu aktualisieren.
Um Kartentypen hinzuzufügen oder zu bearbeiten, klicke während der Bearbeitung von Notizen auf die Schaltfläche "Karten...". Für weitere Informationen siehe bitte den Abschnitt Kartenvorlagen.
Notiztypen
Anki erlaubt dir, für unterschiedlichen Stoff verschiedene Notiztypen zu erstellen. Jeder Notiztyp hat seine eigenen Felder und Kartentypen. Es ist sinnvoll, für jedes weitgefasste Thema, das du lernst, einen eigenen Notiztyp anzulegen. Im obigen Beispiel könnten wir einen Notiztyp "Französisch" erstellen. Wenn wir dann noch Hauptstädte lernen möchten, könnten wir dafür einen weiteren Notiztyp anlegen, der Felder wie "Land" und "Hauptstadt" hat.
Wenn Anki nach Duplikaten sucht, vergleicht es nur Notizen vom selben Typ. Wenn du also eine Hauptstadt namens "Orange" hinzufügst, wirst du keine Duplikatwarnung erhalten, wenn du irgendwann das französische Wort für "orange" lernst.
Wenn du eine neue Sammlung anlegst, fügt Anki automatisch einige Standardnotiztypen hinzu. Die erleichtern neuen Nutzern den Einstieg, aber auf lange Sicht wird empfohlen, je nach dem gelernten Stoff eigene Notiztypen anzulegen. Die Standardnotiztypen sind die folgenden:
Einfach
Hat die Felder "Vorderseite" und "Rückseite" und erzeugt eine einzige Karte.
Text, den du in die Felder eingibst, wird auf der jeweiligen Kartenseite gezeigt.
Einfach (beide Richtungen)
Wie "Einfach", erzeugt aber zwei Karten für eingegebenen Text: eine von
"Vorderseite" nach "Rückseite" und eine von "Rückseite" nach "Vorderseite".
Einfach (eine oder zwei Richtungen)
Erzeugt eine Karte mit "Vorderseite"→"Rückseite" und optional eine Karte mit
"Rückseite"→"Vorderseite". Hierfür hat der Notiztyp ein drittes Feld namens
"Gegenrichtung hinzufügen". Gibst du in dieses Feld Text ein, so wird die
umgekehrte Karte erzeugt. Mehr Informationen finden sich im Abschnitt
Kartenvorlagen.
Einfach (Antwort eintippen)
Fast wie einfach, hat aber einen Kasten auf der Vorderseite, in den du deine
Antwort eingegeben kannst. Beim Anzeigen der Rückseite wird deine Eingabe überprüft
und mit der Antwort verglichen. Weitere Informationen findest du im Abschnitt
Deine Antwort überprüfen.
Lückentext
Erlaubt es, Text in einen Lückentext zu verwandeln. Zum Beispiel:
"Die Mondlandung geschah im Jahre [...]." → "Die Mondlandung geschah im Jahre
1969." Mehr Informationen finden sich im Abschnitt
Lückentext.
Um deine eigenen Notiztypen hinzuzufügen und vorhandene zu bearbeiten, kannst du vom Hauptfenster aus Werkzeuge > Notiztypen verwalten auswählen.
Notizen und Notiztypen sind nicht auf einen einzelnen Stapel beschränkt
- sie gelten für deine gesamte Sammlung. Das bedeutet, dass du viele verschiedene Notiztypen im selben Stapel verwenden oder Karten, die von derselben Notiz erzeugt wurden, in verschiedene Stapel einteilen kannst. Im Hinzufügen-Fenster kannst du auswählen, welcher Notiztyp für neue Notizen verwendet wird und in welchem Stapel die Karten landen sollen. Diese beiden Entscheidungen sind komplett unabhängig voneinander. Du kannst auch den Notiztyp von Notizen ändern, nachdem du sie schon erstellt hast.
Sammlung
Deine Sammlung ist das gesamte in Anki gespeicherte Material – deine Karten, Notizen, Stapel, Notiztypen, Stapeloptionen und so weiter.
Öffentliche Stapel
Du kannst dir ein Video über öffentliche Stapel und Wiederholung (Englisch) auf YouTube ansehen.
Die einfachste Möglichkeit, mit Anki loszulegen, ist einen Stapel herunterzuladen, den jemand geteilt hat:
-
Klick auf "Stapel herunterladen" am unteren Ende der Stapelansicht.
-
Wenn du einen Stapel gefunden hast, der dich interessiert, klick auf "Download", um das Stapelpaket herunterzuladen
-
Doppelklicke auf die heruntergeladene Datei oder geh auf Datei > Importieren, um den Stapel in Anki zu laden.
Beachte bitte, dass es derzeit nicht möglich ist, öffentliche Stapel direkt zu deinem AnkiWeb-Konto hinzuzufügen. Du musst sie mit dem Desktop-Programm importieren und dann synchronisieren, um sie auf AnkiWeb hochzuladen.
Einen eigenen Stapel zu erstellen, ist die effektivste Möglichkeit, ein komplexes Thema zu lernen. Themen wie Sprachen oder Naturwissenschaften können nicht einfach durch Auswendiglernen begriffen werden. Sie benötigen Erklärungen und Kontext, um sie effektiv zu lernen. Außerdem zwingt dich das eigenhändige Eingeben der Informationen zu entscheiden, was die wesentlichen Aspekte sind, was widerum zu einem besseren Verständnis führt.
Wenn du eine Sprache lernst, ist es verlockend, eine lange Liste von Vokabeln und ihren Übersetzungen herunterzuladen, aber das wird dir genauso wenig eine Sprache beibringen, wie dich das Auswendiglernen von wissenschaftlichen Gleichungen Astrophysik lehrt. Um wirklich zu lernen brauchst du Lehrbücher, Lehrer oder Zugang zu Sätzen aus der echten Welt.
Lerne nicht, was du nicht verstehst.
— SuperMemo
Die meisten öffentlichen Stapel werden von Leuten erstellt, die Stoff außerhalb von Anki lernen — aus Lehrbüchern, Kursen, dem Fernsehen, etc. Sie wählen die interessanten Punkte von dem, was sie lernen, aus und geben sie in Anki ein. Sie bemühen sich nicht, Hintergrundinformationen oder Erklärungen zu den Karten hinzuzufügen, da sie den Stoff ohnehin schon verstehen. Wenn dann jemand ihren Stapel herunterlädt und versucht, ihn zu benutzen, wird ihm das große Schwierigkeiten bereiten, weil ihm die Hintergrundinformationen oder Erklärungen fehlen.
Das soll nicht bedeuten, dass öffentliche Stapel nutzlos sind — nur, dass sie bei komplexen Themen als Ergänzung und nicht als Ersatz für externes Material verwendet werden sollten. Wenn du mit einem bestimmten Lehrbuch lernst und jemand einen Stapel mit Ideen aus diesem Buch geteilt hat, ist das eine gute Möglichkeit, etwas Zeit zu sparen. Auch für einfache Themen, die praktisch nur aus einer Liste von Fakten bestehen, zum Beispiel Hauptstädte oder Trivialwissen, brauchst du vermutlich kein Material aus externen Quellen. Aber wenn du versuchst, ein komplexes Thema ohne externes Material zu lernen, wirst du vom Ergebnis wahrscheinlich enttäuscht sein.
Lernen
- Stapel
- Stapelübersicht
- Fragen
- Karten (erneut) lernen
- Karten wiederholen
- Anzahl fälliger Karten
- Zufallsfaktor
- Bearbeiten und Sonstiges
- Anzeigereihenfolge
- Geschwister und Zurückstellen
- Tastenkombinationen
- Rückstände
Wenn du einen Stapel gefunden hast, der dir gefällt, oder ein paar Notizen erstellt hast, ist es an der Zeit, mit dem Lernen zu beginnen.
Stapel
In Anki lernst du immer nur den gerade ausgewählten Stapel und dessen Unterstapel.
In der Stapelansicht werden deine Stapel mit drei Spalten aufgelistet: "Neu" gibt die Anzahl neuer Karten an, die heute gelernt werden können. Die zweite Spalte zeigt die Anzahl der Karten, die sich gerade in der Lernphase befinden. "Fällig" ist die Zahl anstehender Wiederholungen.
Wenn du einen Stapel anklickst, wird er zum aktuellen Stapel und Anki wechselt in die Lernansicht. Um den aktuellen Stapel zu wechseln, kannst du jederzeit zur Stapelansicht zurückkehren, indem du auf die entsprechende Schaltfläche am oberen Rand des Hauptfensters klickst. Dort kannst du auch den Menüpunkt "Stapel lernen" benutzen, um einen neuen Stapel per Tastatur auszuwählen, oder du kannst S drücken, um den aktuellen Stapel zu lernen.
Du kannst das Zahnradsymbol rechts neben einem Stapel anklicken, um den Stapel umzubenennen, zu löschen, seine Einstellungen zu bearbeiten oder ihn zu exportieren.
Stapelübersicht
Nachdem du in der Stapelansicht auf einen Stapel geklickt hast, wird dir die sogenannte Stapelübersicht angezeigt. Dort kannst du sehen, wie viele Karten heute fällig sind. Die Karten sind dabei in drei Kategorien aufgeteilt:
-
Neu bezieht sich auf Karten, die du heruntergeladen oder selbst angelegt, aber noch nie gelernt hast.
-
Lernen bezieht sich auf Karten, die du schon mal gesehen hast, aber immer noch lernst.
-
Wiederholen bezieht sich auf Karten, die du bereits gelernt hast und die nun wiederholt werden müssen, damit du sie nicht wieder vergisst.
Klick auf "Jetzt lernen", um zu beginnen. Anki wird dir solange Karten zeigen, bis es keine heute fälligen mehr gibt.
Während des Lernens kannst du mit der Taste S zur Übersicht zurückkehren.
Fragen
Für jede Karte wird zuerst nur die Frage gezeigt. Klick auf "Antwort zeigen" oder betätige die Leertaste, nachdem du über die Antwort nachgedacht hast. Es ist nicht schlimm, wenn du eine Weile brauchst, bis dir die Antwort einfällt, aber als Faustregel solltest du besser aufgeben, wenn sie dir nach etwa 10 Sekunden noch nicht eingefallen ist, anstatt dich weiter zu versuchen zu erinnern.
Wenn die Antwort gezeigt wird, solltest du sie mit der, an die du gedacht hast, vergleichen und Anki mitteilen, wie gut du dich erinnern konntest. Wenn du dir nicht zutraust, deine Antwort korrekt abzugleichen, kannst du Anki dich nach der Eingabe deiner Antwort fragen lassen, anstatt dir nur Frage und Antwort zu zeigen.
Karten (erneut) lernen
Wenn du Karten lernst oder erneut lernst, nachdem du sie vergessen hattest, zeigt Anki sie dir mehrmals, um dir zu helfen, sie im Gedächtnis zu behalten. Diese Abfragen heißen Lernstufen. Standardmäßig gibt es zwei: 1 Minute und 10 Minuten. Du kannst die Anzahl und Abstände der Stufen in den Stapeleinstellungen ändern.
Beim Lernen gibt es vier Bewertungsschaltflächen:
-
Nochmal schickt die Karte zurück zur ersten Lernstufe.
-
Schwierig lässt die Karte die aktuelle Lernstufe wiederholen, außer es handelt sich um die erst Lernstufe, in welchem Fall das neue Intervall der Durchschnitt von Nochmal und Gut ist.
-
Gut schickt die Karte zur nächsten Lernstufe. Wenn sich die Karte auf der letzten Lernstufe befand, wird sie in eine Wiederholungskarte umgewandelt, sie steigt auf. Standardmäßig wird eine aufgestiegene Karte am nächsten Tag und dann in größer werdenden Abständen wieder gezeigt (siehe den nächsten Abschnitt).
-
Einfach wandelt die Karte sofort in eine Wiederholungskarte um, auch wenn noch Lernstufen übrig sind. Standardmäßig wird die Karte nach 4 Tagen und dann in größer werdenden Abständen wieder gezeigt. Mit dem Zeitplaner V1 ist die Einfach-Schaltfläche beim erneuten Lernen von Karten nicht sichtbar, da sie das gleiche Intervall wie Gut liefern würde. Mit dem Zeitplaner V2+ erhöht sie das Intervall beim erneuten Lernen um einen zusätzlichen Tag.
Erstmalig gezeigte Karten beginnen auf der ersten Lernstufe. Wenn du also eine Karte beim ersten Mal, das du sie siehst, mit Gut bewertest, wird sie nach 10 Minuten ein weiteres Mal gezeigt und die erste Lernstufe von einer Minute wird übersprungen.
Du kannst die Tasten 1, 2, 3 und 4 benutzen, um die entsprechende Schaltfläche auszuwählen. Die Leertaste und Enter stehen ebenfalls für Gut.
Wenn keine anderen Karten anstehen, zeigt Anki dir Lernkarten selbst dann, wenn ihr Intervall noch nicht vollständig abgelaufen ist. Falls du das Intervall lieber zur Gänze abwarten möchtest, kannst du dieses Verhalten unter Einstellungen > Neu planen > Grenzwert für vorgezogenes Lernen anpassen.
Karten wiederholen
Wenn eine Karte zuvor gelernt wurde und zur Wiederholung ansteht, gibt es vier Bewertungsschaltflächen:
-
Nochmal kennzeichnet deine Antwort als falsch und weist Anki an, dir die Karte in Zukunft öfter zu zeigen. Die Wiederholung wird als Fehlschlag bezeichnet. Siehe den Abschnitt Fehlschläge für Informationen darüber, wie mit gescheiterten Wiederholungen verfahren wird.
-
Schwierig zeigt die Karte standardmäßig nach einem etwas längeren Zeitraum wieder und weist Anki an, dir die Karte in Zukunft öfter zu zeigen.
-
Good teilt Anki mit, dass das letzte Intervall in etwa angemessen war und die Leichtigkeit der Karte nicht nach oben oder unten angepasst werden muss. Mit der voreingestellten Leichtigkeit ist der Zeitraum bis zur nächsten Wiederholung ungefähr der zweieinhalb-fache des letzten Zeitraums. Wenn du also zuletzt 10 Tage gewartet hast, bis die Karte gezeigt wurde, werden es nun 25 Tage sein.
-
Einfach teilt Anki mit, dass der Zeitraum zu kurz war. Die Karte wird für einen späteren Zeitpunkt als mit Gut geplant und seltener gezeigt werden. Da Einfach das Intervall rapide ansteigen lässt, sollte es nur für die allereinfachsten Karten benutzt werden. Üblicherweise solltest du stattdessen mit Gut bewerten.
Wie schon bei Lernkarten kannst du die Tasten 1, 2, 3 und 4 zur Bewertung nutzen. Leertaste und Enter bewerten mit Gut.
Siehe Stapeleinstellungen und die FAQs, um mehr über die Funktionsweise des Algorithmus zu lernen.
Anzahl fälliger Karten
Während nur die Frage zu sehen ist, zeigt Anki drei Zahlen am unteren Ende des
Bildschirms an, z.B. 12 + 34 + 56. Sie stehen für neue Karten, Karten in der
Lernphase und zu wiederholende Karten. Wenn du sie lieber nicht sehen würdest,
kannst du sie in Ankis Einstellungen abschalten.
Mit dem V1-Zeitplaner zählen die Wiederholungen, die nötig sind, bis alle anstehenden Karten abgearbeitet sind, nicht die Anzahl der Karten. Wenn du mehrere Lernstufen für fehlgeschlagene Wiederholungen eingestellt hast, steigt die Zahl bei einem Fehlschlag um mehr als 1, da die Karte nun mehrfach gezeigt werden muss.
Ab dem V2-Zeitplaner zählen Karten, sodass die Anzahl immer um 1 steigt, egal wie viele Lernstufen verbleiben.
Sobald die Antwort sichtbar ist, zeigt Anki über jeder Schaltfläche eine Schätzung davon, wann die Karte das nächste Mal gezeigt werden wird. Wenn du das lieber nicht sehen würdest, kannst du es in Ankis Einstellungen abschalten.
Zufallsfaktor
Wenn du eine Wiederholungskarte bewertest, wendet Anki zudem einen geringen Zufallsfaktor ("Fuzz") an, um zu vermeiden, dass Karten, die gleichzeitig eingeführt wurden, zusammebleiben und auch in Zukunft stets am selben Tag angezeigt werden. Seit dem V3-Zeitplaner wird dieser Zufallsfaktor auf den Schaltflächenbeschriftungen berücksichtigt. Wenn du also einen der vorherigen Zeitplaner benutzt und eine geringe Abweichung zwischen den Bewertungsschaltflächen und den tatsächlichen Intervallen feststellst, ist das vermutlich die Ursache.
Lernkarten werden ebenfalls mit bis zu 5 Minuten Verzögerung angezeigt, damit sie nicht immer in derselben Reihenfolge erscheinen, allerdings wird das von den Bewertungsschaltflächen nicht berücksichtigt. Diese Funktion kann nicht abgeschaltet werden.
Bearbeiten und Sonstiges
Du kannst auf die Schaltfläche Bearbeiten in der linken unteren Ecke klicken, um die aktuelle Notiz zu bearbeiten. Anschließend kannst du weiterlernen. Das Bearbeiten-Fenster funktioniert ganz ähnlich wie das Hinzufügen-Fenster.
In der rechten unteren Ecke des Wiederholungsfenster befindet sich die Schaltfläche Mehr. Sie bietet einige weitere Funktionen für die aktuelle Karte oder Notiz:
-
Markieren: Fügt der Karte eine farbige Markierung hinzu oder entfernt sie wieder. Diese Markierungen sind beim Lernen sichtbar und können zur Suche in der Kartenverwaltung verwendet werden. Das ist nützlich, wenn du mit der Karte zu einem späteren Zeitpunkt noch etwas machen möchtest, z.B. ein Wort nachschlagen, sobald du zuhause bist. Ab Anki 2.1.45+ kannst du den Markierungen von der Kartenverwaltung aus Namen geben.
-
Karte / Notiz zurückstellen: Verbirgt die Karte bzw. alle Karten der Notiz bis zum nächsten Tag. (Wenn du Karten schon früher wieder sehen möchtest, kannst du auf die Schaltfläche Zurückstellen aufheben in der Stapelübersicht klicken.) Das ist nützlich, wenn du die Karte gerade nicht beantworten kannst oder später auf sie zurückkommen möchtest. Eine Zurückstellung kann auch automatisch für Karten derselben Notiz erfolgen.
Mit dem alten Zeitplaner wurden zurückgestellte Lernkarten wieder als neue oder Wiederholungskarten eingereiht.
Mit dem Zeitplaner 2.1 werden die Lernstufen durch eine Zurückstellung hingegen nicht zurückgesetzt.
-
Karte vergessen: Schiebt die Karte ans Ende der Warteschlange neuer Karten.
Anki 2.1.50+ merkt sich die ursprüngliche Position, wenn eine Karte das erste Mal mit dem Zeitplaner 2.1 gelernt wird. Mit der Option "Ursprüngliche Position wiederherstellen" wird einer Karte, die du vergisst, wieder diese Position zugewiesen.
Mit der Option "Fehlschläge und Wiederholungen zurücksetzen" werden diese Zähler wieder auf 0 gesetzt. Die Kartenhistorie, die unten in der Kartenstatisik angezeigt wird, wird nicht entfernt.
-
Fälligkeitsdatum auswählen: Reiht die Karte in die Wiederholungsschlange ein und lässt sie zu einem bestimmten Datum fällig werden.
-
Karte / Notiz aussetzen: Verbirgt die Karte bzw. alle Karten der Notiz bis sie manuell wieder eingesetzt wird ("wieder einsetzen" in der Kartenverwaltung). Das ist nützlich, wenn du die Karte erstmal nicht wiederholen, aber auch nicht löschen möchtest. Mit dem alten Zeitplaner wurden ausgesetzte Lernkarten wieder als neue oder Wiederholungskarten eingereiht.
Mit dem Zeitplaner 2.1 werden die Lernstufen durch eine Aussetzung hingegen nicht zurückgesetzt.
-
Optionen: Erlaubt die Bearbeitung der Optionen des aktuellen Stapels.
-
Karteninformation: Zeigt statistische Daten zur Karte.
-
Vorherige Karteninformation: Zeigt statistische Daten zur vorherigen Karte.
-
Notiz kennzeichnen: Fügt der Notiz das Schlagwort marked ("markiert") hinzu, sodass sie leicht in der Kartenverwaltung wiedergefunden werden kann. Das ist ähnlich, wie einzelnen Karten Flaggen zuzuweisen, aber da es sich hier um ein Schlagwort handelt, werden bei einer Suche danach alle Karten einer Notiz angezeigt. Für die meisten Benutzer sind Flaggen angemessener.
-
Kopie erstellen: Öffnet ein Duplikat der aktuellen Notiz im Editor, das angepasst werden kann, um schnell neue Varianten zu erzeugen. Standardmäßig wird das Duplikat im selben Stapel wie das Original angelegt.
-
Notiz löschen: Löscht die Notiz und all ihre Karten.
-
Erneut abspielen: Spielt eventuell vorhandene Audiodateien auf der Vor- oder Rückseite erneut ab.
-
Audio anhalten: Hält eine eventuell abspielende Audiodatei an.
-
Audio -5s / +5s: Springt in der abspielenden Audiodatei 5 Sekunden zurück bzw. vor.
-
Eigene Stimme aufzeichnen: Zeichnet den Ton deines Mikrofons auf, damit du deine Aussprache prüfen kannst. Diese Aufnahme is temporär und verschwindet, sobald du zur nächsten Karte übergehst. Wenn du einer Karte dauerhaft Ton hinzufügen willst, kannst du das im Bearbeiten-Fenster machen.
-
Aufnahme abspielen: Spielt deine Aufnahme erneut ab. (Für gewöhnlich nach Zeigen der Antwort.)
Anzeigereihenfolge
Beim Lernen werden Karten des ausgewählten Stapels und aller enthaltenen Stapel angezeigt. Wenn du also den Stapel "Französisch" auswählst, werden auch die Stapel "Französisch::Vokabeln" und "Französisch::Mein Lehrbuch::Lektion 1" angezeigt.
Wie Anki Karten aus den Stapeln entnimmt, hängt vom verwendeten Algorithmus ab:
-
Mit dem V1-Zeitplaner erscheinen die Karten der Reihe nach aus jedem Stapel.
-
Mit dem V2-Zeitplaner werden aus allen Unterstapeln gleichzeitig Karten entnommen. Die Wiederholungsgrenzwerte der Unterstapel werden ignoriert - nur der des ausgewählten Stapels wird berücksichtigt.
-
Mit dem V3-Zeitplaner werden die Grenzwerte der Unterstapel ebenfalls berücksichtigt und die Karten müssen auch nicht in der Reihenfolge der Stapel angezeigt werden. Siehe das Kapitel Stapeloptionen für weitere Informationen.
Standardmäßig entnimmt Anki neue Karten aus den Stapeln in alphabetischer Reihenfolge.
Im obigen Beispiel würdest du also erst die Karten von "Französisch", dann die von
"Französisch::Mein Lehrbuch" und schließlich die von "Französisch::Vokabeln" sehen.
Das kannst du dir zunutze machen, um die Anzeigereihenfolge der Karten zu kontrollieren,
indem du wichtige Karten in Stapeln ganz oben auf der Liste platzierst.
Wenn Computer Text sortieren, kommt das Symbol "-" vor allen Buchstaben des
Alphabets und das Symbol "~" danach. Du könntest den Stapel also "-Vokabeln"
nennen, damit er zuerst erscheint, und den anderen Stapel "~Mein Lehrbuch",
damit er als allerletztes erscheint.
Neue und Wiederholungskarten werden unabhängig entnommen und Anki wartet nicht, bis beides erschöpft ist, bevor es zum nächsten Stapel übergeht. Es kann also passieren, dass du neue Karten von einem Stapel und Wiederholungskarten von einem anderen siehst, oder umgekehrt. Wenn du das vermeiden willst, solltest du anstelle des Oberstapels direkt den Stapel, den du lernen möchtest, auswählen.
Da Lernkarten in gewisser Weise zeitkritisch sind, werden sie aus allen Stapeln gleichzeitig entnommen und in der Reihenfolge ihrer Fälligkeit angezeigt.
Um die Anzeigereihenfolge eines bestimmten Stapels zu beeinflussen oder neue Karten in zufälliger Reihenfolge erscheinen zu lassen, siehe bitte die Stapeloptionen. Für eine präzisere Anordnung neuer Karten kannst du ihre Reihenfolge in der Kartenverwaltung festlegen.
Geschwister und Zurückstellen
Im Kapitel Grundlagen haben wir gesehen, dass Anki für jeden Eingabenblock mehr als eine Karte erzeugen kann, z.B. eine Karte Vorderseite→Rückseite und eine Rückseite→Vorderseite oder zwei Lückentexte zum selben Text. Diese zusammengehörigen Karten heißen Geschwister.
Wenn du eine Karte mit Geschwistern beantwortest, kann Anki verhindern, dass diese Geschwister in derselben Lerneinheit gezeigt werden, in dem es sie automatisch zurückstellt. Zurückgestellte Karten sind von der Wiederholung ausgenommen, bis ein neuer Tag beginnt oder du sie mit der Option "Zurückstellen aufheben" am unteren Ende der Stapelübersicht zurückholst. Anki stellt sogar Geschwister zurück, die nicht im selben Stapel sind (z.B. weil du die Funktion Stapel überschreiben benutzt).
Du kannst das Zurückstellen von den Stapeloptionen aus aktivieren. Es gibt getrennte Einstellungen für neue und Wiederholungskarten.
Anki stellt nur neue und Wiederholungskarten zurück. Lernkarten sind nicht betroffen, da der zeitliche Abstand für sie entscheidend ist. Wenn du andererseits eine Lernkarte beantwortest, werden ihre Geschwister, die neue oder Wiederholungskarten sind, zurückgestellt.
Anmerkung: Eine Karte kann nicht zugleich ausgesetzt und zurückgestellt sein. Das Aussetzen einer Karte hebt ihre Zurückstellung auf. Ausgesetzte Karten können in Anki 2.1.49+ nicht zurückgestellt werden, wohingegen es in früheren Versionen die Aussetzung aufhebt.
Tastenkombinationen
Die meisten gebräuchlichen Funktionen in Anki haben Tastenkombinationen, die über die Benutzeroberfläche in Erfahrung gebracht werden können: Menüpunkte führen ihre Tastenkombinationen rechts neben sich auf und Schaltflächen offenbaren sie meistens, wenn die Maus über sie bewegt wird.
Beim Lernen zeigen Leertaste oder Enter die Antwort. Anschließend können die Tasten 1 bis 4 benutzt werden, um eine bestimmte Bewertung zu wählen. Viele Benutzer finden es praktisch, die meisten Karten mit Leertaste zu bewerten und einen Finger auf 1 zu halten, für den Fall, dass sie eine Karte vergessen.
Die Funktion Stapel lernen im Werkzeugmenü erlaubt es, schnell mit der Tastatur den Stapel zu wechseln. Du kannst sie mit der Taste / auslösen. Es werden alle deine Stapel und oben ein Filterbereich angezeigt. Während du tippst, begrenzt Anki die Anzeige auf passende Stapel. Mit einem Leerzeichen kannst du mehrere Suchbegriffen angeben, die alle zutreffen müssen. Zu "ja 1" und "on1 ja" würde beidem ein Stapel namens "Japanisch::Lektion1" passen.
Rückstände
Wenn du mit deinen Wiederholungen in Verzug gerätst, priorisiert Anki die Karten, die schon am längsten gewartet haben, und zeigt sie in zufälliger Reihenfolge, bis dein täglicher Wiederholungsgrenzwert erreicht ist. Das garantiert, dass keine Karte für immer wartet, bedeutet aber auch, dass neue Karten, die du einführst, nicht wiederholt werden, bis du deinen Rückstand aufgeholt hast.
Wenn du die Anzeigereihenfolge der überfälligen Wiederholungen ändern möchtest, kannst du zu diesem Zweck einen Auswahlstapel erstellen.
Wenn du überfällige Karten beantwortest, bezieht Anki die zusätzlich verstrichene Zeit bei der Berechnung, wann die Karte das nächste Mal gezeigt werden soll, mit ein. Siehe bitte den Abschnitt über Ankis Spaced-Repetition-Algorithmus für weitere Informationen.
Hinzufügen/Bearbeiten
- Notizen und Karten hinzufügen
- Notiztypen hinzufügen
- Felder anpassen
- Stapel oder Notiztyp ändern
- Material strukturieren
- Funktionen des Editors
- Lücken einfügen
- Sonderzeichen und Akzente eingeben
- Unicode-Normalisierung
Notizen und Karten hinzufügen
In den Grundlagen haben wir besprochen, dass man in Anki nicht direkt Karten, sondern Notizen hinzufügt und Anki die Erstellung der Karten übernimmt. Du kannst das "Hinzufügen"-Fenster mit einem Klick auf die entsprechende Schaltfläche in der Hauptansicht öffnen.
In der linken oberen Ecke dieses Fensters wird der aktuelle Notiztyp angezeigt. Sollte dort nicht "Einfach" stehen, hast du vermutlich Notiztypen durch Herunterladen eines geteilten Stapels hinzugefügt. Im Folgenden gehen wir davon aus, dass der Notiztyp "Einfach" ausgewählt ist.
In der rechten oberen Ecke steht der Name des Stapels, in dem die neuen Karten landen werden. Wenn du einen neuen Stapel für deine Karten erstellen willst, klicke auf den aktuell ausgewählten Stapel und wähle im Folgefenster "Hinzufügen".
Unterhalb dieser Schaltflächen befinden sich einige Werkzeuge sowie zwei Eingabeflächen, die mit "Vorderseite" und "Rückseite" beschrieben sind. Diese Eingabeflächen werden "Felder" genannt. Felder können durch einen Klick auf die Schaltfläche "Felder…" hinzugefügt, entfernt oder umbenannt werden.
Unterhalb der Felder gibt es einen weiteren Bereich für "Schlagwörter". Schlagwörter sind wie Etiketten, die du an deine Notizen anhängen kannst, um deine Sammlung zu strukturieren und Notizen einfacher zu finden. Du kannst mehrere Schlagwörter hinzufügen, indem du sie mit Leerzeichen voneinander trennst. So würde z. B. die Eingabe
Vokabeln mit_Tutor_durchgehen
… zwei Schlagwörter an die Notiz anhängen. Du kannst diesen Bereich aber auch leer lassen.
Hast du Text auf Vorder- und Rückseite eingegeben, kannst du die Notiz mit einem Klick auf die Schalfläche "Hinzufügen" oder mit dem Tastaturkürzel Strg +Enter (⌘+Enter auf dem Mac) zu deiner Sammlung hinzufügen. Zusätzlich wird eine Karte erstellt und in den aktuell ausgewählten Stapel einsortiert. Du kannst auch nach der Erstellung noch Änderungen an deinen Notizen vornehmen. Klicke auf die Schaltfläche "Verlauf", um in der Kartenverwaltung nach einer kürzlich hinzugefügten Notiz zu suchen.
Für eine Erklärung der Werkzeuge, die sich im Bereich zwischen Notiztyp und Feldern befinden, siehe den Abschnitt Funktionen des Editors.
Duplikatüberprüfung
Anki überprüft das erste Feld auf Einzigartigkeit. Erstellst du z. B. eine Notiz mit der Vorderseite "Apfel", obwohl sich bereits eine derartige Notiz in deiner Sammlung befindet, wird Anki dich mit einer Warnung darauf hinweisen. Die Duplikatüberprüfung ist jedoch auf den aktuellen Notiztyp beschränkt. Anki wird also keine Warnung anzeigen, wenn das Wort "Apfel" auf der Vorderseite mehrerer Notizen von unterschiedlichen Notiztypen steht (z. B. ein Notiztyp für Japanisch und einer für Französisch).
Aus Effizienzgründen überprüft Anki die restlichen Felder nicht automatisch auf Duplikate. Die Kartenverwaltung bietet jedoch eine Funktion namens "Duplikate suchen", die du bei Bedarf manuell ausführen kannst.
Effektiv lernen
Jeder hat seine eigenen Vorlieben, wenn es um die Wiederholung von Lernstoff geht. Es gibt jedoch eine Reihe allgemeingültiger Konzepte, die man stets im Hinterkopf behalten sollte. Dieser Artikel von SuperMemo bietet eine hervorragende Einführung, insbesondere die folgenden Punkte:
-
Halte es einfach: Je kürzer deine Karten sind, desto einfacher wird es sein, sie zu wiederholen. Du magst vielleicht in Versuchung kommen, möglichst viele Fakten "sicherheitshalber" mitaufzunehmen - die Wiederholungen würden aber durch das Übermaß an Information schnell zur Belastung werden.
-
Lerne nicht auswendig, was du nicht verstehst: Versuche, lange Vokabellisten beim Erlernen einer Sprache zu vermeiden. Neue Sprachen lernt man am besten kontextuell. Das bedeutet, Wörter so zu lernen, wie sie in Wirklichkeit verwendet werden: in ganzen Sätzen. Das gilt auch für alle anderen Disziplinen. Stell dir vor, du machst einen Computer-Kurs und möchtest dir eine große Menge an Abkürzungen merken. Ohne Kontext wird dir das vermutlich schwer fallen. Wenn du dir aber die Zeit nimmst, um die Konzepte hinter den Abkürzungen zu verstehen, wird das Auswendiglernen wesentlich leichter von der Hand gehen.
Notiztypen hinzufügen
Die Standardnotiztypen sind gut geeignet für simple Karten mit nur einem Wort oder Satz je Seite. Sobald du jedoch mehr als eine Information in einer Notiz unterbringen willst, solltest du den Inhalt auf mehrere Felder verteilen.
Vielleicht denkst du: "Aber ich will nur eine Karte, warum kann ich nicht einfach eine Audiodatei, ein Bild, einen Hinweis und die Übersetzung in das Feld Vorderseite eingeben?" Wenn du das bevorzugst, geht das natürlich in Ordnung. Diese Herangehensweise hat jedoch einen großen Nachteil: All diese Informationen sind untrennbar miteinander verbunden. So bist du dann z. B. nicht in der Lage, die Karten nach dem Hinweis zu sortieren, da dieser mit dem restlichen Inhalt vermischt ist. Die Aufteilung des Inhalts auf mehrere Felder erleichtert eine spätere Bearbeitung deiner Karten deutlich. Würdest du im oben genannten Beispiel die Audiodatei von der Vorder- auf die Rückseite bringen wollen, müsstest du das manuell für jede einzelne Notiz erledigen. Hast du jedoch ein eigenes Feld für die Audiodatei, musst du nur einmal die Kartenvorlage anpassen, um alle Notizen zu ändern.
Um einen neuen Notiztyp zu erstellen, wähle den Eintrag
Werkzeuge → Notiztypen verwalten in der Hauptansicht von Anki und klicke auf "Hinzufügen".
Es öffnet sich ein neues Fenster, das eine Auswahl an Notiztypen
anbietet, auf denen der neue Notiztyp basieren soll.
"Hinzufügen" bedeutet also, einen Notiztyp nach einer von Ankis Vorlagen zu erstellen.
Soll der neue Notiztyp auf einem Notitzyp aus deiner Sammlung basieren,
wähle stattdessen "Klonen" aus. Hast du z. B. bereits einen Notiztyp für
Französischvokabeln, könntest du einen Klon für Spanischvokabeln erstellen.
Nach dem Klick auf OK wird dich Anki nach einem Namen für den neuen Notiztyp fragen. Das Fach des Lernmaterials ist zumeist eine gute Wahl, z. B. "Japanisch", "Allgemeinwissen" etc. Nach Eingabe des Namens kannst du den Dialog schließen und zum Editor zurückkehren.
Felder anpassen
Um die Felder eines Notiztyps anzupassen, klicke bei der Erstellung oder Bearbeitung von Notizen im Editor, oder nach Auswahl des Notiztyps im Fenster "Notiztypen verwalten" auf die Schaltfläche "Felder…".
Du kannst mit den entsprechenden Schaltflächen Felder hinzufügen, entfernen oder umbenennen. Im Dialog "Position ändern" kannst du die numerische Position eines Feldes im Editor festlegen. Willst du, dass ein bestimmtes Feld an erster Stelle erscheint, ändere dessen Position auf "1".
"Tags", "Type", "Deck", "Card" und "FrontSide" sind spezielle, von Anki reservierte Feldnamen und sollten deshalb nicht verwendet werden.
Mithilfe der Bedienelemente auf der unteren Hälfte des Fensters kannst du verschiedene Eigenschaften der Felder im Editor festlegen. Wichtig: In diesem Fenster wird nicht festgelegt, wie der Inhalt deiner Felder beim Wiederholen auf deinen Karten aussieht. Das ist die Aufgabe der Vorlagen.
Schriftart festlegen
Damit lässt sich die Schriftart und Größe ändern, in welcher der Textinhalt
des jeweiligen Feldes angezeigt wird. Das kann beispielsweise nützlich sein,
wenn du unwichtige Informationen kleiner darstellen oder die Größe fremder
Schriftzeichen erhöhen willst, um sie lesbarer zu machen.
Nochmals: Diese Einstellungen haben keine Auswirkungen auf das Aussehen
der Karten im Rahmen der Wiederholung.
Das Design wird mittels CSS in den Vorlagen festgelegt.
Notiztypen mit der Funktion "Antwort eintippen" stellen hier eine Ausnahme dar:
Der einzugebende Text verwendet die Schriftgröße, die du hier
definierst.
(Wie du bei solchen Notiztypen die Schriftart für das Eingabefeld ändern kannst,
erfährst du im Abschnitt Antwort überprüfen).
In der Kartenverwaltung nach diesem Feld sortieren
Mit dieser Einstellung kannst du das Feld festlegen, das für die Spalte
"Sortierfeld" in der Kartenverwaltung verwendet werden soll. So lassen sich
Notizen und Karten alphabetisch nach dem Feldinhalt ordnen.
Ein Notiztyp kann jeweils nur ein Sortierfeld haben.
Textrichtung umkehren
Verwende diese Funktion für Sprachen, deren Leserichtung von rechts nach links
verläuft (engl. "right to left" = "RTL"), z. B. Arabisch oder Hebräisch.
Auch hier gilt: Diese Einstellung betrifft lediglich die Anzeige des
Feldinhalts im Editor. Für die korrekte Darstellung des Textes sind
weitere Anpassungen der Vorlage notwendig.
Nachdem du neue Felder hinzugefügt hast, wirst du sie wahrscheinlich auch zur Vorder- oder Rückseite deiner Karten hinzufügen wollen. Wie das funktioniert, lernst du im Kapitel Vorlagen.
Stapel oder Notiztyp ändern
Während du Notizen hinzufügst, kannst du mit der Schaltfläche "Typ" (links oben) den Notiztyp ändern, der für die nächste Notiz verwendet werden soll. Analog funktioniert die Schaltfläche "Stapel" (rechts oben) für die Festlegung des Zielstapels. Das jeweilige Fenster erlaubt nicht nur die Auswahl existierender Stapel oder Notiztypen, sondern auch das Hinzufügen neuer Stapel/Notiztypen und die Verwaltung bestehender Notiztypen.
Material strukturieren
Stapel richtig verwenden
Stapel haben den Zweck, Material in breite Kategorien aufzuteilen, die du unabhängig voneinander lernen willst, z. B. Englisch, Geographie usw. Es mag verlockend erscheinen, eine Menge kleiner Stapel zu erstellen, um deinem Lernmaterial Struktur zu geben, z. B. "Mein Geographie-Lehrbuch Kapitel 1", oder "Essensverben", wir raten jedoch aus folgenden Gründen davon ab:
-
Eine große Anzahl kleiner Stapel kann bedingen, dass deine Karten in einer erkennbaren Reihenfolge erscheinen. Ältere Versionen des Zeitplaners können neue Karten nämlich nur in der Reihenfolge der Stapel einführen. Und falls du vorhast, jeden Stapel einzeln durchzugehen (was nebenbei bemerkt recht ineffizient ist), würden alle Karten aus "Kapitel 1" bzw. "Essensverben" gemeinsam kommen. Das vereinfacht die Beantwortung der Fragen, weil du die Karten aus ihrem Kontext erraten könntest, was wiederum eine Verschlechterung der Lernqualität bedeuten würde. In realen Testsituationen solltest du auch nicht darauf bauen, Denkanstöße durch verwandte Inhalte zu bekommen!
-
Obwohl das Ausmaß dieses Problems in neueren Versionen etwas eingedämmt wurde, können sich hunderte von Stapeln negativ auf die Leistung des Programms auswirken. Bei Anki-Versionen unterhalb von 2.1.50 können übergroße Stapelhierarchien sogar zu Anzeigefehlern in der Stapelübersicht führen.
Schlagwörter verwenden
Anstatt eine Menge kleiner Stapel zu erstellen, solltest du Schlagwörter und/oder Felder verwenden, um dein Lernmaterial zu strukturieren. Schlagwörter sind äußerst hilfreich, um Suchergebnisse zu verbessern, spezifische Inhalte zu finden und deine Sammlung zu ordnen. Es gibt eine Unzahl an Möglichkeiten, Schlagwörter und Flaggen effektiv zu nutzen, weshalb es ratsam ist, dir bereits im Vorhinein zu überlegen, wie du sie verwenden willst.
Manche bevorzugen es, Stapel und Unterstapel zur Stukturierung zu verwenden. Schlagwörter haben aber einen großen Vorteil: Eine Karte kann beliebig viele Schlagwörter beinhalten, sie kann jedoch nur zu einem Stapel gehören. Das macht Schlagwörter in den meisten Fällen zu einem wesentlich stärkeren und flexibleren Kategorisierungssystem als Unterstapel. Genau wie Stapel, kannst du Schlagwörter auch in einem Stammbaum anordnen.
Statt einen Stapel namens "Essensverben" zu erstellen, könntest du diese Karten in deinen Hauptstapel für diese Sprache legen und ihnen die Schlagwörter "Essen" und "Verb" geben. Da jede Karte mehrere Schlagwörter beinhalten kann, eröffnen sich Möglichkeiten wie die Suche nach allen Verben, oder allen Vokabeln, die etwas mit "Essen" zu tun haben, oder allen Verben, die zum Thema "Essen" gehören.
Du kannst Notizen sowohl im Editor des "Hinzufügen"-Fensters als auch in dem der Kartenverwaltung Schlagwörter geben. Du kannst auch neue Schlagwörter hinzufügen und bestehende umbenennen oder organisieren. Bitte beachte, dass Schlagwörter auf der Notiz-Ebene gespeichert werden. Das heißt, dass das Hinzufügen eines Schlagworts zu einer Karte automatisch auch alle Geschwister dieser Karte betrifft. Um eine einzelne Karte ohne ihre Geschwister zu kennzeichnen, kannst du Flaggen verwenden, da diese auf der Karten-Ebene gespeichert werden.
Flaggen verwenden
Flaggen funktionieren ähnlich wie Schlagwörter, werden beim Wiederholen aber rechts oben angezeigt. Du kannst auch in der Kartenverwaltung nach Karten mit einer bestimmten Flagge suchen, Flaggen in der Seitenleiste umbenennen und Auswahlstapel aus Karten erstellen, die mit einer bestimmten Flagge gekennzeichnet wurden. Im Gegensatz zu Schlagwörtern kann eine Karte nur eine Flagge auf einmal zugewiesen bekommen. Ein weiterer wichtiger Unterschied besteht darin, dass Flaggen auf der Kartenebene gespeichert werden, d. h. das Zuweisen einer Flagge zu einer Karte hat keine Auswirkungen auf deren Geschwister.
Du kannst Karten direkt beim Wiederholen eine Flagge zuweisen bzw. diese wieder entfernen, indem du das Tastaturkürzel Strg + 1-7 (⌘ + 1-7 auf dem Mac) drückst. Das funktioniert auch in der Kartenverwaltung.
Das Schlagwort "marked"
Anki behandelt das Schlagwort "marked" (engl. für "markiert") gesondert. Beim Wiederholen und in der Kartenverwaltung gibt es Funktionen, um dieses Schlagwort schnell hinzuzufügen oder zu entfernen. In der Wiederholungsansicht wird mit einem Stern in der linken oberen Ecke angezeigt, ob die aktuelle Karte das Schlagwort "marked" enthält. Karten, deren Notiz auf diese Weise markiert ist, werden in der Kartenverwaltung mit einer anderen Farbe hinterlegt.
Info: Diese Funktion gibt es nur mehr aus Kompatibilitätsgründen mit älteren Versionen. In den meisten Fällen sind Flaggen besser geeignet.
Felder verwenden
Sollten Schlagworte nicht ausreichen, kann man auch designierte Felder zur
inhaltlichen Klassifizierung verwenden, z. B. "Buch", "Seite" o. ä.
Man kann die Suche nämlich auf bestimmte Felder einschränken. So sind sehr spezifische
Suchanfragen möglich, wie z. B. "Buch:Grimm's Märchen" Seite:63.
Benutzerdefiniertes Lernen und Auswahlstapel
Die Funktionen Benutzerdefiniertes Lernen und Auswahlstapel ermöglichen dir, temporäre Stapel anhand von Suchbegriffen wie Schlagwörtern, Flaggen, Markierungen und Feldern zu erstellen. So kannst du im täglichen Gebrauch den Großteil deines Lernmaterials durchmischt in einem einzelnen Stapel wiederholen, bei Bedarf aber jederzeit temporäre Stapel erstellen, falls du einmal vollen Fokus auf ein bestimmtes Fach setzen musst, z. B. vor einer Prüfung. Im Allgemeinen gilt die folgende Regel: Wenn du bestimmten Stoff immer getrennt vom Rest wiederholen willst, solltest du ihn in einen normalen Stapel geben; wenn du ihn hin und wieder separat durchgehen musst (z. B. vor einer Prüfung, oder um einen Arbeitsrückstand aufzuholen), sind Auswahlstapel die bessere Wahl.
Funktionen des Editors
Der Editor wird beim Hinzufügen von Notizen, bei deren Bearbeitung im Rahmen der Wiederholung und in der Kartenverwaltung angezeigt.
Oben links befinden sich zwei Schaltflächen: Eine öffnet das Fenster für die Felder, die andere die Kartenvorlagen.
Rechts davon schließen sich die Formatierungswerkzeuge an. Fett, Kursiv und Unterstrichen funktionieren, wie man es von anderen Textverarbeitungsprogrammen gewohnt ist. Mit den nächsten beiden Schaltflächen kannst du Text tief- und hochstellen, was praktisch sein kann für chemische Verbindungen wie H20 oder einfache mathematische Ausdrücke wie x2.
Der Radiergummi entfernt die Formatierung des aktuell markierten Textes - einschließlich Farben, Schriftstärke und -stil, usw.
Dahinter reihen sich drei Werkzeuge, die der Erstellung von Listen sowie Textausrichtung und -einrückung dienen, und zwei Schaltflächen, mit denen du die Schriftfarbe ändern kannst.
Die Schaltfläche […] ist nur sichtbar, wenn ein Lückentext-Notiztyp ausgewählt ist.
Du kannst mit dem Büroklammer-Werkzeug Audiodateien, Bilder und Videos von deiner Festplatte auswählen und sie an deine Notiz anhängen. Alternativ kannst du Medien auch in die Zwischenablage deines Computers geben (z. B. durch einen Rechtsklick auf ein Bild im Internet und die Auswahl von "Bild kopieren") und in einem Feld deiner Wahl einfügen. Für nähere Informationen zu Medien, siehe das Kapitel Medien.
Mit einem Klick auf das Mikrofon kannst du eine Audiodatei über das Mikrofon deines Computers aufnehmen und in das aktuelle Feld einfügen.
Die Schaltfläche Fx öffnet ein Menü, über welches du MathJax oder LaTeX in die Notiz einfügen kannst.
Die Schaltfläche </> zeigt den zugrundeliegenden HTML-Code eines Feldes an.
Anki 2.1.45+ unterstützt das Anheften von Feldern direkt aus dem Editor. Wenn du auf die Reißzwecke rechts oben in einem Feld klickst, wird Anki den Inhalt dieses Feldes nach dem Hinzufügen einer Notiz beibehalten. Das kann nützlich sein, wenn du oft hintereinander denselben Inhalt eingeben musst. In älteren Anki-Versionen wurde diese Funktion vom Felder-Fenster aus aktiviert.
Die meisten Bedienelemente können auch über Tataturkürzel aktiviert werden, die angezeigt werden, wenn du mit der Maus darüber fährst.
Anki behält beim Einfügen von Inhalten über die Zwischenablage im Normalfall den Großteil der Formatierung bei. Wenn du dabei jedoch die Umschalttaste gedrückt hältst, werden die Inhalte ohne Formatierung eingefügt. In den Einstellungen kannst du dieses Verhalten mit der Option "Text aus der Zwischenablage ohne Formatierung einfügen" zum Standard machen.
Lücken einfügen
In Lückentexten werden ein oder mehrere Wörter eines Satzes ausgeblendet. Nehmen wir den folgenden Satz:
Die Universität Wien wurde 1365 gegründet.
Machen wir "1365" zu einer Lücke, würde der Satz beim Wiederholen so aussehen:
Die Universität Wien wurde […] gegründet.
"1365" ist auf der Vorderseite ausgeblendet und wird auf der Rückseite aufgedeckt.
Siehe Regel 5 hier, um mehr über die Vorteile von Lückentexten zu erfahren.
Anki bietet einen eigenen Notiztyp, um einfach Lückentexte zu erstellen. leicht macht. Um einen Lückentext zu erstellen, wähle zuerst den Notiztyp "Lückentext" und gib dann einen Satz in das "Text"-Feld ein. Markiere danach mit der Maus den Teil, den du verstecken willst, und klicke auf die Schaltfläche […]. Anki wird den Text dann mit doppelten geschweiften Klammern und einem Index markieren:
Die Universität Wien wurde {{c1::1365}} gegründet.
Das "c1" bedeutet, dass du eine Lücke mit dem Index 1 erstellt hast. Du kannst auch mehrere Lücken erstellen, wenn du willst. Wenn du in unserem Beispiel "Die Universität Wien" auswählst und noch einmal auf […] klickst, wird der Satz nun so aussehen:
Die {{c2::Universität Wien}} wurde {{c1::1365}} gegründet.
Fügst du diese Notiz hinzu, wird Anki zwei Karten erstellen. Die erste Karte zeigt:
Die Universität Wien wurde […] gegründet.
… auf der Vorderseite und den vollständigen Satz auf der Rückseite. Die zweite Karte wird auf der Vorderseite so aussehen:
Die […] wurde 1365 gegründet.
Du kannst auch mehrere Lücken auf derselben Karte erstellen. Änderst du im obigen Beispiel den Index c2 auf c1, wird nur eine Karte erstellt, auf der sowohl "Die Universität Wien" als auch "1365" ausgeblendet sind. Wenn du beim Einfügen einer Lücke die Alt-Taste (Option auf dem Mac) gedrückt hältst, behält Anki den aktuellen Index bei, anstatt ihn zu erhöhen.
Lücken werden strikt um den markierten Text gesetzt, Wortgrenzen werden also nicht beachtet.
Wählst du "niversität Wien" statt "Universität Wien" aus, würde die Lücke in der
Wiederholung als Die U[…] wurde 1365 gegründet. erscheinen, was dir einen Hinweis gäbe.
Du kannst aber auch Tipps erstellen, die nicht im Text vorkommen. Wenn du den ursprünglichen Text so eingibst:
Die Universität Wien::Bildungseinrichtung wurde 1365 gegründet.
… und dann nach Auswahl von "Die Universität Wien::Bildungseinrichtung" auf […] klickst, wird Anki den Text hinter den zwei Doppelpunkten als Tipp interpretieren. Das Resultat sieht dann so aus:
Die {{c1::Universität Wien::Bildungseinrichtung}} wurde 1365 gegründet.
Bei der Wiederholung wird die Karte so erscheinen:
Die [Bildungseinrichtung] wurde 1365 gegründet.
Es gibt auch die Möglichkeit, den Lückeninhalt bei der Wiederholung einzutippen. Für nähere Informationen, siehe Antworten eingeben.
Ab Version 2.1.56 wird auch die Verschachtelung von Lücken unterstützt:
Die {{c1::Universität {{c2::Wien}}}} wurde 1365 gegründet.
Die innere Lücke wird vollständig von der äußeren umschlossen. Überlappende Lücken wie hier werden nicht unterstützt:
[...] 1365 gegründet. -> Die Universität Wien wurde
Die Universität Wien [...]. -> wurde 1365 gegründet.
("wurde" kommt in beiden Lücken vor.)
Wenn du überlappende Lückentexte auf einer Version vor 2.1.56 brauchst, musst du ein zweites Feld erzeugen, dieses in die Vorlage des Notiztyps einfügen und den Text folgendermaßen in beide Felder kopieren:
Feld 1: Die {{c1::Universität Wien}} wurde 1365 gegründet.

Feld 2: Die {{c2::Universität}} Wien wurde 1365 gegründet.
Der Standardnotiztyp für Lückentexte hat ein zweites Feld namens "Extra", dessen Inhalt nur auf der Rückseite der Karte erscheint. Damit kannst du zusätzliche Informationen in deine Notiz einbauen.
"Lückentext"-Notiztypen werden von Anki besonders behandelt und können deswegen nicht auf einem regulären Notiztyp basieren. Um einen solchen Notiztyp anzupassen, musst du den Standardnotiztyp "Lückentext" klonen. Formatierung und Stil können wie bei regulären Notiztypen angepasst werden, es ist jedoch nicht möglich, zusätzliche Kartenvorlagen zu einem Notiztyp hinzuzufügen, der auf dem Typ "Lückentext" basiert.
Sonderzeichen und Akzente eingeben
Alle modernen Computer unterstützen die Eingabe fremder Symbole und Akzente auf unterschiedliche Art und Weise. Wir empfehlen, die Tastaturbelegung der Sprache zu verwenden, die du lernen willst.
Sprachen, die ihre eigene Schrift haben (z. B. Japanisch, Chinesisch, Russisch usw.) haben stets auch spezifische Tastaturbelegungen.
Europäische Sprachen, die Akzente benutzen, haben oftmals auch eigene Belegungen, können aber auch mit der deutschen Tastaturbelegung geschrieben werden. Hierfür musst du zuerst den gewünschten Akzent und dann den Buchstaben eingeben, der den Akzent erhalten soll - z. B. ergeben ` und A das Symbol à.
Um herauszufinden, wie du fremde Tastaturbelegungen auf deinem Betriebssystem installieren kannst, gib in Google Suchbegriffe wie "Japanische Tastaturbelegung Mac" oder "Chinesische Tastaturbelegung Windows" ein.
Für Sprachen mit umgekehrter Leserichtung (RTL) wird es etwas komplizierter. Diese Website (Englisch) bietet einen guten Ausgangspunkt.
Das Toolkit, auf dem Ankis Editor aufgebaut ist, hat Schwierigkeiten mit manchen Eingabemethoden wie z. B. auf dem Mac das Gedrückthalten von Tasten, um akzentuierte Buchstaben auszuwählen, oder die Eingabe von Schriftzeichen durch Kombination der Alt-Taste und numerischer Codes auf Windows.
Unicode-Normalisierung
Zeichen wie à können auf einem Computer auf unterschiedliche Arten gespeichert werden,
beispielsweise mit einem für das Symbol spezifischen Code, oder mit einem normalen a
und einem weiteren Code für den Akzent darüber. Das kann beim Mischen von Code
aus unterschiedlichen Quellen oder bei der Verwendung verschiedener Computer
Probleme verursachen. Wenn dein Computer Tastatureingaben in einer bestimmten
Form handhabt, der Inhalt aber auf eine andere Art gespeichert wird, so werden
Sonderzeichen bei Sucheingaben entsprechend der Art deines Computers nicht
gefunden, obwohl die visuelle Ausgabe beider Varianten dieselbe ist.
Um eine problemlose Suche zu gewährleisten, normalisiert Anki den Text in einen Standard. Für die meisten Nutzer:innen ist dieser Vorgang unbemerkbar. Wenn du jedoch sehr spezifisches Material wie altertümliche japanische Symbole lernst, kann der Normalisierungsprozess sie ungewollt in ein moderneres Äquivalent umwandeln.
Willst du, dass Anki deine Buchstabencodes exakt beibehält - trotz des Risikos, dass Sucheingaben fehlschlagen könnten - so kannst du das mit dem folgenden Befehl in der Debugging-Konsole bewerkstelligen:
mw.col.conf["normalize_note_text"] = False
Jeglicher Inhalt, der nach der Eingabe dieses Befehls hinzugefügt wird, bleibt von der Normalisierung unberührt. Es sei hier noch einmal ausrücklich erwähnt, dass es sich um einen Kompromiss für Spezialfälle handelt, der die Suche nach Inhalten bei der Verwendung unterschiedlicher Betriebssysteme oder gemischter Quellen erschweren kann.
Card Templates
Card templates tell Anki which fields should appear on the front and back of your card, and control which cards will be generated when certain fields have text in them. By adjusting your card templates, you can alter the design and styling of many of your cards at once.
Card templates are covered in some of the intro videos:
The Templates Screen
You can modify card templates by clicking the "Cards..." button inside the editing screen.
For older Anki versions, on the top left is the front template, on the bottom left is the back template, and in between them is the card styling section. For Anki versions 2.1.28+ the front, back, and styling are no longer shown at the same time. You can switch between them with Ctrl+1, Ctrl+2, and Ctrl+3.
In Anki, templates are written in HTML, which is the language that web pages are written in. The styling section is CSS, which is the language used for styling web pages.
On the right is a preview of the front and back of the currently selected card. If you opened the window while adding notes, the preview will be based on the text you had typed into the Add Notes window. If you opened the window while editing a note, the preview will be based on the content of that note. If you opened the window from Tools → Manage Note Types, Anki will display each field’s name in parentheses in place of content.
At the top right of the window is an Options button that gives you options to rename or reorder the cards, as well as the following two options:
-
The 'Deck Override' option allows you to change the deck that cards generated from the current card type will be placed into. By default, cards are placed into the deck you provide in the Add Notes window. If you set a deck here, that card type will be placed into the deck you specified, instead of the deck listed in the Add Notes window. This can be useful if you want to separate cards into different decks (for instance, when studying a language, to put production cards in one deck and recognition cards in another). You can check which deck the cards are currently going to by choosing Deck Override again.
-
The 'Browser Appearance' option allows you to set different (perhaps simplified) templates for display in the Question and Answer columns of the browser; see browser appearance for more information.
Field Replacements
- Basic Replacements
- Newlines
- Text to Speech
- Special Fields
- Hint Fields
- Dictionary Links
- HTML Stripping
- Right To Left Text
- Ruby Characters
- Media & LaTeX
- Checking Your Answer
Basic Replacements
The most basic template looks something like this:
{{Front}}
When you place text within curly brackets, Anki looks for a field by that name, and replaces the text with the actual content of the field.
Field names are case sensitive. If you have a field named Front,
writing {{front}} will not work properly.
Your templates are not limited to a list of fields. You can also include arbitrary text on your templates. For example, if you’re studying capital cities, and you’ve created a note type with a “Country” field, you might create a front template like this:
What's the capital city of {{Country}}?
The default back template will look something like this:
{{FrontSide}}

<hr id=answer>

{{Back}}
This means “show me the text that’s on the front side, then a divider line, and then the Back field”.
The 'id=answer' part tells Anki where the divider is between the question and the answer. This allows Anki to automatically scroll to the spot where the answer starts when you press 'show answer' on a long card (especially useful on mobile devices with small screens). If you don’t want a horizontal line at the beginning of the answer, you can use another HTML element such as a paragraph or div instead.
Newlines
Card templates are like web pages, which means a special command is required to create a new line. For example, if you wrote the following in the template:
one
two
In the preview, you’d actually see:
one two
To add a new line, you need to add a <br> code to the end of a line, like so:
one<br>
two
The br code stands for "(line) br(eak)".
The same applies for fields. If you want to display two fields, one on each line, you would use
{{Field 1}}<br>
{{Field 2}}
Text to Speech
This feature requires Anki 2.1.20, or AnkiMobile 2.0.56. AnkiDroid does not currently support this method.
To have Anki read the Front field in a US English voice, you can place the following in your card template:
{{tts en_US:Front}}
On Windows, macOS, and iOS, Anki will use the OS’s built in voices. On Linux, no voices are built in, but voices can be provided by add-ons, such as this one.
To see a list of all available languages/voices, place the following on your card template:
{{tts-voices:}}
If there are multiple voices that support your chosen language, you can specify desired voices in a list, and Anki will choose the first available voice. For example:
{{tts ja_JP voices=Apple_Otoya,Microsoft_Haruka:Field}}
This would use Otoya when on an Apple device, and Haruka when on a Windows PC.
Specifying a different speed is possible in some TTS implementations:
{{tts fr_FR speed=0.8:SomeField}}
Both speed and voices are optional, but the language must be included.
On a Mac, you can customize the available voices:
-
Open the System Preferences screen.
-
Click on Accessibility.
-
Click on Speech.
-
Click on the system voice dropdown, and choose Customize.
Some voices sound better than others, so experiment to choose the one you prefer. Please note that the Siri voice can only be used by Apple apps. Once you’ve installed new voices, you’ll need to restart Anki for the new voices to become available.
On Windows, some voices like Cortana can not be selected, as Microsoft does not make those voices available to other applications.
On a cloze note type, you can make Anki read only the elided sections
using the cloze-only filter, like so:
{{tts en_US:cloze-only:Text}}
The cloze-only filter is supported in Anki 2.1.29+ and AnkiMobile 2.0.65+.
You can enable Anki's TTS feature on supported platforms while falling back to AnkiDroid's own method. Until AnkiDroid supports the {{tts:FieldName}} syntax, it will render these fields as text, while other platforms will render a (re)play audio button. In order to temporarily fix this discrepancy between platforms, we can use the following in our templates:
<tts service="android" voice="en_US">{{Front}}</tts>

<span class="ankitts">{{tts en_US:Front}}</span>

<button class="ankidroidTtsButton" onclick="
AnkiDroidJS.ankiTtsSpeak('{{Front}}');">Play TTS</button>
Then in the styling section:
/*Anki (desktop) TTS needs to be hidden because AnkiDroid currently renders it as text instead of a play button like desktop.*/
.android .ankitts {
  display: none;
}

/*The AnkiDroid tts button won't work on other platforms because it uses the JS API, therefore it should be hidden*/
html:not(.android) .ankidroidTtsButton {
  display: none;
}
Special Fields
There are some special fields you can include in your templates:
The note's tags: {{Tags}}

The type of note: {{Type}}

The card's deck: {{Deck}}

The card's subdeck: {{Subdeck}}

The card's flag: {{CardFlag}}

The type of card ("Forward", etc): {{Card}}

The content of the front template
(only valid in back template): {{FrontSide}}
FrontSide will not automatically play any audio that was on the front side of the card. If you wish to have the same audio play automatically on both the front and back of the card, you’ll need to manually include the audio fields on the back as well.
As with other fields, special field names are case sensitive - you must use
{{Tags}} rather than {{tags}} for example.
Hint Fields
It’s possible to add a field to the front or back of a card, but make it hidden until you explicitly show it. We call this a 'hint field'. Before adding a hint, please bear in mind that the easier you make it to answer a question in Anki, the less likely you are to remember that question when you encounter it in real life. Please have a read about the 'minimum information principle' on http://www.supermemo.com/articles/20rules.htm before proceeding.
First, you’ll need to add a field to store the hint in if you have not already. Please see the fields section if you’re not sure how to do this.
Assuming you’ve created a field called MyField, you can tell Anki to include it on the card but hide it by default by adding the following to your template:
{{hint:MyField}}
This will show a link labeled “show hint”; when you click it, the content of the field will be displayed on the card. (If MyField is empty, nothing will be shown.)
If you show the hint on the question and then reveal the answer, the
hint will be hidden again. If you want to have the hint always revealed
when the answer is shown, you will need to remove {{FrontSide}} from
your back template and manually add the fields you wish to appear.
It is not currently possible to use a hint field for audio — the audio will play regardless of whether you’ve clicked on the hint link.
If you want to customize the appearance or behaviour, you’ll need to implement the hint field yourself. We can not provide any support for doing so, but the following code should get you started:
{{#Back}}
<a class=hint href="#"
onclick="this.style.display='none';document.getElementById('hint4753594160').style.display='inline-block';return false;">
Show Back</a><div id="hint4753594160" class=hint style="display: none">{{Back}}</div>
{{/Back}}
Dictionary Links
You can also use field replacement to create dictionary links. Imagine you’re studying a language and your favourite online dictionary allows you to search for text using a web URL like:
http://example.com/search?q=myword
You could add an automatic link by doing the following in your template:
{{Expression}}

<a href="http://example.com/search?q={{Expression}}">check in dictionary</a>
The template above would allow you to search for each note’s expression by clicking on the link while reviewing. There is a caveat however, so please see the next section.
HTML Stripping
Like templates, fields are stored in HTML. In the dictionary link example above, if the expression contained the word "myword" without any formatting, then the HTML would be the same: "myword". But when you include formatting in your fields, extra HTML is included. If "myword" was bolded for example, the actual HTML would be "<b>myword</b>".
This can present a problem for things like dictionary links. In the above example, the dictionary link would end up being:
<a href="http://example.com/search?q=<b>myword</b>">check in dictionary</a>
The extra characters in the link would likely confuse the dictionary site, and you’re likely not to get any matches.
To solve this, Anki provides the ability to strip formatting from fields when they are replaced. If you prefix a field name with text:, Anki will not include any formatting. So a dictionary link that worked even with formatted text would be:
<a href="http://example.com/search?q={{text:Expression}}">check in dictionary</a>
Right To Left Text
If you’re using a language that reads from right to left, you’ll need to adjust the template like so:
<div dir=rtl>{{FieldThatHasRTLTextInIt}}</div>
Ruby Characters
Some languages commonly use annotations above the text to display the pronunciation of characters. These annotations are known as ruby characters. In Japanese, these are known as furigana.
In Anki, you can display ruby characters by using the following syntax:
Text[Ruby]
Suppose the text above is written in MyField. By default, if you simply use
{{Myfield}}, the field will be displayed as is. To properly position the
ruby characters above the text, use the furigana filter in the templates
like so:
{{furigana:MyField}}
Here are some examples:
| Raw Text | Rendered Text |
|---|---|
Text[Ruby] | |
日本語[にほんご] | |
世[よ]の 中[なか] | |
世[よ]の中[なか] |
Notice how the third example has a space before the 中 character. This is necessary to specify that the ruby text applies only to that character. If there was no space, the ruby text will be misplaced above the の character, as shown in the fourth example.
Additional Ruby Character Filters
In addition to the furigana filter, you can also only show certain parts
of the ruby text, with the kana and kanji filters. The kana filter will
only show the ruby text, while the kanji filter removes the ruby text
entirely.
| Raw Text | Field Filter | Rendered Text |
|---|---|---|
日本語[にほんご] | {{furigana:MyField}} | |
日本語[にほんご] | {{kana:MyField}} | にほんご |
日本語[にほんご] | {{kanji:MyField}} | 日本語 |
These names are again, borrowed from Japanese. The term kana represents the phonetic system used to describe how words are pronounced, whereas the term kanji represents its Chinese characters.
Media & LaTeX
Anki does not scan templates for media references, because it is slow to do so. This has implications for including media on the template.
Static Sounds/Images
If you wish to include images or sounds on your cards that are the same for every card (eg, a company logo at the top of each card):
-
Rename the file so it starts with an underscore, eg "_logo.jpg". The underscore tells Anki that the file is used by the template and it should be exported when sharing the deck.
-
Add a reference to the media on your front or back template, like:
<img src="_logo.jpg">
Field References
Media references to fields are not supported. They may or may not display during review, and will not work when checking for unused media, importing/exporting, and so on. Examples that won’t work:
<img src="{{Expression}}.jpg">

[sound:{{Word}}]

[latex]{{Field 1}}[/latex]
Instead, you should include the media references in the field. Please see the importing section for more information.
Checking Your Answer
You can watch a video about this feature on YouTube.
The easiest way to check your answer is to click "Basic" at the top left of the card adding screen, and select "Basic (type in the answer)".
If you have downloaded a shared deck and would like to type in the answer with it, you can modify its card template. If it has a template like:
{{Native Word}}

{{FrontSide}}

<hr id=answer>

{{Foreign Word}}
To type in the foreign word and check if you are correct, you need to edit your front template so that it looks like this:
{{Native Word}}
{{type:Foreign Word}}
Note that we have added type: in front of the field we want to
compare. Since FrontSide is on the back of the card, the type answer box
will appear on the back as well.
When reviewing, Anki will display a text box where you can type in the answer, and upon hitting Enter or showing the answer, Anki will show you which parts you got right and which parts you got wrong. The text box’s font size will be the size you configured for that field (via the “Fields” button when editing).
This feature does not change how the cards are answered, so it’s still up to you to decide how well you remembered or not.
Only one typing comparison can be used on a card. If you add the above text multiple times, it will not work. It also only supports a single line, so it is not useful for comparing against a field that is comprised of multiple lines.
Anki uses a monospaced font for the answer comparison so that the “provided” and “correct” sections line up. If you wish to override the font for the answer comparison, you can put the following at the bottom of your styling section:
code#typeans { font-family: "myfontname"; }
Which will affect the following HTML for the answer comparison:
<code id=typeans>...</code>
Advanced users can override the default type-answer colors with the css classes 'typeGood', 'typeBad' and 'typeMissed'. AnkiMobile supports 'typeGood' and 'typeBad', but not 'typeMissed'.
If you wish to override the size of the typing box and don’t want to
change the font in the Fields dialog, you can override the default
inline style using !important, like so:
#typeans { font-size: 50px !important; }
It is also possible to type in the answer for cloze deletion cards. To
do this, add {{type:cloze:Text}} to both the front and back
template, so the back looks something like this:
{{cloze:Text}}
{{type:cloze:Text}}
{{Extra}}
Note that since the cloze type does not use FrontSide, this must be added to both sides on a cloze note type.
If there are multiple sections elided, you can separate the answers in the text box with a comma.
Type answer boxes will not appear in the "preview" dialog in the browser. When you review or look at the preview in the card types window, they will display.
Card Generation
- Reverse Cards
- Card Generation & Deletion
- Selective Card Generation
- Conditional Replacement
- Blank Back Sides
- Limitations in Older Anki Versions
- Adding Empty Notes
- Cloze Templates
Reverse Cards
You can watch a video about reversing cards on YouTube.
If you want to create cards that go in both directions (e.g., both “ookii”→“big” and “big”→“ookii”), you have several options. The simplest is to select the “Basic (and reversed card)” built-in note type. This will generate two cards, one in each direction.
If you want to generate reverse cards for only some of your material (perhaps you only want to take the time to study reverses for the most important material, or some of your cards don’t make sense reversed), you can select the “Basic (optional reversed card)” note type. This note type generates a forward-only card when you fill in only the first two fields; if you additionally enter something in the “Add Reverse” field (like a 'y'), Anki will generate a reverse card as well. The contents of this field will never be displayed on a card.
Card Generation & Deletion
Anki will not create cards with empty front sides. Thus if “My Field” was empty, and one card’s front template included only that field, the card would not be created.
If no cards can be created because all of the cards would have empty front sides, then the Add Notes window will warn you and not allow the note to be added until at least one card would be generated.
When you edit a previously added note, Anki will automatically create extra cards if they were previously blank but no longer are. If your edits have made some cards blank when they previously were not, however, Anki will not delete them immediately, as that could lead to accidental data loss. To remove the empty cards, go to Tools → Empty Cards in the main window. You will be shown a list of empty cards and be given the option to delete them.
Because of the way that card generation works, it is not possible to manually delete individual cards, as they would just end up being recreated the next time the note was edited. Instead, you should make the relevant conditional replacement fields empty and then use the Empty Cards option.
Anki does not consider special fields or non-field text for the purposes of card generation. Thus if your front template looked like the following, no card would be generated if Country was empty:
Where is {{Country}} on the map?
Selective Card Generation
Sometimes you may want to generate extra cards for only some of your material, such as testing your ability to recall the most important words of a set. You can accomplish this by adding an extra field to your note, and adding some text into it (such as "1") on the notes you want the extra card. Then in the card template, you can make the card’s creation depend on that field being non-empty. For more information on this, please see the conditional replacement section below.
Conditional Replacement
It is possible to include certain text, fields, or HTML on your cards only if a field is empty or not empty. An example:
This text is always shown.

{{#FieldName}}
    This text is only shown if FieldName has text in it
{{/FieldName}}

{{^FieldName}}
    This text is only shown if FieldName is empty
{{/FieldName}}
A real life example is only showing a label if the field is not empty:
{{#Tags}}
    Tags: {{Tags}}
{{/Tags}}
Or say you want to display a specific field in blue on the front of your card if there are extra notes on the back (perhaps the fact that there are notes serves as a reminder that you should spend more time thinking about the answer). You can style the field as follows:
{{#Notes}}
    <span style="color:blue;">
{{/Notes}}

{{FieldToFormat}}

{{#Notes}}
    </span>
{{/Notes}}
You can also use conditional replacement to control which cards are generated. This works since Anki will not generate cards which would have a blank front side. For example, consider a card with two fields on the front:
{{Expression}}
{{Notes}}
Normally a card would be generated if either the expression or notes field had text in it. If you only wanted a card generated if expression was not empty, then you could change the template to this:
{{#Expression}}
    {{Expression}}
    {{Notes}}
{{/Expression}}
And if you wanted to require both fields, you could use two conditional replacements:
{{#Expression}}
    {{#Notes}}
        {{Expression}}
        {{Notes}}
    {{/Notes}}
{{/Expression}}
Keep in mind that this only works when you place the conditional replacement code on the front of the card; if you do this on the back, you will simply end up with cards with a blank back side. Similarly, since this works by checking if the front field would be empty, it is important to make sure you wrap the 'entire' front side in the conditional replacement; for instance, the following would not work as expected:
{{#Expression}}
    {{Expression}}
{{/Expression}}
{{Notes}}
Blank Back Sides
Card generation only looks at the front side of the card. For example, if you have a front template:
{{Field 1}}
and a back template:
{{Field 2}}
Then a card will be generated if Field 1 is non-empty. If Field 2 is empty, the card will still be generated, and you will get a blank back side.
If you wish to avoid a blank back side, you will need to place a required field on the front template as a conditional, like so:
{{#Field 2}}
    {{Field 1}}
{{/Field 2}}
This will ensure the card is generated only if both Field 2 and Field 1 are non-empty.
Limitations in Older Anki Versions
The following limitations do not apply to Anki 2.1.28+ and AnkiMobile 2.0.64+.
Older Anki versions cannot use negated conditionals for card generation. For example, on Anki 2.1.28, the following would add a card if a field called AddIfEmpty is empty, and Front is non-empty:
{{^AddIfEmpty}}
    {{Front}}
{{/AddIfEmpty}}
On earlier Anki versions, the negated conditional is ignored, and card generation will depend only on Front being non-empty.
Mixing AND and OR conditions can also cause problems on older versions. For example, the following ("add the card if A OR B OR C is non-empty") is fine:
{{A}}
{{B}}
{{C}}
And the following ("add the card if A AND B AND C are non-empty") is fine:
{{#A}}
    {{#B}}
        {{#C}}
            {{A}}
        {{/C}}
    {{/B}}
{{/A}}
But the following ("add the card if A OR (B AND C) are non-empty") will not work properly:
{{A}}
{{#B}}
    {{#C}}
        {{B}}
    {{/C}}
{{/B}}
Adding Empty Notes
When you add a new note in Anki 2.1.28+ and AnkiMobile 2.0.64+, if the card templates and note fields combine to produce no cards, a blank card will be created using the first template. This allows you to add material even if it's incomplete, and modify it or the template later to make it valid. If you don't wish to keep an empty note, you can remove it with the Empty Cards function.
On older Anki versions, Anki refuses to add or import a note if no cards would be generated.
Cloze Templates
Please see the cloze deletion section for background info.
The cloze note type functions differently from regular note types. Instead of a customizable number of card types, it has a single type which is shared by all cloze deletions on a note.
As mentioned in the card generation section above, generation of regular cards depends on one or more fields on the question being non-empty. Cloze deletion note types are generated differently:
-
Anki looks on the front template for one or more cloze replacements, like {{cloze:FieldName}}.
-
It then looks in the FieldName field for all cloze references, like {{c1::text}}.
-
For each separate number, a card will be generated.
Because card generation functions differently for cloze deletion cards, {{cloze:…}} tags can not be used with a regular note type - they will only function properly when used with a cloze note type.
Conditional generation provides a special field so you can check which card you are rendering. If you wanted to display the "hint1" field on the first cloze, and "hint2" field on the second cloze for example, you could use the following template:
{{cloze:Text}}

{{#c1}}
    {{Hint1}}
{{/c1}}

{{#c2}}
    {{Hint2}}
{{/c2}}
Styling & HTML
- Card Styling
- Image Resizing
- Field Styling
- Audio Replay Buttons
- Text Direction
- Other HTML
- Browser Appearance
- Platform-Specific CSS
- Installing Fonts
- Night Mode
- Fading and Scrolling
- Javascript
Card Styling
You can watch a video about styling cards on YouTube. The video shows Anki 2.0’s interface, but the concepts are largely the same.
The styling section of the Cards screen can accessed by clicking the "Styling" button next to the "Back Template" button. In that section, you can change the background color of the card, the default font, the text alignment, and so on.
The standard options available to you are:
font-family
The name of the font to use on the card. If your font has spaces in it
like "MS Unicode", then you need to surround the font name in double
quotes as in this sentence. It is also possible to use multiple fonts on
one card; for information on that, please see below.
font-size
The size of the font in pixels. When changing it, make sure you leave px
at the end.
text-align
Whether the text should be aligned in the center, left, or right.
color
The color of the text. Simple color names like 'blue', 'lightyellow',
and so on will work, or you can use HTML color codes to select arbitrary
colors. Please see this webpage for more
information.
background-color
The color of the card background.
Any CSS can be placed in the styling section – advanced users may wish to do things like add a background image or gradient, for example. If you’re wondering how to get some particular formatting, please search the web for information about how to do it in CSS, as there is a great deal of documentation available.
The styling is shared between all cards, which means that when you make an adjustment it will affect all cards for that note type. It is also possible to specify card-specific styling, however. The following example will use a yellow background on all cards except the first one:
.card {
  background-color: yellow;
}
.card1 {
  background-color: blue;
}
Image Resizing
Anki shrinks images to fit the screen by default. You can change this by adding
the following to the bottom of your styling section (outside of the default
.card { ... }):
img {
  max-width: none;
  max-height: none;
}
AnkiDroid sometimes has trouble scaling images to fit the
screen. Setting maximum
image dimensions using css should fix this, but seems to be ignored as of
AnkiDroid 2.9. A fix is to append !important to each style directive, for
example:
img {
  max-width: 300px !important;
  max-height: 300px !important;
}
If you try to change the style for images and find that the star that appears on marked cards is affected (for instance, it becomes way too large), you can target it with the following:
img#star {
  ...;
}
You can explore the styling of cards interactively by using Chrome:
https://addon-docs.ankiweb.net/porting2.0.html#webview-changes
Anki 2.1.50+ supports image resizing within the editor natively.
Field Styling
The default styling applies to the whole card. You can also make certain fields or part of the card use a different font, color, and so on. This is particularly important when studying foreign languages, as Anki will sometimes be unable to correctly display characters unless an appropriate font has been chosen.
Say you have an “Expression” field, and you want to give it the OSX Thai font “Ayuthaya”. Imagine your template already reads:
What is {{Expression}}?

{{Notes}}
What we need to do is wrap the text we want to style in some HTML. We will put the following in front of the text:
<div class=mystyle1>
And the following behind it:
</div>
By wrapping the text like the above, we tell Anki to style the wrapped text with a custom style called “mystyle1”, which we will create later.
Thus if we wanted the entire “What is …?” expression to use the Thai font, we would use:
<div class=mystyle1>What is {{Expression}}?</div>

{{Notes}}
And if we wanted only the expression field itself to use the Thai font, we’d use:
What is <div class=mystyle1>{{Expression}}</div>?

{{Notes}}
After we’ve edited the template, we now need to move to the Styling section between the templates. Before editing it, it should look something like:
.card {
  font-family: arial;
  font-size: 20px;
  text-align: center;
  color: black;
  background-color: white;
}
Add your new style to the bottom, so it looks like:
.card {
  font-family: arial;
  font-size: 20px;
  text-align: center;
  color: black;
  background-color: white;
}

.mystyle1 {
  font-family: ayuthaya;
}
You can include any styling you want in the style. If you wanted to increase the font size too, you’d change the mystyle1 section to look like:
.mystyle1 {
  font-family: ayuthaya;
  font-size: 30px;
}
It’s also possible to bundle custom fonts with your deck, so you don’t need to install them on your computer or mobile device. Please see the installing fonts section for more info.
Audio Replay Buttons
When audio or text to speech is included on your cards, Anki will show buttons you can click on to replay the audio.
If you prefer not to see the buttons, you can hide them in the preferences screen.
You can customize their appearance in your card styling, for example, to make them smaller and colored, you could use the following:
.replay-button svg {
  width: 20px;
  height: 20px;
}
.replay-button svg circle {
  fill: blue;
}
.replay-button svg path {
  stroke: white;
  fill: green;
}
Text Direction
If you use a language that is written right-to-left, such as Arabic or Hebrew,
you can add the CSS direction property to the .card section for correct display during review:
.card {
  direction: rtl;
}
This will change the direction of the entire card. You can change the direction of only certain fields by wrapping their references in some HTML:
<div dir="rtl">{{Front}}</div>
To change the direction of fields in the editor, please see the editing section.
Other HTML
Your templates can contain arbitrary HTML, which means that all the layout possibilities used on internet web pages can also be used on your cards. Things like tables, lists, images, links to external pages and so on are all supported. With tables for example, you could change the layout so that the front and back of a card appear on the left and right instead of the top and bottom.
Covering all of HTML’s features is outside the scope of this manual, but there are plenty of good introductory guides to HTML available on the web if you’d like to learn more.
Browser Appearance
If your card templates are complex, it may be difficult to read the question and answer columns (called "Front" and "Back") in the card list. The "browser appearance" option allows you to define a custom template to be used only in the browser, so you can include only the important fields and change the order if you desire. The syntax is the same as in standard card templates.
Platform-Specific CSS
Anki defines some special CSS classes that allow you to define different styling for different platforms. The example below shows how to vary the font depending on where you’re reviewing:
/* Windows */
.win .example {
  font-family: "Example1";
}
/* macOS */
.mac .example {
  font-family: "Example2";
}
/* Linux desktops */
.linux:not(.android) .example {
  font-family: "Example3";
}
/* both Linux desktops, and Android devices */
.linux .example {
  font-family: "Example4";
}
/* both Android and iOS */
.mobile .example {
  font-family: "Example5";
}
/* iOS */
.iphone .example,
.ipad .example {
  font-family: "Example6";
}
/* Android */
.android .example {
  font-family: "Example7";
}
And in the template:
<div class="example">{{Field}}</div>
You can also use properties like .gecko, .opera, and .ie to select particular browsers when using AnkiWeb. Please see http://rafael.adm.br/css_browser_selector/ for a full list of options.
Installing Fonts
If you’re using Anki on a work or school computer where you don’t have permission to install new fonts, or you’re using Anki on a mobile device, it’s possible to add fonts directly to Anki.
To add a font to Anki, it must be in the TrueType format. TrueType fonts have a filename ending in .ttf, such as "Arial.ttf". Once you’ve located a TrueType font, we’ll need to add it to the media folder:
-
Rename the file, adding an underscore at the start, so it becomes like "_arial.ttf". Adding an underscore will tell Anki that this file will be used on a template, and should not be deleted when checking for unused media.
-
In your computer’s file browser, go to your Anki Folder, and then a folder called "User 1" (or your profile name if you’ve renamed/added profiles).
-
Inside the folder, you should see a folder called collection.media. Drag the renamed file to that folder.
After that, we need to update the template:
-
Click Add at the top of the main screen, and then select the note type you want to change with the top left button.
-
Click Cards.
-
In the styling section, add the following text to the bottom (after the last "}" character), replacing "_arial.ttf" with the name of the file you copied into your media folder:
@font-face {
  font-family: myfont;
  src: url("_arial.ttf");
}
Only change the "arial" part, not the "myfont" part.
After that, you can either change the font for the entire card, or for individual fields. To change the font for the entire card, simply locate the font-family: line in the .card section and change the font to "myfont". To change the font for only certain fields, please see the Field Styling instructions above.
Please make sure the filenames match exactly. If the file is called arial.TTF and you write arial.ttf in your card templates, it will not work.
Night Mode
You can customize the way templates appear when night mode is enabled in the preferences screen.
If you wanted a lighter grey background, you could use something like:
.card.nightMode {
  background-color: #555;
}
If you have a 'myclass' style, the following would show the text in yellow when night mode is enabled:
.nightMode .myclass {
  color: yellow;
}
Fading and Scrolling
Anki will automatically scroll to the answer by default. It looks for a HTML element with id=answer, and scrolls to that. You can place the id on a different element to adjust the scrolling position, or remove the id=answer to turn off scrolling.
The question side of a card fades in by default. If you wish to adjust this delay, you can place the following at the top of your front card template:
<script>
  qFade = 100;
  if (typeof anki !== "undefined") anki.qFade = qFade;
</script>
100 (milliseconds) is the default; set to 0 to disable fading.
Javascript
As Anki cards are treated like webpages, it is possible to embed some Javascript on your cards via the card template. For a good reference please read this post in the forums.
Because Javascript is an advanced feature and so many things can go wrong, Javascript functionality is provided without any support or warranty. We can not provide any assistance with writing Javascript, and can not guarantee any code you have written will continue to work without modification in future Anki updates. If you are not comfortable addressing any issues you encounter on your own, then please avoid using Javascript.
Each Anki client may implement card display differently, so you will need to test the behaviour across platforms. A number of clients are implemented by keeping a long running webpage and dynamically updating parts of it as cards are reviewed, so your Javascript will need to update sections of the document using things like document.getElementById() rather than doing things like document.write().
Functions like window.alert are also not available. Anki will write javascript errors to the terminal, so if you’re running on a Mac or Windows computer, you’ll need to manually catch the errors and write them to the document to see them. There is no debugger available, so to figure out problems you’ll need to break down your code until you discover which parts are causing problems.
Checks and Errors
When you save changes to a notetype or export a deck, Anki 2.1.45+ checks for some common errors. These errors will cause issues later on when anyone studies the affected cards, so Anki won't let you proceed before you have fixed them.
Basics
Please see Key Concepts before reading further.
Most of the errors below will require you to modify your notetype/card template. To do so:
- Open the Browse screen, and look at the items on the left.
- Locate the notetype mentioned in error message. You can use the search bar at the top left if necessary.
- Click on the notetype, to show its cards/notes on the right.
- Click the Cards... button at the top of the editing area to open the templates screen.
Specific Issues
Template Syntax Error
This kind of error indicates an incorrect usage of the field replacement syntax. Visit the templates screen for the reported note and card type, and look at the preview area for more information. Some more information about template problems is available.
Identical Front Sides
You have Anki configured to create two identical questions for each input. This can happen if you add a new card type without making any adjustments to it. Identical cards double your workload, and make Anki's scheduling less effective.
To fix this, open the templates screen, and select one of the duplicates at the top. Then use the button on the top right to remove the selected card type. This will delete all the duplicate cards/notes that were using the card type as well.
No Field Replacement on Front Side
If you don't use a field replacement in the front template of a card type, every card created from it will look the same on the question side, regardless of its note. It would then be impossible to answer the card, as you wouldn't know what answer is expected.
To resolve the issue, open the templates screen, and click the Add Field button to add one or more fields to the front.
Cloze Filter Outside Cloze Notetype
The cloze filter (as in {{cloze:Some Field}})
may only be used on the cloze notetype, and on those created by cloning it.
If you get this error, you can remove the cloze filter from the template.
If you have notes with cloze deletions that are using that notetype, you can select them in the Browse screen, and use the Change Notetype action to assign them to a standard Cloze notetype instead.
Older Anki versions did not complain when you attempted to use cloze deletions on a normal notetype, but this was never a use case that was intended to be supported. If you want to combine cloze deletions with regular cards, you may find an add-on like the Closet add-on provides some alternatives.
No Cloze Filter on Cloze Notetype
A Cloze notetype's front and back templates should have a cloze filter. If one is missing, you will need to add it back so that Anki can create cloze cards correctly.
Einstellungen
Die Einstellungen finden sich im Menü Werkzeuge auf Windows/Linux und im Anki-Menü auf einem Mac.
Einfach
Sprache Ändere die Anzeigesprache. Hier kannst du helfen, die Übersetzungen zu verbessern.
Thema Der Dunkelmodus (Nachtmodus) macht Ankis Oberfläche dunkel und lässt Karten in weißer Schrift auf schwarzem Hintergrund erscheinen. Manche Kartenvorlagen müssen für eine korrekte Darstellung eventuell angepasst werden. Siehe Nachtmodus-Design für weitere Informationen.
In Version 2.1.50+ gibt es eine Einstellung, um autmatisch zwischen Tag- und Nachtmodus zu wechseln.
Videotreiber
Ankis Programmbibliotheken benötogen einen Videotreiber, um Inhalte auf dem Bildschirm darstellen zu
können. Aufgrund unterschiedlicher Hardware- und Software-Konfigurationen hängt es von deinem Rechner
ab, welcher Treiber am besten funktioniert. ANGLE und OpenGL sind schneller als die Option Software,
aber funktionieren auf manchen Systemen vielleicht nicht richtig. Auf einem Mac ist OpenGL fast immer
die beste Wahl.
Wiedergabesteuerelemente auf Karten mit Audiodateien anzeigen
Ob eine anklickbare Schaltfläche zum (erneuten) Abspielen beim Lernen von Karten mit Ton angezeigt
werden soll.
Audiowiedergabe beim Antworten unterbrechen
Ob eine aktuelle Audioausgabe beendet werden soll, wenn eine Karte beantwortet wird.
Bilder aus der Zwischenablage im PNG-Bildformat einfügen
Standardmäßig fügt Anki Bilder aus der Zwischenablage als JPG-Dateien ein, um Speicherplatz zu sparen.
Mit dieser Option kannst du stattdessen PNG-Dateien einfügen lassen. PNG-Bilder unterstützen durchsichtigen
Hintergrund und sind verlustfrei, resultieren aber meistens in sehr viel größeren Dateien.
Text aus der Zwischenablage ohne Formatierung einfügen
Standardmäßig wird Formatierung wie Schriftstärke und Farbe beim Einfügen beibehalten, außer es wird
die Umschalttaste gedrückt. Diese Option kehrt dieses Verhalte um.
Akzente bei der Suche ignorieren
Wenn aktiviert, werden in einfachen Suchen automatisch Akzente ignoriert.
Beim Hinzufügen aktuellen Stapel als Standard festlegen
Beeinflusst die Wechselwirkung zwischen Notiztypen und Stapeln. Das voreingestellte Verhalten
"Beim Hinzufügen aktuellen Stapel als Standard festlegen" bedeutet, dass Anki für jeden Stapel den
zuletzt genutzten Notiztyp speichert und ihn wieder auswählt, wenn du das nächste Mal den Stapel
auswählst. (Zusätzlich wird der aktuelle Stapel vorausgewählt, wenn du von irgendwo aus Hinzufügen
startest.)
Die andere Möglichkeit "Stapel abhängig vom Notiztyp zuweisen" speichert den zuletzt genutzten
Stapel für jeden Notiztyp (und der zuletzt genutzte Notiztyp wird vorausgewählt, wenn du Hinzufügen
startest). Das kann praktischer sein, wenn du für jeden Stapel immer einen einizigen Notiztyp verwendest.
Standardmäßig eingestellter Suchtext
Erlaubt die Anpassung des anfänglichen Suchtextes in der Kartenverwaltung (deck:current lässt z.B.
den aktuellen Stapel anzeigen.)
Schriftgröße der Benutzeroberfläche
Wenn dir die Elemente der Benutzeroberfläche zu klein sind, kannst du diese Einstellung erhöhen.
Zeitplanung
Zeit für nächste Wiederholung über Antworttaste anzeigen
Nützlich um zu wissen, wann Karten das nächste Mal wieder gezeigt werden
Zähler für verbleibende Karten beim Lernen anzeigen
Deaktivieren, um den Kartenzähler am unteren Rand zu verstecken.
Lernkarten mit größeren Lernstufen vor Wiederholungskarten zeigen
Nur mit aktiviertem V3-Zeitplaner sichtbar. Normalerweise werden Lernkarten mit einem Intervall
von mehr als einem Tag nach Wiederholungskarten gezeigt. Mit dieser Option werden sie stattdessen
vorher gezeigt.
Veralteter Umgang mit Zeitzonen
Siehe
https://faqs.ankiweb.net/timezone-handling-changes.html.
V3-Zeitplaner
Der V3-Zeitplaner ist hier dokumentiert:
https://faqs.ankiweb.net/the-2021-scheduler.html
Neue und Wiederholungskarten mischen
Nur mit V1- oder V2-Zeitplaner sichtbar. Diese Option bestimmt, wann neue Karten gezeigt werden:
Gemischt mit, vor oder nach Wiederholungskarten.
Neuer Tag beginnt um
Legt fest, ab wann Anki die Karten des nächsten Tages zeigen soll. Die Standardeinstellung von 4 Uhr
stellt sicher, dass dir in einer Sitzung nicht die Karten von zwei Tagen angezeigt werden, wenn du
gegen Mittenacht lernst. Wenn du sehr spät schlafen gehst oder sehr früh aufstehst, solltest du
stattdessen eine Zeit einstellen, zu der du normalerweise schläfst.
Beachte, dass der Beginn des neuen Tages von deiner aktuellen Zeitzone abhängt. Beachte außerdem,
dass Karten, die eine Tagesgrenze überschreiten,
zu Beginn des Tages, für den sie geplant wurden,
angezeigt werden, genau wie Wiederholungskarten.
Grenzwert für vorgezogenes Lernen
Bestimmt das Verhalten, wenn es im aktuellen Stapel nur noch Lernkarten zu lernen gibt.
Mit der Voreinstellung von 20 Minuten zeigt Anki Karten verfrüht, wenn ihr Restintervall weniger
als 20 Minuten beträgt und es sonst nichts zu tun gibt.
Wenn du 0 einstellst, wartet Anki immer das ganze Intervall ab und zeigt den Glückwunsch-Bildschirm,
bis die verbleibenden Karten bereit sind.
Zeitbegrenzung für Sitzungen
Timeboxing ist eine Konzentrationstechnik, bei der eine längere Aktivität (wie eine dreißigminütige
Lerneinheit) in kleinere Blöcke zerlegt wird. Wenn du eine Zeitbegrenzung von mehr als 0 Minuten
einstellst, zeigt Anki dir regelmäßig, wie viele Karten du in in der vorgegebenen Zeit geschafft hast.
Synchronisierung und Netzwerk
Der Netzwerkreiter enthält Einstellungen für die Synchronisierung mit AnkiWeb.
- Wenn du angemeldet bist, wird eine Schaltfläche zum Abmelden angezeigt.
- Wenn die Option "Bei der nächsten Synchronisation Änderungen in eine Richtung erzwingen" aktiviert ist, wirst du bei der nächsten Synchronisierung gefragt, ob du hochladen oder herunterladen willst. Das ist nützlich, wenn du aus Versehen Änderungen vorgenommen hast und sie mit einer älteren Version auf AnkiWeb rückkgängig machen willst.
- Für Informationen zur Einstellung eines eigenen Synchronisierungs-Servers, siehe diesen Abschnitt.
Sicherungen
Siehe diesen Abschnitt des Handbuchs.
Deck Options
- Presets
- Subdecks
- Daily Limits
- New Cards
- Lapses
- Timer
- Burying
- Display Order
- Audio
- Advanced
- Custom Scheduling
Deck options primarily control the way Anki schedules cards. It is recommended that you spend a few weeks with the defaults to get a feel for how Anki works before you start adjusting options. Please make sure you understand the options before changing them, as mistakes could reduce Anki's effectiveness.
Deck options are accessed by:
- Clicking the gear icon on the
Decksscreen. - Selecting a deck on the
Decksscreen, and then clickingOptionsat the bottom of the screen. - Clicking on
More>Optionswhile in review mode. - Pressing
owhile in review mode.
This page describes the options shown in Anki 2.1.45+, when you have the v2 or v3 scheduler enabled. On older versions, some options will not be available, or will appear in a different section. Please keep in mind that the V1 scheduler is no longer supported in Anki 2.1.50+. If you have not yet updated to V2 or V3, you will be prompted to update when you attempt to review cards in 2.1.50+.
For more info on deck options, please check:
Presets
Anki allows you to share options between different decks, to make updating options in many decks at once easy. To do this, options are grouped into presets. By default, all newly created decks use the same preset.
If you’d like to alter the settings on one deck but not other decks, click the arrow icon in the top right of the Deck Options window. The options are:
- Save: Saves all modifications you've made since opening the deck options screen.
- Add: Add a new preset, with the default options.
- Clone: Clone your current present, which is useful if you just want to modify certain options, keeping the rest as they are.
- Rename Changes the name of the current preset.
- Delete Deletes the current preset. This will require that the next sync is a one-way sync.
- Save to all subdecks. Like Save, but also assigns the selected preset to all subdecks of the currently selected deck.
Deck Options are not retroactive. For example, if you change an option that controls the delay after failing a card, cards that you failed prior to changing the option will have the old delay, not the new one.
Subdecks
If your deck has subdecks, each deck can optionally be assigned a different preset. When Anki shows a card, it will check which subdeck the card is in, and use the options for that deck. There are some exceptions:
- The new cards/day and reviews/day limits behave differently depending on the scheduler version you have selected.
- The display order options in the v3 scheduler are taken from the deck you select to study, not the deck of the current card.
For example, let's say you have this collection:
- Deck A (Preset 1)
  - Deck A::Subdeck B (Preset 2)
    - Card B1
    - Card B2
Preset 1 and 2 are identical, with two exceptions:
- Preset 1:
- New Cards - Learning steps: 1m 10m
- Display Order - New/review priority: Mix with reviews
- Preset 2:
- New Cards - Learning steps: 20m 2h
- Display Order - New/review priority: Show after reviews
If you choose to study Deck A:
- Learning steps for all new cards will be 1m 10m (preset 1 applies)
- All new cards will be mixed with reviews (preset 1 applies)
If you choose to study Subdeck B:
- Learning steps for all new cards will be 20m 2h (preset 2 applies)
- All new cards will be shown after reviews (preset 2 applies)
Daily Limits
New Cards/Day
Controls how many new cards are introduced each day you open the program. If you study fewer than the limit, or miss a day, the next day the counts will be back to your limit - they do not accumulate.
When decks are nested (eg Parent, Parent::Child, Parent::Child::Grandchild), the way the limits are applied depends on the scheduler version.
- V1 applies parent limits to children, regardless of which deck you click on
- V2 behaves similarly to V1 for new cards. For reviews, only the limits of the deck you click on are honored.
- V3 honors the limits of the deck you click on, and any decks inside it. Limits from parents above the deck you clicked on are ignored.
For more information, please see the v3 scheduler page.
Studying new cards will temporarily increase the number of reviews you need to do a day, as freshly learnt material needs to be repeated a number of times before the delay between repetitions can increase appreciably. If you are consistently learning 20 new cards a day, you can expect your daily reviews to be roughly about 200 cards/day. You can decrease the reviews required by introducing fewer new cards each day, or by turning off new card display until your review burden decreases. More than one Anki user has excitedly studied hundreds of new cards over their first few days of using the program, and then become overwhelmed by the reviews required.
If using the v3 scheduler, please keep in mind that the new count is capped by the review count. If your review limit is set to 200, and you have 190 reviews waiting, a maximum of 10 new cards will be introduced. If your review limit has been reached, no new cards will be shown. If you have a backlog of reviews and still want to introduce new cards, you can do so by suspending the reviews, or increasing your review limit. That said, it is recommended you hold off on new cards until you catch up instead, as introducing more new cards when you're behind will only make the backlog worse.
Maximum Reviews/Day
Allows you to set an upper limit on the number of reviews to show each day. When this limit is reached, Anki will not show any more review cards for the day, even if there are some waiting. If you study consistently, this setting can help to smooth out occasional peaks in due card counts, and can save you from a heart attack when returning to Anki after a week off. When reviews have been hidden due to this option, a message will appear in the congratulations screen, suggesting you consider increasing the limit if you have time.
In the v3 scheduler and v1 schedulers, the counts are affected by parents/selected decks in the same way as new cards.
In the v2 scheduler, the limit is taken solely from the deck you select - any limits on its parents or child decks are ignored.
The v3 scheduler includes learning cards with a 1+ day delay in the review count, so those learning cards will be subject to the daily limit.
New Cards
The settings in this section only affect new cards and cards in initial learning mode. Once a card has graduated (i.e. there are no more learning steps for this card), it becomes a review card, and the settings in this section are no longer applicable.
Learning Steps
Controls the number of learning repetitions, and the delay
between them. One or more delays, separated by spaces must be entered.
Each time you press Good during review, the card moves to the next step.
For example, let's say that your learning steps are 1m 10m 1d.
- When you press
Again, the card goes back to first step, and will be shown again approximately 1 minute later. - When you press
Goodon a new card, or a card answeredAgain, it will move to the next step, and be shown again in approximately 10 minutes. - When you press
Goodon a card after the 10 minute step, it will be delayed until the next day. - When you press
Goodon the card the next day, it will leave learning (i.e. it will graduate), and become a review card. It will be shown again after the delay configured by the graduating interval.
If there’s nothing else to study, Anki will show cards up to 20 minutes early by default. The amount of time to look ahead is configurable in the preferences.
Please see the learning section for more info on how steps work.
Day Boundaries
Anki treats small steps and steps that cross a day boundary differently. With small steps, the cards are shown as soon as the delay has passed, in preference to other waiting cards like reviews. This is done so that you can answer the card as closely to your requested delay as possible. In contrast, if the interval crosses a day boundary, it is automatically converted to days.
Graduating Interval
The delay in days between answering "Good" on a learning card with no steps left, and seeing the card again as a review card. Please see the example in the previous section.
Easy Interval
The delay between answering Easy on a learning
card, and seeing it in review mode for the first time.
The Easy button immediately turns a learning card into a review card,
and assigns it the delay you have configured. It should always be at least
as long as the graduating interval, and typically a few days longer.
Insertion Order
Controls whether Anki should add new cards into the deck randomly, or in order. When you change this option, Anki will re-sort the decks using the current Option Group. Cards with a lower due number will be shown first when studying, by default. Changing this option will automatically update the existing position of new cards.
One caveat with random order mode: if you review many of your new cards, and then add more new cards, the newly added material is statistically more likely to appear than the new cards that were already in the deck. For example, if you have 100 cards in random order, then review the first 50, newly added cards are still given position 1-100, but as you have already reviewed the first 50, the newly added cards are more likely to appear earlier. To correct this, you can change the order to Ordered mode and back again to force a re-sort.
When you select random order, Anki will randomize your notes, keeping the cards of a given note close together. The cards of a given note are shown in the order, in which their card types appear, so that siblings are introduced consistently — otherwise you could end up in a state where some notes had all their cards introduced and other notes had only one or two. Please see the "bury related" and "display order" sections below for more info.
Lapses
When you forget a review card, it is said to have 'lapsed', and the card must be relearnt. The default behaviour for lapsed reviews is to reset the interval to 1 (i.e. make it due tomorrow), and put it in the learning queue for a refresher in 10 minutes. This behaviour can be customized with the options listed below.
Relearning Steps
The same as 'learning steps', but for forgotten reviews. When you fail a card
(press Again), the card enters the relearning phase, and before it becomes a
review card again, you will have to pass all the relearning steps — or, alternatively, press
Easy on the card.
If you leave the steps blank, the card will skip relearning, and will be assigned a new review delay.
Minimum Interval
Specifies a minimum number of days a card should wait after it finishes relearning. The default is one day, meaning once relearning is finished, it will be shown again the next day.
Leeches
Control the way Anki handles leeches. Please see the leeches section for more information.
Timer
Anki monitors how long it takes you to answer each card, so that it can show you how long was spent studying each day. The time taken does not influence scheduling. The default limit is 60 seconds. If you take longer than that, Anki assumes you have walked away from your computer or have been distracted, and limits the recorded time to 60 seconds, so that you don’t end up with inaccurate statistics. If you consistently take longer than 60 seconds to answer a card (from when question is shown until you press an answer button), you may want to either consider raising this limit, or ideally, making your cards simpler.
Burying
Please see this section for more information.
Display Order
The options in this section are taken from the deck you select to study, not the deck of the currently displayed card.
This section is only available when you have the v3 scheduler enabled.
Some further information about display order is available in the studying section.
New Card Gather Priority
Controls how Anki gathers cards from each subdeck.
With the default Deck ordering, cards are gathered from each subdeck in order,
stopping when the limit of the selected deck has been exceeded. This is faster,
and allows you to priorize subdecks that are closer to the top. Decks / subdecks
are always ordered alphabetically, so you can give them a numeric prefix like
001 to control the order they are shown. You can also use _ and ~ as a
prefix to place items at the top or bottom.
Although position order depends initially on the 'Insertion Order' setting above, you can manually reposition cards in different ways.
New Card Sort Order
Controls how cards are sorted after they have been gathered. By default, Anki sorts by template first, to avoid multiple cards of the same note from being shown in succession. This results in cards appearing in the order they have been added, with the first card template (eg front->back) appearing before later card templates (eg back->front).
New/Review Priority
Whether new cards should be mixed in with reviews, or shown before or after them.
Interday Learning/Review Priority
Whether learning cards with a 1+ day delay should be mixed in with reviews, or shown before or after them. Because learning cards tend to be harder than reviews, some users prefer to see them at the end (getting the easy stuff done first), or at the start (allowing more time to review forgotten ones).
Review Sort Order
The default order prioritizes cards that have been waiting longer, which works well when you are up to date, or when you only have a small backlog. If you have taken an extended break or have fallen behind in your reviews, you may want to consider changing the sort order temporarily. Sorting by ascending intervals will ensure cards with shorter delays are shown first, and by descending intervals will allow you to work through the easier material first.
Choosing the Deck, then due date option will ensure reviews are shown for each subdeck in turn. This is generally not recommended, as having material appear consistently in the same order makes it easier to guess the answer based on context, and may lead to weaker memories.
Audio
By default, Anki automatically plays audio on the front and back of
cards. If you check Don't play audio automatically, Anki will not play
audio until you press the replay audio key, r or F5.
Always include question side when replaying audio controls whether audio from the question side should be played when replaying the audio while an answer is shown. Please note that it does not control what happens when you show the answer; for that please see this section.
Advanced
Maximum Interval
Allows you to place an upper limit on the time Anki will wait to reshow a card. The default is 100 years; you can decrease this to a smaller number if you’re willing to trade extra study time for higher retention.
Starting Ease
Controls the easiness that cards start out with. It is
set when a card graduates from learning for the first time. It defaults
to 2.50, meaning that once you have finished learning a card, answering
Good on subsequent reviews will increase the delay by approximately
2.5x (e.g. if the last delay was 10 days, the next delay would be around 25
days). Based upon how you rate the card in subsequent reviews, the
easiness may increase or decrease from its starting value.
Easy Bonus
An extra multiplier applied to the interval when a review card is answered
Easy. With the default value of 1.30, Easy will give an interval that is
1.3 times the Good interval (e.g. if the Good interval was 10 days, the Easy
interval would be around 13 days).
Interval Modifier
An extra multiplier that is applied to all reviews. At its default of 1.00 it does nothing. If you set it to 0.80, though, for example, intervals will be generated at 80% of their normal size (so a 10 day interval would become 8 days). You can thus use the multiplier to make Anki present cards more or less frequently than it would otherwise, trading study time for retention or vice versa.
For moderately difficult material, the average user should find they remember approximately 90% of mature cards that come up for review. You can find out your own performance by opening the graphs/statistics for a deck and looking at the Answer Buttons graph - mature retention is the correct% on the right side of the graph. If you haven’t been studying long, you may not have any mature cards yet. As performance with new cards and younger cards can vary considerably, it’s a good idea to wait until you have a reasonable amount of mature reviews before you start drawing conclusions about your retention rate.
On the SuperMemo website, they suggest that you can find an appropriate multiplier for a desired retention rate. Their formula boils down to:
log(desired retention%) / log(current retention%)
Imagine we have a current retention rate of 85% and we want to increase it to 90%. We’d calculate the modifier as:
log(90%) / log(85%) = 0.65
You can use Google to calculate it for you.
If you plug the resulting 65% into the interval modifier, you should find over time that your retention moves closer to your desired retention.
One important thing to note however is that the trade-off between time spent studying and retention is not linear: we can see here that to increase our retention by 5 percentage points, we would have to study 35% more frequently. If the material you are learning is very important then it may be worth the extra effort – that is, of course, something you will need to decide for yourself. If you are simply worried that you are forgetting too much, then you may find investing more time at the initial learning stage and/or using mnemonics will give you more gain for less effort.
One final thing to note is that Anki forces a new interval to be at least 1 day longer than it was previously, so that you do not get stuck reviewing with the same interval forever. If your goal is to repeat a card once a day for multiple days, you can do that by setting more learning mode steps, instead of by adjusting this modifier.
Hard Interval
The multiplier used when you use the Hard button. The percentage is relative
to the previous interval: e.g. with a default of 1.20, a card with a 10-day interval
will be given 12 days.
New Interval
The multiplier used when you use the Again button on a review card. The
default 0.00 means that a review card's delay is reset to zero when you forget it
(which then becomes 1 day after the minimum interval is
applied).
If changed from the default, it is possible for forgotten cards to preserve part of their previous delay. For example, if a card had a 100 day interval, and you set the New Interval to 0.20, the new interval would be 20 days.
While preserving part of the interval may seem to make sense, SuperMemo has observed that preserving part of the delay can actually be counter-productive. For this reason, we recommend you leave it on the default setting.
Custom Scheduling
Please see this page.
Synchronisation mit AnkiWeb
- Einführungsvideos
- Einrichtung
- Automatische Synchronisation
- Schaltflächenfarbe
- Medien
- Konflikte
- Zusammenführungskonflikte
- Firewalls
- Proxies
AnkiWeb ist ein Dienst, um deine Sammlung über verschiedene Geräte hinweg synchron zu halten und online zu lernen. Bitte leg einen kostenlosen Account an, bevor du die folgenden Schritten durchführst.
Einführungsvideos
Für eine schnelle Einführung in die Synchronisation sieh dir bitte die Einführungsvideos zur Synchronisation (englisch) an.
Einrichtung
Um mit der geräteübergreifenden Synchronisation zu beginnen, klick auf die Synchronisieren-Schaltfläche (oben rechts im Hauptbildschirm) oder drück Y auf deiner Tastatur. Du wirst nach deiner AnkiWeb-ID und deinem Passwort gefragt, die du bei der Account-Erstellung angelegt hast.
Wenn du deine Sammlung das erste Mal synchronisierst, fragt dich Anki, ob du hoch- oder herunterladen möchtest. Wenn du Karten auf deinem Computer hast und dein AnkiWeb-Account leer ist, wähle Hochladen, um deine Kartendaten nach AnkiWeb zu senden. Wenn du auf AnkiWeb Karten von einem anderen Gerät und keine auf deinem Computer hast, wähle Herunterladen, um deine lokale leere Sammlung mit den Karten von AnkiWeb zu ersetzen. Wenn du verschiedene Karten auf beiden Geräten hast, ist mehr Arbeit erforderlich, um den Verlust von Daten zu vermeiden.
Nachdem die erstmalige Einweg-Synchronisation abgeschlossen ist, kann Anki Änderungen von mehreren Quellen mit ein paar Ausnahmen selbst zusammenführen.
Wenn mehrere Leute Anki auf demselben Gerät mit jeweils eigenem Profil nutzen, muss jeder Benutzer seinen eigenen Account für die Synchronisation anlegen. Wenn du versuchst, mehrere Profile mit demselben Account zu synchronisieren, wirst du Daten verlieren.
Automatische Synchronisation
Nachdem die Synchronisation einmal aktiviert ist, wird Anki deine Sammlung bei jedem Öffnen und Schließen automatisch synchronisieren. Wenn du lieber manuell synchronisieren möchtest, kannst du die automatische Synchronisation in den Einstellungen deaktivieren.
Schaltflächenfarbe
Die Synchronisieren-Schaltfläche wird blau, wenn eine normale, und rot, wenn eine volle Synchronisation erforderlich ist.
Medien
Zugehöriges Video (englisch): https://www.youtube.com/watch?v=phP9GGG-PxY
Anki synchronisiert alle von deinen Notizen genutzten Audio- und Bilddateien. Es registriert, wenn Dateien zu deinem Medienordner hinzugefügt oder daraus entfernt worden sind, aber nicht, wenn du existierende Dateien verändert hast. Dafür musst du erst auch eine Datei hinzugefügen oder entfernen.
Wenn du Anki von einem USB-Speicher aus startest, solltest du ein NTFS-Dateisystem benutzen, da Anki Änderungen auf einem FAT32-System möglicherweise nicht registriert.
Konflikte
Zugehöriges Video (englisch): https://www.youtube.com/watch?v=UEAcpfMQnjo
Unter normalen Umständen können Wiederholungen und Bearbeitungen zusammengeführt werden. Wenn du Karten also auf zwei verschiedenen Geräten lernst und bearbeitest, bevor du synchronisierst, übernimmt Anki die Änderungen von beiden Quellen. Wenn dieselbe Karte an zwei verschiedenen Orten wiederholt wurde, werden beide Wiederholungen in der Wiederholungshistorie vermerkt und die Karte verbleibt im Zustand nach der aktuellsten Wiederholung.
Bestimmte Änderungen kann Anki nicht zusammenführen, hauptsächlich wenn sie das Notizformat betreffen, z.B. das Hinzufügen eines Felds oder das Entfernen einer Vorlage. Wenn du eine Aktion ausführst, die nicht zusammengeführt werden kann, warnt Anki dich und gibt dir die Möglichkeit, sie abzubrechen. Wenn du trotzdem fortfährst, wirst du bei der nächsten Synchronisation gefragt, ob du die lokale oder die Sammlung auf AnkiWeb behalten möchtest.
Auch bestimmte Probleme beim Synchronisieren erzwingen eine Einweg-Synchronisation. Wenn das häufiger geschieht, melde es bitte in unserem Forum.
Bei einer Einweg-Synchronisation musst du wählen, ob du deine lokale Sammlung oder die auf AnkiWeb behalten möchtest. Wenn in beiden Änderungen vorgenommen wurden, können nur die aus einer Quelle erhalten werden.
Wenn du Hochladen wählst, wird der Inhalt deines lokalen Geräts nach AnkiWeb geschickt. Danach musst du deine anderen Geräte synchronisieren und Herunterladen wählen, damit sie diesen Inhalt kopieren.
Wenn du Herunterladen wählst, werden alle lokalen Änderungen, die du vorgenommen hast, durch die Daten von AnkiWeb ersetzt.
Nachdem alle Geräte synchronisiert sind, werden bei folgenden Synchronisationen wieder Änderungen von beiden Seiten zusammengeführt.
Wenn du ein vollständiges Hoch- oder Herunterladen erzwingen möchtest (z.B. weil du aus Versehen einen Stapel auf einer Seite gelöscht hast und ihn wiederherstellen möchtest, anstatt seine Löschung zu synchronisieren), kannst du unter Werkzeuge > Einstellungen > Netzwerk den Haken bei "Bei der nächsten Synchronisation Änderungen in eine Richtung erzwingen" setzen und dann wie gewohnt synchronisieren. (Du hast dann die Wahl, welche Seite du benutzen willst.)
Änderungen in eine Richtung zu erzwingen, beeinflusst nur die Kartensynchronisation – Medien werden wie immer synchronisiert. Wenn du Dateien von AnkiWeb entfernen möchtest, stell bitte zuerst sicher, dass dein Gerät vollständig synchronisiert ist. Anschließend werden alle Dateien, die du entfernst (z.B. durch die Funktion Medien überprüfen), bei der nächsten Synchronisation von AnkiWeb entfernt.
Zusammenführungskonflikte
Da die erste Synchronisierung Änderungen nur in eine Richtung synchronisieren kann, geht Inhalt, den du auf anderen Geräten oder Profilen hinzugefügt hast, verloren, wenn du ihn mit dem Inhalt des anderen Geräts überschreibst. Mit etwas Arbeit ist es jedoch möglich, Daten manuell zu einer einzigen Sammlung zusammenzuführen.
Beginne damit, auf jedem Gerät/Profil ein Backup zu erstellen, für den Fall, dass etwas schief geht. In der Computer-Version kannst du unter Datei>Export "Alle Stapel" mit Zeitplaninformationen und Mediendateien exportieren und die Datei an einem sicheren Ort speichern. In AnkiMobile kannst du über die Schaltfläche "Hinzufügen/Exportieren" in der Stapelübersicht Stapel mit Medien exportieren.
Falles eines ein mobiles Gerät ist, synchronisiere es nun zuerst. Wenn es Konflikte gibt, wähle "Hochladen", um vorhandene Daten auf AnkiWeb mit den Daten deines Mobilgeräts zu überschreiben. Wenn sich beide Geräte/Profile auf deinem Computer befinden, synchronisiere zuerst das Gerät/Profil mit der höchsten Anzahl an Stapeln.
Kehre nun zum anderen Gerät/Profil zurück. Wenn die automatische Synchronisierung aktiviert ist, kann eine Meldung erscheinen, die fragt, ob du hoch- oder herunterladen möchtest. Klicke auf die Abbrechen-Schaltfläche - noch möchten wir nicht synchronisieren.
Sobald du die Stapelübersicht siehst, klicke auf das Zahnradsymbol neben dem ersten Stapel und wähle "Exportieren". Exportiere mit Zeitplaninformationen und Medien und speichere die .apkg-Datei. Wiederhole diesen Schritt für jeden Oberstapel.
Sobald alle Oberstapel exportiert wurden, klick auf die Synchronisierungsschaltfläche oben rechts und wähle "Herunterladen", um den lokalen Inhalt mit dem Inhalt zu überschreiben, den du von deinem anderen Gerät synchronisiert hast.
Du kannst nun über Datei>Importieren die .apkg-Dateien importieren, die du zuvor exportiert hast. Dadurch wird der exportierte Inhalt mit dem vorhandenen Inhalt zusammengeführt, sodass alles an einem Ort ist.
Firewalls
Zur Synchronisation muss Anki in der Lage sein, ausgehende HTTPS-Verbindungen nach ankiweb.net, sync.ankiweb.net, sync2.ankiweb.net und so weiter aufzubauen. Diese Domains ändern und auch die IP-Adressen, auf die sie verweisen, können sich im Laufe der Zeit ändern. Daher empfehlen wir, Wildcard-Zugriff auf *.ankiweb.net zu erlauben, um die Chance zu verringern, dass die Firewall-Regeln in Zukunft aktualisiert werden müssen.
Wenn du eine Firewall auf deinem Rechner hast, solltest du eine Ausnahme für Anki hinzufügen. Wenn du dich in einem Arbeits- oder Schulnetzwerk befindest, bitte deinen Netzwerkadministrator um Unterstützung - damit können wir nicht helfen.
Proxies
Wenn du einen Proxy benötigst, um auf das Internet zuzugreifen, sollte Anki automatisch deine System-Proxy-Einstellungen übernehmen, wenn du Windows oder macOS verwendest. Wenn du auf einer anderen Plattform bist, wird die HTTP_PROXY-Umgebungsvariable berücksichtigt.
Anki kann deine Systemeinstellungen nur dann übernehmen, wenn ein Proxy manuell konfiguriert ist und kein Passwort erfordert. Wenn dein System eine automatische Proxy-Konfiguration verwendet oder ein Proxy, der einen Benutzernamen und ein Passwort erfordert, musst du Anki die Proxy-Konfiguration manuell mitteilen.
Um Anki deine Proxy-Einstellungen mitzuteilen, musst du die Umgebungsvariable HTTPS_PROXY definieren, sodass sie auf den Proxy-Server zeigt. Das sieht etwa so aus:
http://user:pass@proxy.company.com:8080
Wenn dein Benutzername oder Passwort ein @ enthält (z.B. user@workdomain.com),
musst du es durch %40 ersetzen, also:
http://user%40workdomain.com:pass@proxy.company.com:8080
Anki 2.0 erwartet HTTP_PROXY anstelle von HTTPS_PROXY.
Um Umgebungsvariablen unter Windows zu setzen, siehe https://www.google.com/search?q=windows+set+environmental+variable
Wenn du auf einem Mac bist, siehe http://stackoverflow.com/questions/135688/setting-environment-variables-in-os-x
Stark eingeschränkte Netzwerke, die sichere Verbindungen abfangen und anstelle eines Zertifikats ihr eigenes Zertifikat präsentieren, können dazu führen, dass Anki SSL-Fehler ausgibt. In solchen Umgebungen kannst du die Fehler möglicherweise mit https://ankiweb.net/shared/info/878367706 umgehen.
Eine alternative Lösung besteht darin, einen lokalen Proxy-Server zu installieren und diesen auf deinen normalen Proxy-Server zu verweisen. Du kannst Anki dann sagen, dass es den lokalen Proxy verwenden soll, der Anfragen an den von dir normalerweise verwendeten Proxy umleitet.
Profiles
If more than one person wants to use Anki on your computer, you can set up a separate profile for each user. Each user profile has their own collection, and own program settings. Add-ons are shared across profiles. Profiles are configured by going to the File menu and choosing "Switch Profile".
Only a single profile can be synced to an AnkiWeb account. If you have different users on your computer, each user will need to set up a separate AnkiWeb account for their profile. If you attempt to link two or more profiles to the same AnkiWeb account, you will overwrite the data from one profile with the data from the other.
Profiles are primarily intended to be used by different people, and are not recommended for splitting up your own content. If you have created multiple profiles for yourself, the best option is to merge them into a single profile. You can do so by exporting one deck from profile A, and then importing it into profile B, repeating for any other decks in profile A, until everything is in profile B.
AnkiDroid does not support profiles.
Profiles window
From the Profiles window (accessible via File>Switch Profile from the main window), you can:
- Open / Add / Rename / Delete user profiles.
- Quit the program.
- Restore an automatic backup.
- Downgrade your collection, which is necessary if you want to open it with an earlier Anki release. If you skip this step, you may get an error message when opening your collection in an older Anki version, and you will need to return to this version, downgrade, then try again.
Kartenverwaltung
- Tabellenmodi
- Seitenleiste
- Suchleiste
- Karten-/Notiz-Tabelle
- Bearbeitungsbereich
- Menüs und Aktionen
- Suchen und ersetzen
- Duplikate suchen
Mit der Kartenverwaltung kannst du in deinen Karten und Notizen stöbern und sie bearbeiten. Du öffnest sie, indem du im Hauptfenster auf Kartenverwaltung klickst oder B drückst. Sie besteht aus drei Bereichen: der Seitenleiste links, der Karten- bzw. Notiztabelle oben rechts und dem Bearbeitungsbereich unten rechts. Du kannst einen Bereich vergrößern und einen anderen verkleinern, indem du auf den Bereich dazwischen klickst und ziehst.
Tabellenmodi
Anki 2.1.45+ bietet zwei Modi: Entwerden werden Karten oder Notizen in der Tabelle angezeigt. Du kannst den aktuellen Modus ändern, indem du den Schalter oben, links neben dem Suchbereich anklickst oder Alt+T drückst. Der Schalter gibt auch Auskunft darüber, ob gerade Karten oder Notizen angezeigt werden.
Anmerkung: Der Einfachheit halber wird in diesem Leitfaden meistens angenommen, dass der Kartenmodus aktiv ist. Wenn davon die Rede ist, Karten auszuwählen, zu finden usw., gilt das dementsprechend auch für Notizen, wenn der Notizmodus aktiv ist.
Seitenleiste
Die Seitenleiste links gewährt schnellen Zugriff auf gebräuchliche Suchbegriffe. In Anki 2.1.45+ bietet sie auch eine Suchleiste, Funktionen, um Schlagwörter und Stapel zu bearbeiten, und eine Auswahl von zwei Werkzeugen, die in den nächsten Abschnitten erklärt werden. Du kannst zwsichen den Werkzeugen mit der Werkzeugleiste oben in der Seitenleiste oder mit den Tastenkombinationen Alt+1/2 wechseln.
Suchwerkzeug
Mit diesem Werkzeug verhält sich die Leistenleiste wie in früheren Versionen: Auf einen Eintrag zu klicken, löst eine Suche danach aus.
Du kannst Strg (Befehl auf dem Mac) gedrückt halten, um den angeklickten Eintrag mit einer AND-Bedingung ("und") an die aktuelle Suche anzuhängen, anstatt eine neue zu starten. Wenn du z.B. Lernkarten sehen wolltest, die sich außerdem im Englisch-Stapel befinden, könntest du auf Lernen klicken und dann auf Englisch Strg-klicken.
Du kannst die Umschalttaste gedrückt halten, um eine OR- ("oder") statt eine AND-Suche zu erzeugen. Indem du mehrere Stapel mit Umschalttaste anklickst, kannst du so alle Karten gleichzeitig anzeigen lassen, die sich in einem dieser Stapel befinden.
Du kannst Alt (Wahl auf dem Mac) gedrückt halten, um
die Suche umzukehren (- voranzustellen), z.B. um alle Karten anzuzeigen, die
ein bestimmtes Schlagwort nicht haben. Alt / Wahl können
mit Strg oder Umschalttaste kombiniert werden. So wird
das Klicken mit Strg+Alt einen negierten Ausdruck an die
Suche anhängen.
In Anki 2.1.39+ kannst du auch Strg und Umschalttaste
gedrückt halten, um alle Suchausdrücke derselben Art mit dem neuen zu ersetzen.
Angenommen, du hast eine komplexe Suche wie deck:Swahili (is:due or tag:wichtig)
eingegeben und möchtest dieselbe Suche nun für deinen Urdu-Stapel durchführen.
Du kannst Strg+Umschalttaste gedrückt halten, während du
auf den Urdu-Stapel in der Seitenleiste klickst, um die folgende Suche zu erhalten:
deck:Urdu (is:due or tag:wichtig).
Auswahlwerkzeug
Das Auswahlwerkzeug ermöglicht es, mehrere Einträge gleichzeitig auszuwählen, indem beim Klicken Strg oder Umschalttaste gedrückt wird. Es unterstützt auch Drag-and-drop ("Ziehen und Ablegen"), um Stapel und Schlagwörter neu anzuordnen.
Dazu ein Beispiel: Angenommen, du hast die Schlagwörter Mathe, Analysis und
Algebra. Klick das Schlagwort Analysis und dann mit Strg Algebra
an. Nun sind beide ausgewählt und du kannst eines von beiden anklicken und auf
Mathe ziehen, um beide zu Kindern von diesem Schlagwort zu machen.
Hinter den Kulissen hat Anki die beiden Schlagwörter zu Mathe::Analysis bzw.
Mathe::Algebra umbenannt und deine Notizen entsprechend aktualisiert.
Auch beim Suchen ist die Auswahl mehrerer Einträge nützlich: Wenn du eine Auswahl rechtsklickst, gibt es die Optionen Suchen > Alle ausgewählten / Eins der ausgewählten. Das kann mit den verschiedenen Umschalttasten wie im Abschnitt Suchwerkzeug beschrieben kombiniert werden, um das Ergebnis an die aktuelle Suche anzuhängen.
Gespeicherte Suchen
Wenn du oft nach demselben suchst, kansnt du deine aktuelle Suche speichern, indem du den obersten Eintrag in der Seitenleiste rechtsklickst, "Aktuelle Suche speichern" auswählst und einen Namen eingibst.
Einträge bearbeiten
Du kannst Schlagwörter, Stapel und gespeicherte Suchen direkt von der Seitenleiste aus entfernen oder umbenennen. Das geht vom Rechtsklickmenü aus oder unter Benutzung der jeweiligen Taste (in Windows Entf bzw. F2). Es können sogar mehrere Einträge gleichzeitig gelöscht werden (siehe Auswahlwerkzeug).
Einträge finden
Um einen bestimmten Eintrag im Seitenleistenbaum zu finden, kannst du einen Teil seines Namens oben in die Suchleiste eingeben, wodurch unpassende Einträge zeitweise ausgeblendet werden.
Suchleiste
Über der Kartentabelle befindet sich eine Suchleiste, in die du Verschiedenes eingeben kannst, um nach Karten zu suchen. Für weitere Informationen zur Syntax siehe bitte das Kapitel Suchen.
Karten-/Notiz-Tabelle
Die Reihen der Tabelle zeigen Karten oder Notizen, die zur aktuellen Suche passen. Wenn du eine Reihe anklickst, wird die dazugehörige Notiz im Bereich darunter angezeigt.
Reihen
Wenn du mit der Maus ziehst oder Strg bzw. Command benutzt, um mehrere Reihen auszuwählen, wird der Bearbeitungsbereich ausgeblendet. Verschiedene Funktionen (wie das Ändern des Stapels) können für mehrere Karten oder Notizen gleichzeitig ausgeführt werden, unabhängig vom aktuellen Modus. Dafür gilt im Kartenmodus eine Notiz als ausgewählt, wenn eine ihrer Karten ausgewählt ist, und im Notizmodus gilt eine Karte als ausgewählt, wenn ihre Notiz ausgewählt ist.
Andere Funktionen (wie das Zeigen der Kartenstatisik) werden nur für eine einzelne Karte oder Notiz ausgeführt. Diese wird als aktuelle Karte bzw. Notiz bezeichnet und ist im Normalfall die zuletzt ausgewählte oder angeklickte. Im Kartenmodus ist die aktuelle Notiz wieder die der aktuellen Karte und im Notizmodus ist die aktuelle Karte die erste Karte der aktuellen Notiz.
Die Hintergrundfarbe hängt von Karte und Notiz ab. Im Kartenmodus gelten folgende Regeln (nach Priorität):
- Die Farbe der Kartenmarkierung, falls vorhanden.
- Gelb, falls die Karte ausgesetzt ist.
- Lila, falls die Karte zurückgestellt ist.
Im Notizmodus werden nur gekennzeichnete Notizen farbig hinterlegt. Für weitere Informationen über gekennzeichnete Notizen und ausgesetzte Karten, siehe den Abschnitt Bearbeiten und Sonstiges.
Spalten
Du kannst festlegen, welche Spalten angezeigt werden sollen, indem du einen Spaltenkopf rechtsklickst (auf einem Mac mit Strg anklickst). Durch Ziehen mit der Maus kannst du die Reihenfolge festlegen. Durch Klicken auf einen Spaltenkopf kannst du nach der jeweiligen Spalte sortieren lassen, ein weitere Klick kehrt die Reihenfolge um. Du kannst allerdings nicht nach den Spalten Frage oder Antwort sortieren lassen.
Alle Spalten sind sowohl im Karten- als auch im Notizmodus verfügbar, jedoch manchmal mit leicht unterschiedlichen Namen oder Daten. Die folgende Tabelle listet das Verhalten in beiden Modi auf:
| Spalte | Kartenmodus | Notizmodus |
|---|---|---|
| Antwort | Die Kartenrückseite ohne die Frage als Einzeiler. Im Kartentypeneditor kann ein alternatives Format festgelegt werden. | Wie im Kartenmodus für die erste Karte der Notiz. |
| Karte(n) | Der Name der Kartenvorlage. | Die Anzahl der Karten der Notiz. |
| Karte verändert | Das letzte Mal, dass an der Karte Änderungen vorgenommen wurden (z.B. wenn du die Karte wiederholt hast und die Kartenhistorie aktualisiert wurde). | Das letzte Mal, dass an einer der Karten der Notiz Änderungen vorgenommen wurden. |
| Erstellt | Wie im Notizmodus für die Notiz der Karte. | Wann die Notiz erstellt wurde. |
| Stapel | Der Name des Stapels, in dem sich die Karte befindet. | Die Anzahl verschiedener Stapel, die Karten der Notiz enthalten, oder der Name des Stapels, wenn sich alle Karten im selben befinden. |
| Fällig | Das Fälligkeitsdatum für Wiederholungs- und Wiedererlernungskarten und für neue Karten die Position in der Schlange ebendieser Karten. Die Zeile ist eingeklammert, wenn die Karte ausgesetzt oder zurückgestellt ist. Sortiert wird zuerst nach Typ und erst dann nach Datum oder Position. | Das Fälligkeitsdatum für die nächste fällige Wiederholungs- oder Wiedererlernungskarten der Notiz, die nicht ausgesetzt, zurückgestellt oder in einem Auswahlstapel ist. |
| (Durchschn.) Leichtigkeit | Die Leichtigkeit der Karte, sofern sie nicht neu ist. | Die durchschnittliche Leichtigkeit der nicht neuen Karten der Notiz. |
| (Durchschn.) Intervall | Das Intervall, sofern es sich um eine Wiederholungs- oder Wiedererlernungskarte handelt. | Das durchschnittliche Intervall de Wiederholungs- und Wiedererlernungskarten der Notiz. |
| Fehlschläge | Wie oft die Karte mit "Nochmal" bewertet wurde. | Die Summe aller Fehlschläge von Karten der Notiz. |
| Notiz | Wie im Notizmodus für die Notiz der Karte. | Der Name des Notiztyps der Notiz. |
| Notiz verändert | Wie im Notizmodus für die Notiz der Karte. | Wann die Notiz (z.B. der Inhalt eines Felds) zuletzt bearbeitet wurde. |
| Frage | Die Vorderseite der Karte als Einzeiler. Im Kartentypeneditor kann ein alternatives Format festgelegt werden. | Wie im Kartenmodus für die erste Karte der Notiz. |
| Wiederholungen | Wie oft die Karte wiederholt wurde. | Die Summe aller Wiederholungen von Karten der Notiz. |
| Sortierfeld | Wie im Notizmodus für die Notiz der Karte. | Der Inhalt desjenigen Felds der Notiz, das im Notiztyp als Sortierfeld festgelegt wurde. Nur dieses Feld kann angezeigt und für die Sortierung genutzt werden. Du kannst das Sortierfeld ändern, indem du im Bearbeitungsbereich auf Felder klickst. |
| Schlagwörter | Wie im Notizmodus für die Notiz der Karte. | Die Schlagwörter der Notiz. |
Bearbeitungsbereich
Der Bereich unten rechts zeigt die aktuell ausgewählte Notiz an. Für mehr Informationen zu Karten und Notizen, siehe Loslegen. Für mehr Informationen zu Bearbeitungsschaltflächen, siehe Bearbeiten.
Du kannst auf Vorschau oben im Bearbeitungsbereich klicken, um zu sehen, wie die aktuell ausgewählte Karte beim Lernen aussehen würde. Es werden allerdings keine Antwort-Eingeben-Felder angezeigt, wodurch du die Karten leichter schnell durchschauen kannst. Im Notizmodus wird die erste Karte der aktuellen Notiz angezeigt.
Menüs und Aktionen
Am oberen Rand des Kartenverwaltungsfensters findest du eine Werkzeugleiste mit verschiedenen Menüs, die wiederum verschiedene Aktionen bieten.
Bearbeiten
| Name | Aktion |
|---|---|
| Rückgängig machen | Macht die zuletzt ausgeführte Operation rückgängig. |
| Alle auswählen | Wählt alle angezeigten Reihen aus. |
| Notizen auswählen | Lässt nur die ausgewählten Notizen anzeigen und wählt sie aus. |
| Auswahl umkehren | Wählt nicht ausgewählte Reihen aus und hebt die Auswahl ausgewählter Reihen auf. |
| Auswahlstapel erstellen | Zeigt das Auswahlstapel-Fenster an und setzt die aktuelle Kartenverwaltungssuche als Filter. Mit Alt / Option wird stattdessen der zweite Filter gesetzt (benötigt Zeitplanerversion 2+). |
Notizen
Die meisten der folgenden Aktionen operieren auf den ausgewählten Notizen. Sie stehen auch über ein Kontextmenü zur Verfügung, wenn eine ausgewählte Reihe im Notizmodus mit rechts angeklickt wird. Im Kartenmodus sind sie in einem Untermenü des Kontextmenüs zu finden.
| Name | Aktion |
|---|---|
| Notiz hinzufügen | Öffnet das Hinzufügen-Fenster. |
| Kopie erstellen | Öffnet ein Duplikat der aktuellen Notiz im Editor, das angepasst werden kann, um schnell neue Varianten zu erzeugen. Standardmäßig wird das Duplikat im selben Stapel wie das Original angelegt. |
| Notizen exportieren | Öffnet das Export-Fenster. |
| Schlagwörter hinzufügen | Fügt die angegebenen Schlagwörter allen ausgewählten Notizen hinzu. |
| Schlagwörter entfernen | Entfernt die angegebenen Schlagwörter von allen ausgewählten Notizen. |
| Verwaiste Schlagwörter löschen | Entfernt alle Schlagwörter von der Seitenleiste, die von keiner Notiz benutzt werden. |
| Kennzeichnung umschalten | Entfernt die Kennzeichnung von allen ausgewählten Notizen, wenn die aktuelle Notiz gekennzeichnet ist (d.h. das Schlagwort Marked hat). Kennzeichnet die Notizen andernfalls. |
| Notitzyp ändern | Konvertiert die ausgewählten Notizen von einem Typ zum andern. Z.B. angenommen, du hast die Notiztypen Russich und Computer und hast aus Versehen Computer-Stoff als Russich-Notiz hinzugefügt. Mit dieser Aktion kannst du den Fehler beheben. Die Zeitplanung der Karten wird nicht beeinflusst. Eine Änderung des Notitzyps erfordert eine einseitige Synchroniserung. |
| Duplikate finden | Öffnet das Duplikate-Fenster. |
| Suchen und ersetzen | Öffnet das Finden-und-ersetzen-Fenster. |
| Notiztypen verwalten | Öffnet das Notiztyp-Fenster. |
| Löschen | Löscht alle ausgewählten Notizen und deren Karten. Es nicht möglich, einzelne Karten zu löschen, da deren Existenz durch die Kartenvorlagen bestimmt wird. |
Karten
Die meisten der folgenden Aktionen operieren auf den ausgewählten Karten. Sie stehen auch über ein Kontextmenü zur Verfügung, wenn eine ausgewählte Reihe im Kartenmodus mit rechts angeklickt wird. Im Notizmodus sind sie in einem Untermenü des Kontextmenüs zu finden.
| Name | Aktion |
|---|---|
| Stapel wechseln | Verschiebt die aktuell ausgewählten Karten in einen anderen Stapel. |
| Fälligkeitsdatum bestimmen | Macht Karten zu Wiederholungskarten und lässt sie zu einem bestimmten Datum fällig werden. Das kann hilfreich sein, um Karten ein paar Tage vor- oder nach hinten zu verlegen, wenn dein Lernrhythmus unterbrochen wurde. Ein Bereich wie 60-90 lässt die Karten in 60 bis 90 Tagen vom aktuellen Tag an fällig werden. Neue Karten erhalten auch ein dementsprechendes Intervall, wohingegen Wiederholungskarten ohne Änderung des Intervalls neu geplant werden, es sei denn es wurde ein ! angehängt. (Beachte, dass die Antwortzeit hierbei nicht aufgezeichnet wird, da diese Aktion auch außerhalb der Lernansicht ausgeführt werden kann und Anki nicht weiß, welche Karte gerade womöglich angezeigt wird.) |
| Vergessen | Platziert die ausgewählten Karten am Ende der Schlange der neuer Karten. Die Wiederholungshistorie wird beibehalten. In 2.1.50+ können optional die ursprüngliche Position wiederhergestellt und die Kartenfehlschläge sowie -wiederholungen zurückgesetzt werden. |
| Position ändern | Ändert die Reihenfolge, in der neue Karten erscheinen. Die aktuelle Position lässt sich durch Aktivieren der Spalte Fällig ermitteln, siehe dazu den Abschnitt über die Tabelle. Wenn du diese Funktion ausführst, während mehrere Karten ausgewählt sind, werden diesen der Reihe nach aufsteigende Nummern zugewiesen. Standardmäßig steigt die Nummer mit jeder Karte um 1, aber das lässt sich mit der Einstellung Schrittweite anpassen. Die Option Position existierender Karten verschieben ermöglicht die Positionierung zwischen existierenden Karten, wodurch jene auseinander geschoben werden. Wenn du z.B. fünf Karten hast und 3, 4 und 5 zwischen 1 und 2 verschieben möchtest, werden die Karten mit dieser Option in die Reihenfolge 1, 3, 4, 5, 2 gebracht. Im Gegensatz dazu erhalten 1 und 2 ohne diese Option dieselbe Positionsnummer (womit unvorhersehbar ist, welche dieser beiden Karten zuerst erscheinen wird). Bitte beachte, dass mit dieser Option jede Karte mit einer höheren Position verändert wird und all diese Karten bei der nächsten Synchroniserung gesendet werden müssen. |
| Aussetzung umschalten | Setzt die ausgewählten Karten aus oder hebt die Aussetzung auf je nachdem, ob die aktuelle Karte ausgesetzt ist oder nicht. |
| Markierung | Schaltet die Markierungen der ausgewählten Karten um. Ob eine Markierung hinzugefügt oder entfernt wird, hängt davon ob, die aktuelle Karte die gewählte Markierung besitzt. |
| Statistik | Zeigt verschiedene Informationen zur aktuellen Karte, wie die Wiederholungshistorie. Siehe den Abschnitt Kartenstatisik für weitere Informationen. |
Gehe zu
Dieses Menü existiert, um Tastenkombinationen zur Verfügung zu stellen, mit denen zu verschiedenen Bereichen der Kartenverwaltung gesprungen und sich in der Tabelle herauf und herunter bewegt werden kann.
Suchen und ersetzen
Mit diesem Fenster kann Text auf Notizen ersetzt werden. Wie oben erwähnt kann es von der Werkzeugleiste oder vom Tabellenkontextmenü aus geöffnet werden.
Das erste Eingabefeld ist für den zu ersetzenden Text, das zweite für den Ersatz. Darunter befindet sich ein Aufklappmenü, mit dem sich bestimmen lässt, wo Anki nach dem zu ersetzenden Text suchen soll: in den Schlagwörtern einer Notiz (benötigt Anki 2.1.45+), in allen Feldern oder nur in einem bestimmten Feld (es werden nur Felder aufgelistet, die zu einer ausgewählten Notiz gehören).
Standardmäßig wird nur auf ausgewählten Notizen ersetzt. Wenn du diese Beschräknung aufheben willst, kannst du den Haken bei "Nur ausgewählte Notizen" entfernen (erfordert Anki 2.1.45+).
Die Option für reguläre Ausdrücke ermöglicht komplexe Ersetzungen. Nimm z.B. an, in einem Feld befände sich der folgende Text:
<img src="bild.jpg" />
Wir benutzen die folgenden Einstellungen:
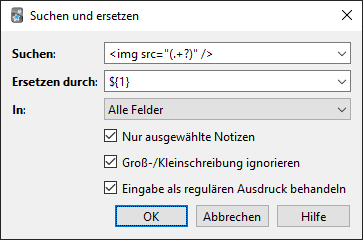
(Beachte, dass du in Anki-Versionen vor 2.1.28 ${1} durch \1 ersetzen müsstest.)
Dann wird der angenommene Feldinhalt geändert zu:
bild.jpg
Eine vollständige Einführung in reguläre Ausdrücke würde den Rahmen dieser Anleitung sprengen. Es gibt zahlreiche Leitfäden zur Syntax im Internet:
- Für Anki 2.1.28+ siehe https://docs.rs/regex/latest/regex/index.html#syntax.
- Für ältere Versionen siehe http://docs.python.org/library/re.html.
Duplikate suchen
Mit der Funktion Notizen > Duplikate suchen lassen sich Notizen mit demselben Inhalt finden. Das Fenster zeigt eine Liste der Felder aller Notitzypen in deiner Sammlung. Wenn du Notizen finden wolltest, die im Feld Rückseite übereinstimmen, würdest du dieses Feld aus der Liste auswählen und auf Suchen klicken.
Standardmäßig wird in allen Notiztypen gesucht, die das angegebene Feld besitzen. Damit unterscheidet sich die Funktion von der Duplikatsprüfung beim Eingeben neuer Notizen, die auf einen Notiztyp beschränkt ist.
Das Eingabefeld Optionaler Filter ermöglicht es, die Suche einzugrenzen. Wenn du nur in den Notiztypen "Französischvokabeln" und "Französische Verben" nach Duplikaten suchen wolltest, würdest du hier
"note:french vocab" OR "note:french verbs"
eingeben. Um nur in einem bestimmten Stapel zu suchen, könntest du
"deck:Mein Stapel"
benutzen. Die Suchsyntax ist dieselbe wie bei der Suche in der Kartenverwaltung, siehe Suchen.
Du kannst die Links in der Suchergebnisliste anklicken, um die Notizen dieser Gruppe
anzeigen zu lassen. Wenn die Suche sehr viele Duplikate zutage fördert, möchtest
du vielleicht lieber die Schalfläche Duplikate verschlagworten benutzen, wodurch
allen gefundenen Notizen das Schlagwort "doppelt" zugewiesen wird.
Anschließend kannst du in der Kartenverwaltung danach suchen (tag:doppelt)
und alle Duplikate von einem Fenster aus behandeln.
Filtered Decks & Cramming
- Custom Study
- Home Decks
- Creating Manually
- Order
- Steps & Returning
- Counts
- Due Reviews
- Reviewing Ahead
- Rescheduling
- Catching Up
When you study a regular deck in Anki, only a limited number of cards are shown: the cards Anki thinks you are about to forget, and a daily limit of new cards. This is generally useful, as it ensures you don't spend more time studying than necessary. But sometimes it can be useful to step outside of these normal limits, such as when you need to review for a test, focus on particular material, and so on. To make this possible, Anki provides a different type of deck called a 'filtered deck'.
Filtered decks offer a lot of possibilities. They can be used for previewing cards, cramming cards before a test, studying particular tags, catching up on a backlog with a particular sort order, reviewing ahead of schedule, going over the day's failed cards, and more.
Custom Study
The easiest way to create a filtered deck is with the Custom Study button, which appears at the bottom of the screen when you click on a deck. It offers some convenient preset filters for common tasks like reviewing the cards that you have failed that day. It will create a filtered deck called "Custom Study Session" and automatically open it for you.
If an existing "Custom Study Session" deck exists, it will be emptied before a new one is created. If you wish to keep a custom study deck, you can rename it from the deck list.
Here is a summary of each of the options:
Increase today's new card limit
Add more new cards to the deck you are currently studying. Note that
unlike other options, this does 'not' create a new filtered deck, it
modifies the existing deck.
Increase today's review card limit
If not all reviews due today were shown because of the daily review limit,
this option allows you to show more of them. As with the new cards
option, this modifies the existing deck.
Review forgotten cards
Show all the cards, for which you've answered Again (1) within the number of days
you specify.
Review ahead
Show cards that will be due in the near future (the number of days you
specify). This is useful for working through some of your older cards
before a vacation, but it will not help with cards you have learnt
recently. Please see the reviewing ahead section
below for more info.
Preview new cards
Show cards that you have recently added, without converting them to
review cards as they are answered.
Study by card state or tag
Select a certain number of cards from the current deck to study. You can
choose to select new cards only, due cards only, or all cards; after you
click "Choose Tags", you can also limit the selected cards by tags. If
you wish to see all the cards in the deck (for instance, to study before
a big test), you can set the number of cards to more than the number of
cards in the deck.
Home Decks
When a card is moved to a filtered deck, it retains a link to the deck, from which it came. That previous deck is said to be the card's 'home deck'.
Cards automatically return to their home deck after they are studied in the filtered deck. This can be after a single review, or after multiple reviews, depending on your settings.
It is also possible to move all cards back to their home decks at once:
-
The "Empty" button in the study overview moves all cards in the filtered deck back to their home deck, but does not delete the empty filtered deck. This can be useful if you want to fill it again later (using the Rebuild button).
-
Deleting a filtered deck does the same thing as "Empty" does, but also removes the emptied deck from the deck list. No cards are deleted when you delete a filtered deck.
In the old scheduler, if you create, rebuild, empty, or delete a filtered deck while cards are still in learning, they will be turned back into new cards. In the case of failed reviews in relearning, any remaining relearning steps will be skipped. This was fixed in the v2 scheduler so cards are no longer reset.
Creating Manually
Advanced users can create filtered decks with arbitrary search strings (or 'filters'), instead of relying on the preset filters. To create a filtered deck manually, choose Create Filtered Deck from the Tools menu.
When you click the Build button, Anki finds cards that match the settings you specified, and temporarily moves them from their existing decks into your new filtered deck for study.
If you wish to fetch cards again using the same filter options (for instance, if you want to study all cards with a particular tag every day), you can use the Rebuild button at the bottom of the deck's overview screen.
The search area controls what cards Anki will gather. All of the searches possible in the browser are also possible for filtered decks, such as limiting to tags, finding cards forgotten a certain number of times, and so on. Please see the searching section of the manual for more information on the different possibilities.
Filtered decks cannot pull in cards that are suspended, buried, or already in a different filtered deck. And if you are using the v1 scheduler, cards in (re)learning will not be included either. For this reason, a search in the browser may reveal cards that do not end up in the filtered deck.
The limit option controls how many cards will be gathered into the deck. The order you select controls both the order cards are gathered in, and the order they will be reviewed in. If you select "most lapses" and a limit of 20 for example, then Anki will show you only the 20 most lapsed cards.
Order
The "cards selected by" option controls the order that cards will appear in. If the maximum number of cards you select is lower than the number of cards that match the filter criteria, Anki will exclude the cards at the end of this sorted list first.
Oldest seen first
Display those cards first, that you haven't seen in reviews for the longest
time.
Random
Randomize the order of all cards that match the filter criteria (use no
set order).
Increasing intervals
Display cards that have the smallest interval first.
Decreasing intervals
Display cards that have the largest interval first.
Most lapses
Display those cards first, that you have failed the most times.
Order added
Display cards that you added first (i.e. those cards that have the earliest
creation date).
Order due
Display cards with the earliest due date first.
Latest added first
Display those cards first, that you have most recently added to the deck.
(This is the opposite of 'Order added'.)
Relative overdueness
Display those cards first, that are most overdue in relation to their current
interval (for instance, a card with a current interval of 5 days
overdue by 2 days displays before a card with a current interval of 5
years overdue by a week). This is useful if you have a large backlog
that may take some time to get through and you want to review those cards
first, that you are most in danger of forgetting.
Steps & Returning
Please see the section on learning as a reminder of how steps work.
By default, Anki will use the steps of a card’s home deck. If a new card would normally be reviewed twice when being learnt, the same thing will happen when you study it in a filtered deck.
Cards return to their home deck when (re)learning is complete. Thus if you have 3 learning steps, a new card will return to its home deck upon three presses of "Good" or a single press of "Easy".
v1 and v2 scheduler
In the v1 scheduler, the custom steps option allows you to override the home deck’s steps and provide your own steps instead. The provided steps apply to both cards being learnt, lapsed reviews, and reviews ahead of time. Please note, however, that from the v2 scheduler filtered decks no longer support custom steps.
v3 scheduler
Filtered decks with rescheduling disabled show 4 buttons in the v3 scheduler - the provided delay applies to the Again button, and Hard/Good will use 1.5x and 2x the provided delay. Easy will remove the card.
Counts
In a filtered deck, reviews that were already due are displayed in the review count as normal. Learning cards and non-due reviews are counted in the new card count, due to how the underlying implementation works. Reviews that were not due are not scheduled like new cards however: Anki uses a special algorithm that takes into account how close they were to their normal due time when reviewed.
Due Reviews
If the filtered deck includes cards that were due for review, they will be shown like they would have been in their original deck: they appear in the review card count at the bottom of the screen, and there are four choices for how well you remembered. Upon a correct answer, the card will be moved back to its home deck, and its next delay adjusted using the home deck's settings. If you forget the card, it will be shown according to the relearning steps defined in the home deck.
Reviewing Ahead
If your search included cards that are not due, Anki will show the reviews ahead of time.
Anki uses a special algorithm for these reviews that takes into account how early you are reviewing. If the cards were almost due to be shown, they will be given a new delay similar to what they would have received if you had reviewed them on time. If the cards are reviewed soon after they were scheduled however, their new delay will be similar to their previous delay. This calculation works on a sliding scale.
Because reviewing a card shortly after it is scheduled has little impact on scheduling (e.g. a card due tomorrow with a one day interval will remain due tomorrow if reviewed early), the "review ahead" custom study setting is not appropriate for repeated use. If used to go through a week's worth of cards before a trip, the mature cards will be rescheduled into the future and the new cards will remain at small intervals, because you don't know them well enough for them to be rescheduled further. If you review ahead again the next day, all you'll end up doing is going through those same new cards again, to little benefit.
Early reviews are included in the new card count rather than the review count, and will be shown according to the number of relearning steps defined in the home deck (unless you have provided custom steps). This means that if you have customized the number of relearning steps in the home deck, the non-due card may be shown more than once.
If you have multiple steps, Anki will only consider the first answer when deciding the next delay, and like relearning in normal decks, "Good" and "Easy" differ only in the step change and not the resulting delay.
Rescheduling
By default, Anki will return cards to their home decks with altered scheduling, based on your performance in the filtered deck. There is a reschedule cards based on my answers option available which alters this behaviour.
From the v2 scheduler, when rescheduling is disabled, cards are shown in a simple "preview mode", and when they are returned to the original deck, they are returned exactly as they started.
In the v1 scheduler, cards were presented more similarly to how they normally are, but studying cards had side effects, and the original position of new cards was lost when you studied them.
Catching Up
Filtered decks can be useful for catching up when you've fallen behind in your reviews. One Anki user describes the way they use the filtered decks to catch up as follows:
I did this for a backlog of 800 cards with filtered subdecks. Worked
very well for me.

Just Due filter with: "is:due prop:due>-7"

Over Due filter with: "is:due prop:due<=-7"

The Just Due deck will then contain cards that became due in the past
week. That's the deck you should study every day as it gets the cards
that become due regularly. With this you can study as if there weren't
any backlog.

The Over Due deck will contain your backlog — cards which you didn't
study in time. You can study them the same way you would study new
cards. They go back into the regular cards, so the number of overdue
will never grow as long as you keep your Just Due deck in check.

How long it takes depends on how many overdue cards you study each day
in addition to the ones that become due regularly. You can still motor
through them when you feel like it - or you can do a specific number per
day like you would for new cards. Up to you.
Suchen
- Einfache Suchen
- Eingrenzung auf Felder
- Schlagwörter, Stapel, Karten- und Notiztypen
- Akzente / kombinierende Zeichen ignorieren
- Reguläre Ausdrücke
- Kartenstatus
- Karteneigenschaften
- Jüngste Ereignisse
- Nach Sonderzeichen suchen
- Kennnummern
Ankis Kartenverwaltung und die Auswahlstapelfunktion benutzen die gleiche Methode, um nach bestimmten Karten oder Notizen zu suchen.
Einfache Suchen
Wenn du Text in die Suchleiste eingibst, findet Anki passende Notizen und zeigt ihre Karten. Anki sucht in allen Feldern der Notizen, aber nicht in ihren Schlagwörtern (siehe dafür weiter unten). Ein paar Beispiele:
hund
Sucht nach "Hund", findet auch Wörter wie "hundert" und "Wachhund".
hund katze
Findet Notizen, die sowohl "Hund" als auch "Katze" beinhalten, z.B. "wie Hund und
Katze".
hund or katze
Findet Notizen mit "Hund" oder (Englisch "or") "Katze".
hund (katze or maus)
Findet Notizen mit "Hund" und "Katze" oder mit "Hund" und "Maus".
-katze
Findet Notizen ohne das Wort "Katze".
-katze -maus
Findet Notizen, die weder "Katze" noch "Maus" beinhalten.
-(katze or maus)
Wie darüber.
"ein hund"
Findet Notizen mit der exakten Buchstabenfolge "ein Hund" wie "mein Hund", aber
nicht "Hund ein" oder "einhundert".
-"ein hund"
Findet Notizen ohne den exakten Ausdruck "ein Hund"
h_nd
Findet Notizen mit "h", dann einem beliebigen Buchstaben und dann "nd", z.B.
"Hund" und "Hand".
h*nd
Findet Notizen mit "h", dann beliebigen Buchstaben und dann "nd" wie "hnd",
"Hund", "hängend" usw.
w:hund
Sucht nach "Hund" umgeben von Wortgrenzen, z.B. "Hund, der", aber nicht "hundert" oder
"Wachhund". Benötigt Anki 2.1.24+ oder AnkiMobile 2.1.61+. Beachte, dass Formatierungsänderungen
als Wortgrenzen interpretiert werden. Z.B. findet w:Bei den Text Beispiel.
w:hund*
Findet "Hund" und "hundert", aber nicht "Wachhund".
w:*hund
Findet "Hund" und "Wachhund", aber nicht "hundert".
An diesen Beispielen lässt sich Folgendes beobachten:
-
Suchbegriffe werden durch Leerzeichen getrennt.
-
Wenn mehrere Suchebegriffe angegeben werden, sucht Anki nach Notizen mit ihnen allen - ein implizites
and("und") wird zwischen je zwei Begriffen eingefügt. In Anki 2.1.24+ und AnkiMobile 2.0.60+ kannst du das explizit angeben, wenn du möchtest (hund and katzeist das gleiche wiehund katze), aber ältere Anki-Versionen werdenandeinfach wie einen weiteren Suchbegriff behandeln. -
Du kannst
orbenutzen, wenn nur einer von zwei Suchbegriffen passen muss. -
Du kannst
-, ein Minus, voranstellen, um Notizen zu finden, die nicht passen. -
Du kannst Suchbegriffe gruppieren, indem du sie einklammerst, wie im Beispiel
hund (katze or maus). Das ist wichtig, wenn duorundandkombinierst. Das Beispiel findet Notizen mit "Hund Katze" oder "Hund Maus", aber ohne die Klammern würde es Notizen mit "Hund Katze" oder "Maus" finden. -
Anki kann innerhalb Formatierung nur im eingestellten Sortierfeld suchen. Wenn du in einem Feld z.B. "Beispiel" schreibst, wird Anki diese Notiz bei einer Suche nach
beispielnicht finden, es sei denn, es handelt sich um das Sortierfeld. Ändert sich die Formatierung eines Wortes nicht zwischendrin, kann Anki dieses Wort in jedem beliebigen Feld finden. -
Einfache Suchen ignorieren Groß-/Kleinschreibung von lateinischen Buchstaben: a-z impliziert A-Z und umgekehrt. Für andere Buchstaben wie Umlaute gilt das nicht:
Ölfindet keine Notizen mit "ölig". Um auch hier Groß-/Kleinschreibung zu ignorieren, können die Suchen nach Wortgrenzen oder regulären Ausdrücken genutzt werden (w:,re:).
Eingrenzung auf Felder
Du kannst Anki auch nur in einem bestimmten Feld suchen lassen. Anders als die Suchen oben erfordert diese Variante eine exakte Übereinstimmung.
vorderseite:hund
Findet Notizen mit einem Feld Vorderseite, das genau "Hund" enthält. Ein Feld mit Inhalt "ein Hund"
würde nicht gefunden werden.
"Mein Tier:ein Hund"
Findet Notizen, wo das Feld "Mein Tier" genau "ein Hund" enthält. Die Anführungszeichen sind
erforderlich, siehe unten.
vorderseite:*hund*
Findet Notizen mit einem Feld Vorderseite, in dem irgendwo "Hund" vorkommt.
vorderseite:
Findet Notizen mit einem leeren Feld Vorderseite.
vorderseite:_*
Findet Notizen mit einem nicht leeren Feld Vorderseite.
vorderseite:*
Findet Notizen mit einem Feld Vorderseite, egal ob leer oder nicht.
vor*:text
Findet Notizen mit einem Feld, das mit mit "Vor" beginnt. Benötigt Anki 2.1.24+ oder AnkiMobile 2.1.60+.
Schlagwörter, Stapel, Karten- und Notiztypen
tag:tier
Findet Notizen mit dem Schlagwort "Tier" oder einem Unterschlagwort wie "Tier::Säugetier".
tag:none
Findet Notizen ohne Schlagwörter.
tag:ti*
Findet Notizen mit Schlagwörtern, die mit "Ti" beginnen.
deck:französisch
Findet Karten in dem Stapel Französisch oder in einem Unterstapel wie Französisch::Vokabeln.
deck:französisch -deck:französisch::*
Findet Karten in dem Stapel Französisch, aber nicht in seinen Unterstapel.
deck:"vokabeln französisch"
Für Stapelnamen mit Leerzeichen.
"deck:vokabeln französisch"
Alternative zu oben.
deck:filtered
Nur Auswahlstapel.
-deck:filtered
Nur reguläre Stapel.
card:vorwärts
Findet Karten mit dem Kartentyp Vorwärts.
card:1
Findet Karten mit Kartentyp Nummer 1. Um z.B. die Karte mit dem zweiten Lückentext einer Notiz zu
finden, könntest du card:2 benutzen.
note:einfach
Findet Notizen mit dem Notiztyp Einfach.
Akzente / kombinierende Zeichen ignorieren
Benötigt Anki 2.1.24+ oder AnkiMobile 2.0.60+.
Du kannst nc: benutzen, um kombinierende Zeichen zu ignorieren (für Englisch "no combining").
Beispiel:
nc:uber
Findet Notizen mit "uber", "über", "Über" usw.
nc:は
Findet "は", "ば" und "ぱ".
Diese Suchen sind langsamer als reguläre Suchen.
Reguläre Ausdrücke
Anki 2.1.24+ und AnkiMobile 2.0.60+ unterstützen die Suche mit regulären Ausdrücken, einem standardisierten und mächtigen Verfahren, um Text zu durchsuchen.
Beginne eine Suche dafür mit re:. Zur Erleichterung wird Anki das Folgende als Roheingaben
betrachten, also beachte die dort aufgelisteten Regeln.
Beispiele:
"re:(k|irgend).*ein"
Findet Notizen, die "k" oder "irgend" beinhalten, dann 0 oder mehr beliebige Zeichen und schließlich "ein".
re:\d{3}
Findet Notizen mit drei Zahlen hintereinander.
Reguläre Ausdrücke können ebenfalls auf ein Feld eingegrenzt werden. Bitte beachte, dass das anders als normale Suchen keine exakte Übereinstimmung erfordert. Beispiel:
vorderseite:re:[a-c]1
Findet "a1", "b1" und "c1", auch groß geschrieben, irgendwo in einem Feld Vorderseite.
front:re:^[a-c]1$
Wie oben, erfordert aber, dass vor und nach "a1", "b1" bzw. "c1" kein weiterer Text steht.
Seit Anki 2.1.50 können reguläre Ausdrücke auch für Schlagwörter benutzt werden:
tag:re:^vorfahr$
Findet Notizen mit dem exakten Schlagwort "Vorfahr", ohne Unterschlagwörter wie "Vorfahr::Nachfahre"
zu berücksichtigen.
"tag:re:lektion-(1[7-9]|2[0-5])"
Findet Notizen mit den Schlagwörtern "Lektion-17" bis "Lektion-25".
Mehr über reguläre Ausdrücke findest du z.B. hier: https://www.ionos.de/digitalguide/websites/webseiten-erstellen/regulaere-ausdruecke/
Ein paar Anmerkungen:
- Standardmäßig ignoriert die Suche Groß-/Kleinschreibung. Durch das Voranstellen von
(?-i)kann das geändert werden. - Manche Zeichen wie Zeilenumbrüche oder Leerzeichen werden in HTML anders dargestellt. Du kannst den HTML-Editor des Editor-Fensters benutzen, um das zugrundeliegende HTML zu sehen.
- Für Details zu den von Anki unterstützten regulären Ausdrücken, siehe die Dokumentation des Crates regex: https://docs.rs/regex/1.3.9/regex/#syntax (Englisch)
Kartenstatus
is:due
Fällige Wiederholungs- und Lernkarten.
is:new
Neue Karten.
is:learn
Lernkarten.
is:review
Wiederholungskarten (fällig oder nicht), auch gescheiterte.
is:suspended
Karten, die manuell ausgesetzt wurden.
is:buried
Karten, die entweder automatisch oder manuell zurückgestellt wurden.
Beachte, dass der neue Zeitplaner zwischen manuell und automatisch zurückgestellten Karten unterscheidet, sodass du die einen ohne die anderen wiedereinstellen kannst.
Karten, deren Wiederholung gescheitert ist, fallen in mehrere dieser Kategorien, weshalb es nützlich sein kann, Kombinationen von ihnen zu verwenden, um genauere Ergebnisse zu erzielen:
is:learn is:review
Gescheiterte Karten, die in der Wiedererlernphase sind.
-is:learn is:review
Wiederholungskarten, aber keine gescheiterten.
is:learn -is:review
Karten, die erstmalig gelernt werden.
flag:1
Karten mit der roten Markierung.
flag:2
Karten mit der orangen Markierung.
flag:3
Karten mit der grünen Markierung.
flag:4
Karten mit der blauen Markierung.
flag:5
Karten mit der rosa Markierung.
flag:6
Karten mit der türkisen Markierung.
flag:7
Karten mit der lilanen Markierung.
Karteneigenschaften
prop:ivl>=10
Karten mit einem Intervall von 10 Tagen oder mehr.
prop:due=1
Karten, die morgen fällig sind.
prop:due=-1
Gestern fällige Karten, die noch nicht beantwortet wurden.
prop:due>-1 prop:due<1
Karten, die zwischen gestern und morgen fällig sind.
prop:reps<10
Karten, die seltener als zehn mal beantwortet wurden.
prop:lapses>3
Karten, die öfter als drei mal gescheitert sind.
prop:ease!=2.5
Karten, die schwieriger oder leichter sind als der Standardwert.
Jüngste Ereignisse
Hinzugefügt
added:1
Heute hinzugefügte Karten.
added:7
In der letzten Woche hinzugefügte Karten.
Dieses Kriterium prüft das Datum der Karten-, nicht der Notizerstellung. Daher werden kürzlich erstellte Karten eingeschlossen, auch wenn ihre Notizen schon vor langer Zeit hinzugefügt wurden.
Bearbeitet
edited:3
Karten, deren Notiztext in den letzten drei Tagen hinzugefügt oder bearbeitet wurde.
Anki 2.1.28+ / AnkiMobile 2.0.64+ wird benötigt.
Beantwortet
rated:1
Heute beantwortete Karten.
rated:1:2
Heute mit Schwer (2) beantwortete Karten.
rated:7:1
In der letzten Woche mit Nochmal (1) beantwortete Karten.
rated:31:4
Im letzten Monat mit Einfach (4) beantwortete Karten.
Vor Version 2.1.39 war diese Suche auf 31 Tage begrenzt.
Erstmalig beantwortet
Mit Version 2.1.45+ lässt sich auch gezielt nach der allerersten Beantwortung suchen:
introduced:1
Karten, die heute das erste Mal beantwortet wurden.
introduced:365
Karten, die das erste Mal in den letzten 365 Tagen beantwortet wurden.
Nach Sonderzeichen suchen
Dieser Abschnitt wurde für Anki 2.1.36+ geschrieben - in früheren Versionen war das Maskieren von Sonderzeichen in bestimmten Fällen nicht möglich.
Wie bereits gesehen haben manche Zeichen wie *, _ oder " eine besondere Bedeutung in Anki.
Wenn du diese Zeichen mit einer Suche ausfindig machen willst, musst du Anki anweisen, sie nicht
besonders zu behandeln.
-
Leerzeichen
Um etwas mit Leerzeichen zu finden, muss der"gesamte Ausdruck"in Anführungszeichen gesetzt werden. Bei einer Doppelpunktsuche kann auch nur derTeil:"nach dem Doppelpunkt"umfasst werden, solange der Teil vor dem Doppelpunkt keine Leerzeichen enthält. -
",*und_
Stell diesen Zeichen einen umgekehrten Schrägstrich voran, um nach ihnen zu suchen. Z.B. findet_ein einzelnes beliebiges Zeichen, aber\_nur den Unterstrich. -
\
Da der umgekehrte Schrägstrich benutzt wird, um Zeichen ihre besondere Bedeutung zu nehmen, wird auch er gesondert behandelt. Um nach dem Zeichen an sich zu suchen, kannst du\\statt\benutzen. -
(und)
Um nach Klammern zu suchen, kann entweder der gesamte Ausdruck in Anführungszeichen gesetzt und/oder ein umgekehrter Schrägstrich verwendet werden. D.h."ein(Wort)",ein\(Wort\)und"ein\(Wort\)"bedeuten alle das Gleiche, aberein(Wort)nicht. -
-
Einen Ausdruck mit-zu beginnen, kehrt ihn normalerweise um:-hundfindet alles außer "Hund". Wenn du einen Bindestrich selbst finden willst, kannst du entweder einen umgekehrten Schrägstrich verwenden oder den gesamten Ausdruck in Anführungszeichen setzen:\-.-oder"-.-". -
:
Doppelpunkte müssen maskiert werden, außer es steht bereits davor ein unmaskierter Doppelpunkt.w:e:gist also eine Wortgrenzensuche nache:g,w\:e\:gfindet buchstäblichw:e:gundw\:e:gsucht in einem Feldw:enachg(siehe Eingrenzung auf Felder). -
&,<und>
&,<und>werden beim Suchen als HTML behandelt, weshalb Suchen mit ihnen nicht wie erwartet funktionieren. Du kannst nach ihnen aber mithilfe ihrer HTML-Entität-Namen suchen (&für&,<für<und>für>). Z.B. findet<&text>Notizen mit<&text>in einem Feld.
Roheingaben
Nach bestimmten Schlüsselwörtern (wie re:) wird folgender Text als Roheingabe behandelt.
Das bedeutet, die oben aufgelisteten Sonderzeichen verlieren zum Großteil ihre besondere Bedeutung.
Nur ein Minimum an Maskierung ist notwendig, um Mehrdeutigkeit zu vermeiden:
-
"muss maskiert werden. -
Leerzeichen und unmaskierte Klammern erfordern, dass der Ausdruck in Anführungszeichen gesetzt wird.
-
Ein Ausdruck darf nicht in einer ungeraden Anzahl von umgekehrten Schrägstrichen enden.
Kennnummern
nid:123
Die Notiz mit Kennnummer 123.
cid:123,456,789
Die Karten mit Kennnummern 123, 456 oder 789.
Notiz- und Kartenkennnummern werden in der Kartenstatistik angezeigt. Diese Suchen können bei der Add-on-Entwicklung oder anderen datenbanknahen Arbeiten nützlich sein.
Importing
Anki can import text files, packaged Anki decks created by the export feature, Mnemosyne 2.0 .db files, and SuperMemo .xml files. To import a file, click the File menu and then "Import".
Text Files
Any plain text file that contains fields separated by commas, semicolons or tabs can be imported into Anki, provided some conditions are met.
-
The files must be plain text (myfile.txt). Other formats like myfile.xls, myfile.rtf, myfile.doc must be saved as a plain text file first.
-
The files must be in UTF-8 format (see below).
-
Anki determines the number of fields in the file by looking at the first (non-commented) line. Any lines in the file which have a different number of fields will be ignored.
-
The first line also defines the separating character – if Anki finds a ';' on the first line it will use that, if it finds a comma it’ll use that, etc.
Fields in your text file can be mapped to any field in your notes, including the tags field. You can choose which field in the text file corresponds to which field in the note when you import.
When you import a text file, you can choose what deck to put the cards in. Keep in mind that if you have the deck override option set for one or more of your templates, the cards will go to that deck rather than the one you’ve selected.
This is an example of a valid file:
foo bar; bar baz; baz quux
apple; banana; grape
There are two ways to include newlines in fields.
Escape the multi-lines by placing the contents of the field in quotation marks:
hello; "this is
a two line answer"
two; this is a one line one
Because quotes are used to mark where a field begins and ends, if you wish to include them inside your field, you need to replace a single doublequote with two doublequotes to "escape" them from the regular handling, like so:
field one;"field two with ""escaped quotes"" inside it"
When you use a spreadsheet program like Libreoffice to create the CSV file for you, it will automatically take care of escaping double quotes.
Use HTML new lines:
hello; this is<br>a two line answer
two; this is a one line one
You need to turn on the "allow HTML in fields" checkbox in the import dialog for HTML newlines to work.
Escaped multi-lines will not work correctly if you are using cloze deletions that span multiple lines. In this case, please use HTML newlines instead.
You can also include tags in another field and select it as a tags field in the import dialog:
first field; second field; tags
This is an example of a valid file where the first line is ignored (#):
# this is a comment and is ignored
foo bar; bar baz; baz quux
field1; field2; field3
Spreadsheets and UTF-8
If you have non-Latin characters in your file (such as accents, Japanese and so on), Anki expects files to be saved in a 'UTF-8 encoding'. The easiest way to do this is to use the free LibreOffice spreadsheet program instead of Excel to edit your file, as it supports UTF-8 easily, and also exports multi-line content properly, unlike Excel. If you wish to keep using Excel, please see this forum post for more information.
To save your spreadsheet to a file Anki can read with LibreOffice, go to File>Save As, and then select CSV for the type of file. After accepting the default options, LibreOffice will save the file and you can then import the saved file into Anki.
HTML
Anki can treat text imported from text files as HTML (the language used for web pages). This means that text with bold, italics and other formatting can be exported to a text file and imported again. If you want to include HTML formatting, you can check the "allow HTML in fields" checkbox when importing. You may wish to turn this off if you’re trying to import cards whose content contains angle brackets or other HTML syntax.
If you wish to use HTML for formatting your file but also wish to include angle brackets or ampersands, you may use the following replacements:
| Character | Replacement |
|---|---|
| < | < |
| > | > |
| & | & |
Importing Media
If you want to include audio and pictures from a text file import, copy the files into the collection.media folder. Do not put subdirectories in the media folder, or some features will not work.
After you’ve copied the files, change one of the fields in your text file as follows.
<img src="myimage.jpg">
or
[sound:myaudio.mp3]
Alternatively, you can use the find and replace feature in the browse screen to update all the fields at once. If each field contains text like "myaudio", and you wish to make it play a sound, you’d search for (.*) and replace it with "[sound:\1.mp3]", with the 'regular expressions' option enabled.
When importing a text file with these references, you must make sure to enable the "Allow HTML" option.
You might be tempted to do this in a template, like:
<img src="{{field name}}">
Anki doesn’t support this for two reasons: searching for used media is expensive, as each card has to be rendered, and such functionality isn’t obvious to shared deck users. Please use the find & replace technique instead.
Bulk Media
Another option for importing large amounts of media at once is to use the media import add-on. This add-on will automatically create notes for all files in a folder you select, with the filenames on the front (minus the file extension, so if you have a file named apple.jpg, the front would say 'apple') and the images or audio on the back. If you would like a different arrangement of media and filenames, you can change the note type of the created cards afterwards.
Adding Tags
If you want to add 'tag1' and 'tag2' to every line you’re importing, add the following to the top of the text file:
tags:tag1 tag2
Duplicates and Updating
When importing text files, Anki uses the first field to determine if a note is unique. By default, if the file you are importing has a first field that matches one of the existing notes in your collection and that existing note is the same type as the type you’re importing, the existing note’s other fields will be updated based on content of the imported file. A drop-down box in the import screen allows you to change this behaviour, to either ignore duplicates completely, or import them as new notes instead of updating existing ones.
The duplicate check is done for your 'entire collection', not just in the current deck. If Anki is indicating that notes have not changed when you expected them to be imported, please check that the notes are not already in your collection somewhere.
If you have updating turned on and older versions of the notes you’re importing are already in your collection, they will be updated in place (in their current decks) rather than being moved to the deck you have set in the import dialog. If notes are updated in place, the existing scheduling information on all their cards will be preserved.
For info on how duplicates are handled in .apkg files, please see the Deck Packages section.
File Headers
Anki 2.1.54+ supports certain headers that can be included in the text file to
make importing more powerful or convenient. They consist of #key:value pairs
and must be listed in separate lines at the top of the file, though the tags line
may precede them. Since header lines start with the comment character #, earlier
Anki clients will just ignore them.
You must enable the new importing option in the preferences screen to use this on 2.1.54. On 2.1.55, the new importing path is the default.
| Key | Allowed Values | Behaviour |
|---|---|---|
separator | Comma, Semicolon, Tab, Space, Pipe, Colon, or the according literal characters | Determines the field separator. |
html | true, false | Determines whether the file is treated as HTML. |
tags | List of tags, separated by spaces | Same as the old syntax. |
columns | List of names, separated by the previously set separator | Determines the number of columns and shows their given names when importing. |
notetype | Notetype name or id | Presets the notetype, if it exists. |
deck | Deck name or id | Presets the deck, if it exists. |
notetype column | 1, 2, 3, ... | Determines which column contains the notetype name or id of each note, see Notetype Column. |
deck column | 1, 2, 3, ... | Determines which column contains the deck name or id of each note, see Deck Column. |
tags column | 1, 2, 3, ... | Determines which column contains the tags of each note. |
guid column | 1, 2, 3, ... | Determines which column contains the GUID of each note, see GUID Column. |
Some headers have further implications.
Notetype Column
Usually, all notes from a file will be mapped to a single notetype, and you may choose which column should be mapped to which field of that notetype.
That changes, if there is a column with notetype names or ids. This allows to import notes with different notetypes, and their fields will be mapped implicitly: The first regular column is used for the first field of any note regardless of its notetype, the second regular column for the second field, and so on. A 'regular column' here being a column that does not contain special information like decks, tags, notetypes or GUIDs.
Deck Column
Usually, any new cards created as a result of importing a text file will be placed in a single deck of your choice. If the file contains a deck column, however, new cards of a note will be placed in its specified deck instead. If the deck does not exist, a deck with the given name will be created.
GUID Column
GUID stands for Globally Unique Identifier and is supposed to not only distinguish a note from other notes in your collection, but even from other users' notes.
Remember that Anki looks out for duplicates by comparing the first field of a note. This may lead to a note being updated with another note which you would consider to be distinct, or a new note being created although it's already in your collection, just because you've modified its first field.
You can specify a GUID to have Anki use this instead when looking for duplicates. If an existing note with the provided GUID is not found, and a new note is created with the provided GUID.
Exporting
Exporting allows you to save part of your collection as a text file or packaged Anki deck. To export, click the File menu and choose 'Export'.
Text Files
If you choose "Notes in Plain Text", Anki will write the contents of the notes into a text file. Each field is separated by a tab. If you edit the resulting file and don't modify the first field, you can later import that file back into Anki and Anki will update your notes based on your edits, provided you import back into the same note type.
If you find yourself needing to edit the first field as well, you'll need to change the format of your note type so that the first field is an ID number rather than actual text. (You can install the Add note id add-on to make this easier.)
In order for formatting to be preserved when you import text back in, the text is exported with all the HTML formatting embedded in it.
Packaged Decks
A 'packaged deck' consists of cards, notes, note types, and any sounds or images bundled up into a file ending with .apkg or .colpkg. You can use packaged decks to transfer cards between people, or for backing up parts of your collection.
There are two different kinds of packaged decks.
Collection (.colpkg)
When you export all decks with scheduling included, this is called a 'collection package'. Anki will copy your entire collection into a file ending in .colpkg, and place it on your desktop. A collection package is used to back up your collection, or copy it to another device.
Collection packages created with previous versions of Anki were called collection.apkg.
When this file is later imported, Anki will delete all the current cards in the collection, and replace the collection with the items in the file. This is useful for copying your collection back and forth between devices.
Existing media in your collection is not deleted when you import a collection package. To delete unused media, use Tools>Check Media.
If you choose Anki 2.1.50+ Collection Package format, imports and exports will be faster, and media files will be compressed, but the resulting .colpkg file will not be readable by older Anki clients.
Deck (.apkg)
Deck packages contain a single deck (and any child decks it may have). They have a filename ending with .apkg, but a filename other than collection.apkg. When you import a deck package, Anki will add the contents into your collection, rather than overwriting your collection.
If some notes in the deck package have previously been imported, Anki will keep the version with the most recent modification time. So if you download an updated deck, the edits that have been made in the updated version will be made in your collection as well, but if you re-import an unchanged deck after making edits in your collection, the changes in your collection will be kept.
If you choose not to include scheduling information, Anki will assume that you are sharing the deck with other people, and will remove marked and leech tags so that they will have a clean copy of it.
Backups
Automatic backups
Anki will create automatic backups of your card data. These include the text on your cards and your scheduling information, but do not include sounds or image files.
Automatic backups can be useful to recover from mistakes, but you should not rely solely on them. Because they are stored on your local device, they will not protect you if your device breaks or is stolen. We recommend you combine them with manual backups.
Restoring
To restore from an automatic backup:
- Open Anki, and choose Switch Profile from the File menu.
- Click on the "Open Backup" button.
- Select the backup you wish to restore from.
When restoring from a backup, any changes made since the backup was created will be lost.
Anki disables automatic syncing and backups when you restore from a backup. Once you're happy that you've restored the correct backup, close and re-open Anki to return to normal.
Anki 2.1.50+
Backups are created periodically. You can configure the time between backups in the preferences screen. The default is 30 minutes.
Certain operations will trigger a backup, even if the configured time has not elapsed yet:
- A one-way sync download
- Importing a .colpkg file using File>Import
- Tools>Check Database
After backups are two days old, Anki will start removing some of the older ones. You can control how many daily, weekly and monthly backups you'd like to keep.
Backups created with 2.1.50 will not be importable into older Anki versions.
Older Anki versions
Each time your collection is closed (when closing Anki, switching profiles, or doing a full sync download), Anki creates a backup. By default it will store up to 30 backups; you can adjust this in the preferences.
Manual colpkg backups
Restoring
You can restore from a manual backup by using File>Import.
Creating
In Anki 2.1.50+, you can use File>Create Backup to trigger an immediate backup. This functions like regular automatic backups, and does not include media files.
To create a backup that includes your sounds and images:
- Select Export from the File menu.
- Ensure "Anki collection package (.colpkg)" is selected.
- Enable the "include media" option.
This will create a .colpkg file that contains all of your cards and any sounds/images they use. We recommend you store the file somewhere safe, like a different device, or a cloud-based file storage service like Dropbox or Google Drive.
AnkiWeb
Synchronising your collection with AnkiWeb provides some level of protection against your device being lost or stolen. If you need to restore your collection from AnkiWeb, you can force a one-way sync in the preferences screen, or sync from a new device, and then choose "Download".
Deletion log
Anki logs deleted notes to a text file called deleted.txt in your profile folder. These notes are in a text format that can be read by File>Import, though please note the import feature only supports a single note type at one time, so if you have deleted notes from different note types, you'll need to split the file into separate files for each note type first.
Managing Files and Your Collection
- Checking Your Collection
- File Locations
- Startup Options
- DropBox and File Syncing
- Network Filesystems
- Running from a Flash Drive
- Backups
- Inaccessible Harddisk
- Permissions of Temp Folder
- Corrupt Collections
Checking Your Collection
It is a good idea to occasionally check your collection file for problems. You can do this via the Tools>Check Database menu item. Checking the database ensures the file has not been corrupted, rebuilds some internal structures, and optimizes the file.
When you check the database, your tag list is also rebuilt. When you delete individual decks or cards, Anki does not update the list of used tags, as it's inefficient to do so. If you want to clear old tags out from the list that are no longer in use, checking your database is the way to do it.
Please note that Anki will automatically optimize your collection once every 2 weeks. This optimization ensures the collection performs well, but it does not check for errors or rebuild the tag list when automatically optimizing.
File Locations
On Windows, the latest Anki versions store your Anki files in your
appdata folder. You can access it by opening the file manager, and
typing %APPDATA%\Anki2 in the location field. Older versions of Anki
stored your Anki files in a folder called Anki in your Documents
folder.
On Mac computers, recent Anki versions store all their files in the
~/Library/Application Support/Anki2 folder. The Library folder is
hidden by default, but can be revealed in Finder by holding down the
option key while clicking on the Go menu. If you're on an older Anki
version, your Anki files will be in your Documents/Anki folder.
On Linux, recent Anki versions store your data in
~/.local/share/Anki2, or $XDG_DATA_HOME/Anki2 if you have set a
custom data path. Older versions of Anki stored your files in
~/Documents/Anki or ~/Anki.
Within the Anki folder, the program-level and profile-level preferences are stored in a file called prefs.db.
There is also a separate folder for each profile. The folder contains:
-
Your notes, decks, cards and so on in a file called collection.anki2
-
Your audio and images in a collection.media folder
-
A backups folder
-
Some system files
You should never copy or move your collection while Anki is open. Doing so could cause your collection to become corrupt. Please do not move or modify the other files in the folder either.
Startup Options
If you have made a destructive change on one computer and have an undamaged copy on another computer, you may wish to start Anki without syncing in order to use the full sync option without first downloading the changes. Similarly, if you are experiencing problems with Anki, you might want to (or might be instructed to) disable add-ons temporarily to see if one might be causing the problem. You can do both of these things by holding down the Shift key while starting Anki.
It is possible to specify a custom folder location during startup. This is an advanced feature that is primarily intended to be used with portable installations, and we recommend you use the default location in most circumstances.
The syntax to specify an alternate folder is as follows:
anki -b /path/to/anki/folder
-
If you have multiple profiles, you can pass -p <name> to load a specific profile.
-
To change the interface language, use -l <iso 639-1 language code>, such as "-l ja" for Japanese.
If you always want to use a custom folder location, you can modify your shortcut to Anki. On Windows, right-click on the shortcut, choose Properties, select the Shortcut tab, and add "-b \path\to\data\folder" after the path to the program, which should leave you with something like
"C:\Program Files\Anki\anki.exe" -b "C:\AnkiDataFolder"
You can also use this technique with the -l option to easily use Anki in different languages.
On Windows, you should use a backslash (\) not a forward slash (/).
On a Mac there is no easy way to alter the behaviour when clicking on the Anki icon, but it is possible to start Anki with a custom base folder from a terminal:
open /Applications/Anki.app --args -b ~/myankifolder
Alternatively, you can define the environment variable "ANKI_BASE". On Windows, you can define the environment variable with:
set "ANKI_BASE=C:/path/to/AnkiDataFolder"
On Linux and macOS, you can use:
export ANKI_BASE="/path/to/AnkiDataFolder"
DropBox and File Syncing
We do not recommend you sync your Anki folder directly with a third-party synchronization service, as it can lead to database corruption when files are synced while in use.
If you just want to synchronize your media, you can link external folders into services like DropBox. Please see DropboxWiki: Sync Folders Outside Dropbox (archive.org) for more info.
If you wish to keep your collection in sync as well, it is strongly recommended that you create a script that copies your files from your synced folder to a local folder, launches Anki, and then copies the files back when Anki is closed. This will ensure that the files are never synchronized while they are open.
Network Filesystems
We strongly recommend you have Anki store your files on a local hard disk, as network filesystems can lead to database corruption. If a network filesystem is your only option, regular use of Tools>Check Database to detect corruption is recommended.
Running from a Flash Drive
On Windows, Anki can be installed on a USB / flash drive and run as a portable application. The following example assumes your USB drive is drive G.
-
Copy the \Program Files\Anki folder to the flash drive, so you have a folder like G:\Anki.
-
Create a text file called G:\anki.bat with the following text:
g:\anki\anki.exe -b g:\ankidata
If you would like to prevent the black command prompt window from remaining open, you can instead use:
start /b g:\anki\anki.exe -b g:\ankidata
- Double-clicking on anki.bat should start Anki with the user data stored in G:\ankidata.
The full path including drive letter is required - if you try using
\anki\anki.exe instead you will find syncing stops working.
Media syncing with AnkiWeb may not work if your flash drive is formatted as FAT32. Please format the drive as NTFS to ensure media syncs correctly.
Backups
Please see this section.
Inaccessible Harddisk
If Anki can't write to files in the Anki folder, a message will be displayed on startup saying that Anki can't write to the harddisk, and Anki will close. If you're unsure how to fix the permissions, please contact someone near you who is knowledgeable about computers and can help you out.
Permissions of Temp Folder
Anki uses the system's temporary folder to store temporary data. If the permissions of this folder have been changed from the default settings by a rogue app or buggy antivirus app, Anki will not function properly.
If you're on a Windows 7 machine, the general steps to fix the problem are listed below. As this is somewhat complicated, please ask someone knowledgeable about Windows if you are not sure.
-
Click on the start bar, and type in %temp% (including the percents), then hit Enter.
-
Go up one folder, and locate the temp folder. Right click on it, and choose Properties.
-
In the security tab, click on Advanced.
-
Click on the Owner tab. If you're not listed as the owner, click the button to take ownership.
-
On the permissions tab, ensure that you have full control. On a default W7 install the control will actually be inherited from c:\users\your-username.
Corrupt Collections
Anki uses a file format that is robust against program and computer crashes, but it's still possible for your collection to become corrupt if the files are modified while Anki is open, stored on a network drive, or corrupted by a bug.
When you run Tools>Check Database, you will receive a message if Anki detects the file has been corrupted. The best way to recover from this is to restore from the most recent automatic backup, but if your backup is too old, then you can attempt to repair the corruption instead.
On Linux, make sure sqlite3 is installed. On a Mac, it should be installed already. On Windows, download http://www.sqlite.org/sqlite-3_6_23.zip.
Next, create a backup of your collection.anki2 file, in case something goes wrong with the steps below.
Linux/macOS
Open a terminal, change to the folder your collection is located in, and type:
sqlite3 collection.anki2 .dump > dump.txt
Open the resulting dump.txt file in a text editor, and look at the final line. If it reads "rollback;", change it to "commit;"
Then run the following in a terminal:
cat dump.txt | sqlite3 temp.file
Make sure you use temp.file - do not put collection.anki2 on the right, or you will blank out the file. When you're done, proceed to the final step.
Windows
Copy the sqlite3.exe program and your deck to your desktop. Then go to
Start>Run and type in cmd.exe.
If you're on a recent Windows, the command prompt may not start on your desktop. If you don't see desktop displayed in the command prompt, type something like the following, replacing 'administrator' with your login name.
cd C:\Users\Administrator\Desktop
Then type:
sqlite3 collection.anki2 .dump > dump.txt
Open the resulting dump.txt file in a text editor, and look at the final line. If it reads "rollback;", change it to "commit;"
Then run the following in a terminal:
type dump.txt | sqlite3 temp.file
Make sure you use temp.file - do not put collection.anki2 on the right, or you will blank out the file. When you're done, proceed to the final step.
Final Step
Check that you didn't get an error message, and that temp.file is not empty. The procedure optimizes the collection in the process, so it's normal for the new file to be somewhat smaller than the old one.
When you've confirmed the file is not empty:
-
rename the original collection.anki2 file to something else
-
rename temp.file to collection.anki2
-
move collection.anki2 back into your collection folder, overwriting the old version
-
start Anki and go to Tools>Check Database to make sure the collection has been successfully restored.
Graphs and Statistics
Card Info
You can display information about a card by using the Cards>Info menu item, by right-clicking on the card and then selecting Info, or by pressing I on the review screen. Most of the displayed information should be self-explanatory. A few notes:
Position
Only shown when the card is new, it shows the order the card will appear
in relative to other new cards. The position can be changed in the
browser.
Interval
The delay from one review to the next. Times are abbreviated; "0s, 1m,
3h, 4d, 5mo, 6y" refers to seconds, minutes, hours, days, months and
years respectively.
Ease
The approximate amount the interval will grow when you answer a review
card with the "Good" button.
Statistics
The statistics window is accessed by clicking on Stats button at the top of the main window, or by pressing T. The statistics window will show statistics from the currently selected deck and any subdecks. If you select the checkbox "collection" at the top, statistics will be shown for your entire collection instead. You can also display graphs for arbitrary searches by adding filters in the search box at the top (2.1.28+).
(Anki 2.1.28+ introduced redesigned graphs. The old graphs are currently still accessible with a Shift-click on the Stats button.)
By default, Anki 2.1.28+ will show you statistics for the last 12 months. You can change this to all history scope or deck life scope at the top. (The "today" section at the top remains of course unaffected by this selection.)
Older versions of Anki will by default show you statistics for the previous month. You can change this to a year scope or deck life scope at the bottom. (Again, the “today” section at the top is unaffected by this selection.)
Clicking on "Save PDF" at the bottom will save a PDF document of the statistics to a file on your desktop to make it easy to share your statistics with others.
When you delete notes, their review history is maintained in Anki. It will not be included when looking at statistics for a specific deck (as Anki has no way of knowing which deck the deleted cards belonged to), but will be included when you look at statistics for the whole collection.
Types of Cards
The stats window uses some terms that you may not be familiar with:
Mature
A mature card is one that has an interval of 21 days or greater.
Young
A young card is one that has an interval of less than 21 days, but is
not in learning.
Learn
A learning card is one that is still in learning mode (using whatever
steps may be defined in the deck’s options).
Relearn
A relearning card is a card that you have failed in review mode, thus
returning it to learning mode to be relearned.
Unseen
An unseen card is one that has been added to your collection but has not
yet entered learning mode. Unseen cards are sometimes referred to as
"new" cards, especially when they are in the "new" queue to be shown for
the first time.
Today
At the top of the statistics window is a brief list of textual statistics about the reviews that you have completed today. A “review” in this context is 'one answering of a card', so a card might count as multiple reviews if it needed to be seen multiple times, and a learning card answered also counts as a “review.” A couple of the stats whose meaning may not be immediately obvious:
Again Count
This is the number of reviews that you have failed (i.e., pressed Again
on). The correct percentage listed afterwards is the number of cards you
did 'not' fail divided by the total number of cards you studied.
Learn, Review, Relearn, Filtered
The number of reviews that were learning cards, review cards, relearning
cards, or studied in a filtered deck when not due.
The stats for the current day are not a good overall indicator of your learning progress; everyone has bad days and good days, and seeing that you got a lower percentage correct on a particular day should not be cause for concern. The remainder of the stats, which take longer periods of time into account, will give more useful information if you wish to try to change your study habits or scheduling settings based on your performance.
The “today” statistics are unaffected by the time period selected at the bottom of the window.
The Graphs
Future Due
This graph shows an estimated number of reviews that will be due on a
given day in the future if you learn no new cards and fail no cards. The
bars and the left axis show the number of cards due on each day if you
study all cards each day, while the line and the right axis show the
number of cards due on that day if you don’t study at all until then.
Note that the forecast graph does not count reviews that are currently
overdue, so if you have a large backlog, the overdue cards will not be
displayed.
Reviews
This graph counts the number of card reviews you have done. The bars may
correspond to days, weeks, or months, depending on the time period
you’ve selected at the bottom of the screen. The differently colored
blocks show how many of the cards you answered on each day were
mature, young, relearning, or learning cards.
There is also a separate group for cards answered in a filtered/cram
deck while they were not due. The line and the right axis shows the
cumulative total for each type of review as time progresses across the
graph (so at 0 days, it would display the number for the entire time
period displayed on the graph).
Card Counts
This pie chart shows what percentage of your deck or collection consists
of mature, unseen, young/learn, and suspended cards. If you wish to
calculate a more precise percentage, the key shows the exact number of
cards in each section, and the total number of cards is displayed to the
side.
Review Time
This graph works exactly like Review Count, except that it deals with
the amount of time you spent on each card rather than the number of
cards answered.
Review Intervals
This graph displays the number of cards that have a given interval (the
delay between two reviews). The line and the right axis tell you what
percentage of your cards have an interval of less than or equal to the
time below that point. The time scope has a different effect on this
graph than other graphs: rather than changing which cards or period of
studying is included, it limits how far out the intervals are displayed
to (so 14-month intervals are not displayed at all on a 1-year graph).
Hourly Breakdown
This graph shows what percentage of total reviews you have passed (i.e.,
not pressed Again on) during given hours. The larger, darker bars and
left axis show the success rate; the thinner, lighter bars and right
axis show the number of reviews you’ve made at that hour (so you know
how significant the results are).
Answer Buttons
This graph shows how many times you’ve chosen the Again, Hard, Good, or
Easy button while studying learning/new, young, and
mature cards. Anki also displays the percentage
of correct reviews for each type of card.
Manual Analysis
If you’re interested in getting information from your statistics other than what Anki provides, it is possible to access the data directly. Because of the complexity involved, this is not something we can provide any support for.
One option is to write an add-on that adds another graph or more details to the statistics window. There are several add-ons of this sort on AnkiWeb already, which you can look at to get an idea of how it works.
A more powerful and more complex option is to extract the review log information directly from Anki’s database and analyze it in an external program. Anki uses a database format called SQLite. There are many tools available for working with SQLite databases; one of the easiest to start with is called SQLite Browser, which will allow you to look around the database as well as export a CSV version of tables for import into another program.
The most important table for statistics is the 'revlog' table, which stores an entry for each review that you conduct. The columns are as follows:
id
The time at which the review was conducted, as the number of
milliseconds that had passed since midnight UTC on January 1, 1970.
(This is sometimes known as 'Unix epoch time', especially when in
straight seconds instead of milliseconds.)
cid
The ID of the card that was reviewed. You can look up this value in the
id field of the 'cards' table to get more information about the card,
although note that the card could have changed between when the revlog
entry was recorded and when you are looking it up. It is also the
millisecond timestamp of the card’s creation time.
usn
This column is used to keep track of the sync state of reviews and
provides no useful information for analysis.
ease
Which button you pressed at the end of the review (1 for Again, 4 for
Easy).
ivl
The new interval that the card was pushed to after the review. Positive
values are in days; negative values are in seconds (for learning cards).
lastIvl
The interval the card had before the review. Cards introduced for the
first time have a last interval equal to the Again delay.
factor
The new ease factor of the card in permille (parts per thousand). If the
ease factor is 2500, the card’s interval will be multiplied by 2.5 the
next time you press Good.
time
The amount of time (in milliseconds) you spent on the question and
answer sides of the card before selecting an ease button.
type
This is 0 for learning cards, 1 for review cards, 2 for relearning cards,
and 3 for early "cram" cards (cards being studied in a filtered deck when they
are not due).
Media
Anki stores the sounds and images used in your notes in a folder next to the collection. For more on the folder location, please see the file locations section. When you add media within Anki, either by using the paperclip icon in the editor or by pasting it into a field, Anki will copy it from its original location into the media folder. This makes it easy to back up your collection’s media or move it to another computer.
If your media filenames contain spaces or other special characters such
as percentage signs, the way the filenames appear in the HTML editor will
differ from the way the filenames appear on disk. For example, a file called
hello 100%.jpg will appear as hello%20100%25.jpg in the HTML editor.
Internally, Anki still uses the original filenames, so if you would like to
search for the file or modify the filename with Find&Replace, you will
need to use the name as it appears on disk, not as it appears in the
HTML editor. Exporting to a text file is another way to see the underlying
representation.
Checking Media
You can use the Tools>Check Media menu option to scan your notes and
media folder. It will generate a report of files in the media folder
that are not used by any notes, and media referenced in notes but
missing from your media folder. It does not scan question or answer
templates, which is why you can’t place media references to fields in
the template. If you need a static image or sound on every card, name it
with a leading _ (e.g., \_dog.jpg) to tell Anki to ignore it when
checking for media. If you delete media using the unused media check,
Anki will move it into your operating system’s trash folder, so you can
recover if you accidentally delete media that shouldn’t have been
deleted.
Manually Adding Media
When you add media via Anki's interface, Anki takes care of ensuring the filenames are encoded in a way that should work across different devices, removing characters that won't work on certain operating systems, and truncating very long filenames.
If you manually add files to your media folder, you should use Tools>Check Media afterwards, to ensure the filenames are encoded correctly. If you skip this step, any filenames that are not compatible will be skipped when syncing.
Supported Formats
Anki uses a program called mpv (and mplayer as a fallback) in order to support sounds and videos. A wide variety of file formats are supported, but not all of these formats will work on AnkiWeb and the mobile clients. MP3 audio and MP4 video seems to be the most universally supported.
Math and Symbols
MathJax
MathJax is a modern, browser-based typesetting system, useful for mathematical and chemical equations. It does not require the installation of any extra software, so it is easy to use, and it is recommended for most users.
MathJax is supported out of the box on Anki 2.1+, AnkiMobile, and AnkiDroid 2.9+.
To try it out:
-
Type the following in a field:
\sqrt{x} -
Select the text you just typed.
-
Click the rightmost button in the editor, and choose "MathJax inline" from the menu. Anki will change the text so it reads:
\(\sqrt{x}\) -
If you click the Cards… button, you’ll see a preview of how the equation will appear when the card is reviewed.
Anki’s MathJax support expects content in TeX format. If you’re not
familiar with TeX formatting, please see this
cheatsheet.
Please note that point 2 does not apply in Anki - Anki uses \( and
\) for inline equations, and \[ and \] for display equations.
If you want to use newlines in a MathJax expression, please use Shift+Enter instead of just Enter, as a normal newline will prevent MathJax from working correctly.
Anki includes built in support for mhchem for rendering chemical equations. Please see the 'chemical equations' section and the following sections for more information: https://mhchem.github.io/MathJax-mhchem/
It is possible to customize some settings.
LaTeX
LaTeX is a powerful typesetting system, useful for entering mathematical formulas, chemical formulas, musical notation and so on. Anki provides some support for LaTeX, allowing you to enter LaTeX code in your notes. When you review a card, Anki will call LaTeX and display the generated image instead.
LaTeX is more work to set up, and images can only be generated with the computer version of Anki - though once generated, the images can be displayed by mobile clients. Because of the extra complexity LaTeX brings, it is only recommended for users that need more features than MathJax provides.
Assumed Knowledge
Anki’s LaTeX support is not turn-key: it is assumed that you know how to use LaTeX already, and that you have it installed. If you have no experience with LaTeX, please consult one of the many guides available on the internet. If you are having trouble with markup, please ask on a LaTeX forum.
To install LaTeX, on Windows use MiKTeX; on macOS use MacTeX, and on Linux use your distro’s package manager. Dvipng must also be installed.
On Windows, go to Settings in MikTeX’s maintenance window, and make sure "Install missing packages on the fly" is set to "Always", not to "Ask me first". If you continue to have difficulties, one user reported that running Anki as an administrator until all the packages were fetched helped.
On macOS, LaTeX has only been tested with MacTeX and BasicTeX. If you use BasicTeX, you need to install dvipng separately, with the following command:
sudo tlmgr update --self; sudo tlmgr install dvipng
The command may not be on the path, so you may need to provide the full path, eg /usr/local/texlive/2014basic/bin/x86_64-darwin/tlmgr.
If you are not using the above LaTeX packages, you will need to use the edit LaTeX add-on to specify the full path to latex and dvipng.
Web/Mobile
When you review a card with LaTeX on it, Anki will generate an image for that LaTeX and place the image in your collection’s media folder for future use. The web & mobile clients will display these images if they already exist, but can not generate the images on their own.
To avoid having to review all your cards at least once before you can study on the other clients, Anki can generate the images in bulk for you. To generate all the images, please go to Tools>Check Media. After that, syncing should upload the generated media to AnkiWeb and the other clients.
Example
The most general way to input LaTeX content is to surround it with [latex][/latex] tags. There’s a shortcut button for this documented in the editor section.
[latex] tags must be used inside a field - placing them in the card template will cause problems.
For example, entering the following on the front of an Anki flashcard:
Does [latex]\begin{math}\sum_{k = 1}^{\infty}\frac{1}{k}\end{math}[/latex] converge?
will produce this when the flashcard is viewed:
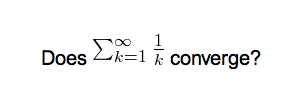
The formula in the example above is called a 'text formula', because it is displayed right within the non-mathematical text. In contrast, the following example shows a 'displayed formula':
Does the sum below converge?

[latex]\begin{displaymath}\sum_{k = 1}^{\infty}\frac{1}{k}\end{displaymath}[/latex]
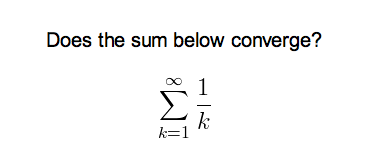
'Text formulas' and 'display formulas' are the most common type of LaTeX expressions, so Anki provides abbreviated versions of them. Expressions of the form:
[latex]\begin{math}...\end{math}[/latex]
can be shortened to
[$]...[/$]
and expressions of the form
[latex]\begin{displaymath}...\end{displaymath}[/latex]
can be shortened to
[$$]...[/$$]
For example, the two LaTeX snippets shown before are equivalent to
Does [$]\sum_{k = 1}^{\infty}\frac{1}{k}[/$] converge?
and
Does the sum below converge?

[$$]\sum_{k = 1}^{\infty}\frac{1}{k}[/$$]
respectively.
Packages
Anki allows you to customize the LaTeX preamble so you can import custom packages for chemistry, music and so on. For example, imagine you find an example file for chemtex on the internet:
\documentclass[a4paper,12pt]{report}
\usepackage{chemtex}
\begin{document}

\initial
\begin{figure}[h]\centering
\parbox{.3\textwidth}{\ethene{H}{H$_3$C}{CH$_3$}{Br}}
\hfil
\parbox{.3\textwidth}{\cbranch{H}{S}{H}{S}{C}{S}{}{S}{H}
  \xi=-200 \cright{}{Q}{C}{D}{O}{S}{OH}}
\hfil
\parbox{.3\textwidth}{\hetisix{Q}{Q}{Q}{Q}{Q}{Q}{O}{Q}{O}
  \xi=-171 \fuseup{Q}{Q}{Q}{Q}{D}{Q}{D}{Q}{D}}
\caption{Chemie mit {\tt CHEMTEX}\label{a1}}
\end{figure}

\end{document}
Firstly, follow the documentation of the package and MiKTeX/MacTeX in order to install the package. To check the package is working, you’ll want to put code like the above into a .latex file and test if you can compile it from the command line. Once you’ve confirmed that the package is available and working, we can integrate it with Anki.
To use the package with Anki, click "Add" in the main window, then click the note type selection button. Click the "Manage" button, then select the note type you plan to use and click "Options". The LaTeX header and footer are shown. The header will look something like:
\documentclass[12pt]{article}
\special{papersize=3in,5in}
\usepackage{amssymb,amsmath}
\pagestyle{empty}
\setlength{\parindent}{0in}
\begin{document}
To use chemtex, you’d add the usepackage line in the earlier example, so it looks like:
\documentclass[12pt]{article}
\special{papersize=3in,5in}
\usepackage{amssymb,amsmath}
\usepackage{chemtex}
\pagestyle{empty}
\setlength{\parindent}{0in}
\begin{document}
After that, you should be able to include lines like the following in your Anki cards:
[latex]\ethene{H}{H$_3$C}{CH$_3$}{Br}[/latex]
Template Conflicts
As of Anki 2.1.20 / AnkiMobile 2.0.56 / AnkiDroid 2.13, this workaround is no
longer required, as {{field}} text inside fields no longer causes problems. If
you need to support older versions and want to keep using this syntax, please
make sure you place the {{=<% %>=}} string at the very top of your front and
back template, as recent Anki versions will not recognize it anywhere but the
start.
For older versions:
It’s not uncommon for {{ and }} to pop up in LaTeX code when writing mathematical equations. To ensure that your LaTeX equations don’t conflict with Anki’s field replacements, it’s possible to change the separator to something else.
For example, if you have a template:
{{latex field}}
Changing it to the following will make it unlikely that the LaTeX will conflict:
{{=<% %>=}}
<%latex field%>
Cloze Conflicts
Cloze deletions are terminated with }}, which can conflict with a }}
appearing in your LaTeX. To prevent LaTeX from being interpreted as a closing
cloze marker, you can put a space between any double closing braces that do not
indicate the end of the cloze, so
{{c1::[$]\frac{foo}{\frac{bar}{baz}}[/$] blah blah blah.}}
will not work, but
{{c1::[$]\frac{foo}{\frac{bar}{baz} }[/$] blah blah blah.}}
will (and LaTeX ignores spaces in math mode, so your equation will render the same). If you want to avoid adding the extra space into the rendered text (for example, when you are making Cloze cards for learning programming languages), another option is to use a HTML comment when editing the card in HTML mode:
{{c1::[$]\frac{foo}{\frac{bar}{baz}<!-- -->}[/$] blah blah blah.}}
You may use either workaround if you need to use the :: character
sequence within the Cloze-deleted text. The first card generated for the
following note text will read [type] in C++ is a type-safe union:
{{c1::std:<!-- -->:variant::~type~}} in C++ is a {{c2::type-safe union}}
Unsafe Commands
Anki prohibits certain commands like \input or \def from being used on cards or in templates, because allowing them could allow malicious shared decks to damage your system. (To be on the safe side, these commands are prohibited even in comments, so if you’re getting this error but don’t think you’ve used one, please double-check any comments you have in your headers, templates, and cards.) If you need to use these commands, please add them to a system package and import that package as described in the previous section.
Leeches
Leeches are cards that you keep on forgetting. Because they require so many reviews, they take up a lot more of your time than other cards.
Anki can help you identify leeches. Each time a review card 'lapses' (is failed while it is review mode), a counter is increased. When that counter reaches 8, the note is tagged as a leech, and the card is suspended. The threshold, and whether to suspend or not, can be adjusted in the deck options.
Anki will continue to issue leech warnings periodically for a difficult card. The warning interval is half the initial leech threshold. That is, if you have Anki configured to warn at 8 lapses, future warnings will happen every 4 lapses. (12, 16, etc)
Once a leech is found, there are a number of ways you can handle it.
Waiting
Some leeches are caused by 'interference'. For example, an English learner may have recently learnt the words "disappoint" and "disappear". As they look similar, the learner may find themselves confusing the two when trying to answer. In these situations, it’s often productive to concentrate on just one idea. When that idea is firmly ingrained in your mind, you can then return to learning the other idea. So in these situations, you may want to leave one of the words suspended until you have learnt the other one well, and then unsuspend it in the browser.
Deleting
Another way to manage leeches is to delete them. Consider if the material you’re struggling with is important enough to make it worth your while. By selectively deleting difficult and obscure items, you can dedicate more time to learning other material, and studying becomes a lot more fun.
Editing
Another approach is to change the way the information is presented. Perhaps the cards you have created have too much information on them, or perhaps you’re trying to memorize something without fully understanding it. Sometimes spending some time changing the way the card is phrased can help. It’s also a good time to think about making a mnemonic to help you remember.
Add-ons
Anki's capabilities can be extended with add-ons. Add-ons can provide features like extra support for specific languages, extra control over scheduling, and so on.
To browse the list of available add-ons, select the Tools>Add-ons menu item, then click on Get Add-ons.
If you have downloaded an add-on that is not working properly, or if you accidentally made a mistake when editing an add-on, you can use the "Delete" option in the menu to remove it.
Add-ons use and modify arbitrary parts of Anki’s codebase, so in some cases, updating Anki can break the compatibility with older add-ons. If one of your add-ons stops working after updating Anki, please consider reporting the issue to the add-on author. If you rely on this add-on, you will need to keep using an older Anki version until the add-on gets an update.
There is a "Contact Author" button on most add-ons pages on Ankiweb, and many authors include their email address in the add-on, so if you need to get in touch with the author, editing the add-on and looking at the top of the file may help.
To learn how to write your own add-ons, please see the add-on writing guide.
Self-Hosted Sync Server
Anki 2.1.57+ includes a built-in sync server. Advanced users who cannot or do not wish to use AnkiWeb can use this sync server instead of AnkiWeb.
Things to be aware of:
- This is an advanced feature, targeted at users who are comfortable with networking and the command line. If you use this, the expectation is you can resolve any setup/network/firewall issues you run into yourself, and use of this is entirely at your own risk.
- Newer clients may depend on changes to the sync protocol, so syncing may stop working if you update your Anki clients without also updating the server.
- Third-party sync servers also exist. No testing is done against them, and they tend to take time to catch up when the sync protocol changes, so they are not recommended.
- The messages inside Anki will use the term 'AnkiWeb' even if a custom server has been configured, (eg "Cannot connect to AnkiWeb" when your server is down).
From a Packaged Build
On Windows in a cmd.exe session:
set SYNC_USER1=user:pass
"\program files\anki\anki-console.exe" --syncserver
Or MacOS, in Terminal.app:
SYNC_USER1=user:pass /Applications/Anki.app/Contents/MacOS/anki --syncserver
Or Linux:
SYNC_USER1=user:pass anki --syncserver
Without GUI dependencies
You can run the server without installing the GUI portion of Anki provided you have a copy of Python3.9+ installed.
python3 -m venv ~/syncserver
~/syncserver/bin/pip install anki
SYNC_USER1=user:pass ~/syncserver/bin/python -m anki.syncserver
Multiple Users
SYNC_USER1 declares the first user and password, and must be set. You can optionally declare SYNC_USER2, SYNC_USER3 and so on, if you wish to set up multiple accounts.
Storage Location
The server needs to store a copy of your collection and media in a folder.
By default it is ~/.syncserver; you can change this by defining
a SYNC_BASE environmental variable. This must not be the same
location as your normal Anki data folder, as the server and client
must store separate copies.
Public Access
The server listens on an unencrypted HTTP connection, so it's not a good idea to expose it directly to the internet. You'll want to either restrict usage to your local network, or place some form of encryption in front of the server, such as a VPN (Tailscale is apparently easy), or a HTTPS reverse proxy.
You can define SYNC_HOST and SYNC_PORT to change the host and port
that the server binds to.
Client Setup
You'll need to determine your computer's network IP address, and then
point each of your Anki clients to the address, eg something like
http://192.168.1.200:8080/. The URL can be configured in the preferences.
Older desktop clients required you to define SYNC_ENDPOINT and SYNC_ENDPOINT_MEDIA.
If using an older client, you'd put it as e.g. http://192.168.1.200:8080/sync/
and http://192.168.1.200:8080/msync/ respectively. AnkiDroid also currently
requires separate configuration for the two endpoints.
Large Requests
The standard AnkiWeb limit on uploads is applied by default. You can optionally set MAX_SYNC_PAYLOAD_MEGS to something greater than 100 if you wish to increase the limit. Bear in mind that if you're using a reverse proxy, you may need to adjust the limit there as well.
Contributing Changes
Because this server is bundled with Anki, simplicity is a design goal - it is targeted at individual/family use, and PRs that add things like a REST API or external databases are unlikely to be accepted at this time. If in doubt, please reach out before starting work on a PR.
If you're looking for an existing API solution, the AnkiConnect add-on may meet your needs.
Miscellanea
Menu Shortcuts
On Windows/Linux you can hold down the Alt key and press a highlighted letter to activate a particular menu.
Although macOS doesn’t support this feature, it does allow you instead to assign shortcuts to specific menu items. Please see http://lifehacker.com/343328/create-a-keyboard-shortcut-for-any-menu-action-in-any-program for more information.
Debug Console
Sometimes you may be asked to use the debug console to change a setting or check something. Unless asked to enter text in the "debug console", you will probably not need this. Advanced users may like to read more about it in the add-on writing guide.
When asked to enter text into the "debug console", please start Anki, and in the main window, press
Ctrl+Shift+;
(the control key, shift key, and semi-colon key at the same time)
On a Mac, press
Command+Shift+;
(the command key, shift key, and semi-colon key at the same time)
On some non-English keyboards, you may need to press : or + instead of ;.
In the window that has popped up, please paste the text you were asked to paste in the top section. When you’ve done so, please press Ctrl+Return (Command+Return on a Mac), and some text should appear in the bottom section. If you’ve been asked to paste the resulting output, please copy it from the bottom area, and paste it back to the support person.
If you press Ctrl+Shift+Return instead of just Ctrl+Return, Anki will try to print the result rather than doing what you asked it to. If you are getting unexpected errors, please make sure you’re not holding down the Shift key.
Contributing
Sharing Decks Publicly
To share decks with the general public, synchronize them with AnkiWeb, then log into AnkiWeb and click on "Share" from the menu next to the deck you wish to share.
If you shared a deck previously (including with previous versions of Anki), you can update it by clicking "Share" as above. Updating a shared deck will not reset the download counts or ratings. You can delete a shared deck that you have uploaded using the Delete button on the shared deck's page.
When updating a deck, AnkiWeb expects the deck to be at the same location as before. If you shared a deck when it was called "Korean Verbs" for example, and then renamed it to "Korean::Korean Verbs", resharing will not be able to update the existing copy. If you have forgotten the original name, you can guess it by downloading the deck on ankiweb and importing it (File > Import) in a new profile (File > Switch profile > Add). Then you can copy the exact name of the deck when it was first shared. If this doesn't work, please contact support.
When you update a shared deck, users who downloaded the deck previously will not automatically receive updates. If they download the deck again and re-import it, newly added material will be imported without altering their existing study progress, provided neither you nor the user has altered the note type since the first import.
Sharing Decks Privately
If you’d like to share decks with a limited group of people (such as a study group or class) rather than the general public, you can do so by sharing them outside of AnkiWeb.
To share a deck privately, go to the File menu and choose Export. Select a single deck (not "All Decks"), and turn off "include scheduling information". This will produce an .apkg file which you can share with others.
You can share the .apkg file by emailing it to people, placing it on a website or shared folder, or using a free file sharing service like Dropbox or Google Drive and sending people a link.
Both the computer version and mobile clients make it easy to import from an apkg file simply by clicking or tapping on it. AnkiWeb does not have the ability to import apkg files however, so the recipients of your deck will need to have the computer version or Anki on their mobile device.
When a user imports an .apkg file, cards that already exist in their collection will be ignored and any new cards will be added. As long as they use the same note type, modified cards will also be updated. To prevent data loss, cards that have been deleted in the new apkg file will not be deleted in the user’s collection, so if you need to delete cards from users' decks for whatever reason, you will need to contact them about it.
Sharing Add-ons
Please see https://addon-docs.ankiweb.net/sharing.html
Translating Anki
Please see https://translating.ankiweb.net
Contributing Code
Anki's source code is available at https://github.com/ankitects/anki
Before contributing, please see contributing.md.
Frequently Asked Questions
Please see https://faqs.ankiweb.net
Resources
The SuperMemo site has a lot of good information about spaced repetition and memory: http://www.supermemo.com/
Michael Nielsen has written a thorough piece about long term memory and how he uses Anki. He also provides a condensed version as a series of tweets.
Some medical students have banded together to make a paid-for guide focusing on the use of Anki in medical school: https://courses.ankipalace.com/
Soren Bjornstad has written a series of extensive articles about memory, SRS and how to use Anki effectively.